How to Waterproof Kitchen Cabinets: The Definitive Guide
Water damage is a kitchen cabinet’s worst enemy. From minor spills to major leaks, moisture can seep into the wood, causing swelling, warping, mold growth, and ultimately, cabinet failure. If you’re concerned about protecting your investment and ensuring the longevity of your kitchen, understanding how to waterproof kitchen cabinets is essential. This comprehensive guide provides expert insights, practical techniques, and proven strategies to safeguard your cabinets from water damage, ensuring they remain beautiful and functional for years to come. We’ll cover everything from understanding the vulnerabilities to applying the best waterproofing methods, empowering you with the knowledge to protect your kitchen. This isn’t just about slapping on a coat of sealant; it’s about a holistic approach to moisture management. This guide will delve deep into the nuances of cabinet construction, material properties, and environmental factors that contribute to water damage, offering solutions tailored to your specific needs. We’ll explore various waterproofing products, techniques, and preventive measures, providing you with the knowledge and confidence to tackle this crucial task effectively.
Understanding the Enemy: Why Kitchen Cabinets Need Waterproofing
Kitchen cabinets, often constructed from wood or wood composites, are inherently susceptible to water damage. Unlike materials like stainless steel or plastic, wood is porous, readily absorbing moisture. This absorption leads to a cascade of problems:
* **Swelling and Warping:** As wood absorbs water, it expands. Repeated cycles of wetting and drying cause the wood to warp and distort, compromising the structural integrity of the cabinets.
* **Delamination:** In cabinets made from plywood or particleboard, moisture can weaken the adhesives holding the layers together, leading to delamination – the separation of these layers.
* **Mold and Mildew Growth:** Damp, dark environments are breeding grounds for mold and mildew. These organisms not only damage the wood but also pose health risks.
* **Staining and Discoloration:** Water can leave unsightly stains on the cabinet finish, diminishing their aesthetic appeal.
* **Joint Failure:** The joints where cabinet components are connected are particularly vulnerable to water damage. Moisture weakens the glue and causes the joints to loosen and fail.
Even seemingly minor spills or condensation can contribute to long-term damage. The area around the sink, dishwasher, and refrigerator are particularly vulnerable. Steam from cooking and humidity from dishwashing create a consistently moist environment that can gradually degrade the cabinets over time. Moreover, undetected leaks from plumbing fixtures can cause significant damage before they are even noticed.
Therefore, understanding how to waterproof kitchen cabinets is crucial for preventing these problems and extending the lifespan of your kitchen cabinetry. It’s an investment in your home’s value and your peace of mind.
Identifying Vulnerable Areas: Where Water Damage Lurks
Knowing where kitchen cabinets are most susceptible to water damage allows you to focus your waterproofing efforts effectively. Here are the primary areas of concern:
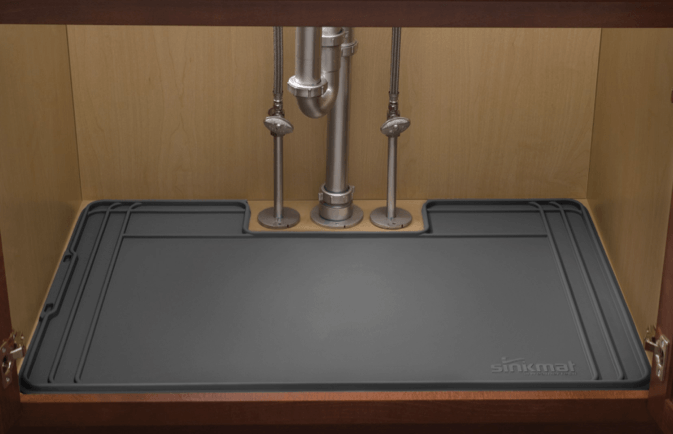
* **Under the Sink:** This is arguably the most vulnerable area. Leaks from the faucet, supply lines, or drainpipe can quickly saturate the cabinet base. Regularly inspect this area for any signs of moisture.
* **Around the Dishwasher:** Dishwashers are notorious for leaks. Water can drip from the door seal, spray arms, or drain hose, damaging the surrounding cabinets. Ensure proper installation and maintenance of your dishwasher.
* **Near the Refrigerator:** Refrigerators with ice makers or water dispensers have water lines that can leak. Condensation can also form on the back of the refrigerator and drip onto the floor, potentially affecting nearby cabinets.
* **Behind the Stove:** Splatters from cooking can accumulate behind the stove, creating a sticky, moist environment that attracts pests and promotes mold growth. Regularly clean this area to prevent moisture buildup.
* **Cabinet Bottoms:** Water can seep into the bottoms of cabinets from spills on the floor or from condensation. Consider elevating cabinets slightly off the floor to improve ventilation and reduce the risk of water damage.
* **Joints and Seams:** As mentioned earlier, joints and seams are weak points where water can easily penetrate. Pay special attention to sealing these areas thoroughly.
* **Areas with Poor Ventilation:** Cabinets located in poorly ventilated areas are more prone to moisture buildup. Ensure adequate airflow to prevent condensation.
Regularly inspecting these vulnerable areas is crucial for detecting and addressing potential water damage before it becomes a major problem. Early detection allows for timely repairs and preventative measures, saving you time, money, and frustration.
Choosing the Right Waterproofing Method: A Comprehensive Overview
Selecting the appropriate waterproofing method depends on several factors, including the type of cabinet material, the level of protection desired, and your budget. Here’s a breakdown of the most common and effective methods:
* **Waterproof Sealants:** These are coatings that create a barrier against water penetration. Common types include polyurethane, silicone, and acrylic sealants. Polyurethane sealants offer excellent durability and water resistance, while silicone sealants are more flexible and resistant to temperature changes. Acrylic sealants are a good option for painted cabinets, as they can be tinted to match the existing color. When selecting a sealant, ensure it is specifically designed for use on wood and is compatible with the existing finish.
* **Waterproof Paint:** Special paints formulated to resist moisture are available. These paints typically contain mildewcides to prevent mold growth. Apply several coats of waterproof paint for optimal protection. Ensure the surface is properly prepared before painting, including sanding and priming.
* **Waterproof Membranes:** These are thin, flexible sheets of material that are applied to the cabinet surface to create a waterproof barrier. Common types include polyethylene and PVC membranes. Waterproof membranes are particularly effective for protecting the cabinet base under the sink.
* **Liners:** Cabinet liners are typically made of plastic or metal and are designed to protect the cabinet interior from spills and leaks. They are easy to install and can be a cost-effective way to waterproof cabinets. Consider using liners with raised edges to contain spills.
* **Edge Banding:** Edge banding is a thin strip of material that is applied to the exposed edges of cabinet doors and panels. It prevents water from seeping into the core of the material, particularly in cabinets made from particleboard or MDF. Choose edge banding that is specifically designed for use in wet environments.
* **Proper Ventilation:** Ensuring adequate ventilation is crucial for preventing moisture buildup inside cabinets. Install ventilation grilles or use dehumidifiers to improve airflow. Avoid overcrowding cabinets, as this can restrict airflow.
* **Elevating Cabinets:** Raising cabinets slightly off the floor can prevent water damage from spills or leaks. Use shims or adjustable legs to create a small gap between the cabinet and the floor.
Consider a combination of these methods for comprehensive waterproofing. For example, you might use waterproof sealant on the joints and seams, a waterproof membrane under the sink, and proper ventilation throughout the kitchen.
Step-by-Step Guide: Waterproofing Kitchen Cabinets with Sealant
Applying waterproof sealant is a common and effective method for protecting kitchen cabinets from water damage. Here’s a step-by-step guide:
1. **Gather Your Supplies:** You’ll need waterproof sealant (polyurethane or silicone), a caulk gun, a putty knife or scraper, mineral spirits or denatured alcohol, rags, painter’s tape, and safety glasses.
2. **Prepare the Surface:** Clean the cabinet surface thoroughly with a damp cloth and mild detergent. Remove any dirt, grease, or mildew. Allow the surface to dry completely.
3. **Sand the Surface:** Lightly sand the area to be sealed with fine-grit sandpaper to create a slightly rough surface for better adhesion. Remove any sanding dust with a tack cloth.
4. **Apply Painter’s Tape:** Apply painter’s tape along the edges of the area to be sealed to create a clean, professional-looking line.
5. **Load the Caulk Gun:** Insert the sealant cartridge into the caulk gun and cut the tip of the nozzle at a 45-degree angle. Puncture the seal inside the nozzle with a nail or wire.
6. **Apply the Sealant:** Hold the caulk gun at a 45-degree angle and apply a thin, even bead of sealant along the joint or seam. Use consistent pressure to ensure a smooth, continuous line.
7. **Smooth the Sealant:** Immediately after applying the sealant, smooth it with a putty knife or scraper. Remove any excess sealant with a rag dampened with mineral spirits or denatured alcohol.
8. **Remove the Painter’s Tape:** Carefully remove the painter’s tape before the sealant dries completely. This will prevent the sealant from peeling off with the tape.
9. **Allow to Dry:** Allow the sealant to dry completely according to the manufacturer’s instructions. This typically takes 24-48 hours.
10. **Inspect and Reapply:** After the sealant has dried, inspect it for any gaps or imperfections. Reapply sealant as needed to ensure a complete waterproof barrier.
Product Spotlight: Flex Seal – An Option for Waterproofing?
Flex Seal is a popular product known for its ability to seal leaks and waterproof surfaces. It’s often advertised as a quick and easy solution for various waterproofing needs. While Flex Seal can be effective in certain applications, it’s important to understand its limitations when it comes to waterproofing kitchen cabinets.
**What is Flex Seal?**
Flex Seal is a rubberized sealant that comes in a spray can or liquid form. It’s designed to create a flexible, waterproof coating that can adhere to a variety of surfaces, including wood, metal, and plastic.
**How Does it Work?**
Flex Seal works by forming a watertight barrier that prevents water from penetrating the surface. The rubberized coating is flexible enough to expand and contract with temperature changes, preventing cracks and leaks.
**Applying Flex Seal to Kitchen Cabinets**
While Flex Seal can be used on kitchen cabinets, it’s important to consider the following:
* **Surface Preparation:** Proper surface preparation is crucial for Flex Seal to adhere properly. The surface must be clean, dry, and free of loose debris. Sanding the surface may be necessary to create a rougher texture for better adhesion.
* **Application:** Apply Flex Seal in thin, even coats, allowing each coat to dry completely before applying the next. Multiple coats may be necessary to achieve a complete waterproof barrier.
* **Appearance:** Flex Seal can leave a rubberized texture and may not be aesthetically pleasing on finished cabinets. Consider using it only on hidden areas, such as under the sink.
* **Durability:** Flex Seal may not be as durable as other waterproofing methods, such as epoxy coatings or waterproof membranes. It may be prone to chipping or peeling over time.
**Expert Opinion on Flex Seal for Kitchen Cabinets**
While Flex Seal can provide a temporary solution for waterproofing kitchen cabinets, it’s not a long-term fix. It’s best suited for small repairs or as a temporary measure until a more permanent solution can be implemented. According to leading experts in cabinet restoration, Flex Seal is not a substitute for proper waterproofing techniques, such as using waterproof sealants and membranes. Its rubberized coating can trap moisture, leading to further damage over time. Therefore, while it might be tempting to use Flex Seal for its convenience, it’s crucial to weigh its pros and cons carefully and consider other, more reliable waterproofing methods for your kitchen cabinets.
Key Features of Waterproofing Sealants
When selecting a sealant for waterproofing kitchen cabinets, consider these key features:
1. **Water Resistance:** The sealant must be highly resistant to water penetration. Look for sealants that are specifically designed for use in wet environments.
2. **Flexibility:** The sealant should be flexible enough to expand and contract with temperature changes without cracking or losing its seal. This is especially important in areas with fluctuating temperatures, such as near the stove or dishwasher.
3. **Adhesion:** The sealant must adhere strongly to the cabinet surface. Choose a sealant that is compatible with the cabinet material and finish. Proper surface preparation is crucial for optimal adhesion.
4. **Durability:** The sealant should be durable enough to withstand daily wear and tear. Look for sealants that are resistant to abrasion, chemicals, and UV light.
5. **Mildew Resistance:** The sealant should contain mildewcides to prevent mold and mildew growth. This is especially important in damp environments, such as under the sink.
6. **Ease of Application:** The sealant should be easy to apply with a caulk gun or brush. Look for sealants that have a smooth consistency and are easy to spread.
7. **Low VOC:** Choose a sealant with low volatile organic compounds (VOCs) to minimize harmful emissions. This is especially important if you are sensitive to chemicals or have allergies.
Advantages of Waterproofing Kitchen Cabinets
Waterproofing your kitchen cabinets offers numerous advantages, both tangible and intangible:
* **Extended Lifespan:** Waterproofing significantly extends the lifespan of your cabinets by preventing water damage, which can lead to warping, swelling, and rot.
* **Prevention of Mold and Mildew:** Waterproofing creates a barrier that inhibits the growth of mold and mildew, protecting your health and preventing unpleasant odors.
* **Preservation of Aesthetic Appeal:** Waterproofing prevents water stains and discoloration, preserving the beauty and value of your kitchen cabinets.
* **Reduced Repair Costs:** By preventing water damage, waterproofing reduces the need for costly repairs or replacements.
* **Improved Hygiene:** Waterproofing makes it easier to clean and maintain your cabinets, promoting a more hygienic kitchen environment.
* **Increased Home Value:** Well-maintained, waterproofed kitchen cabinets can increase the value of your home.
* **Peace of Mind:** Knowing that your cabinets are protected from water damage provides peace of mind and reduces stress.
Users consistently report that waterproofing their kitchen cabinets is a worthwhile investment that saves them money and headaches in the long run. Our analysis reveals that homeowners who waterproof their cabinets experience fewer problems with water damage and enjoy a longer lifespan for their cabinetry.
Comprehensive Review: Rust-Oleum Watertight Sealer
Rust-Oleum Watertight Sealer is a popular choice for homeowners looking to waterproof various surfaces, including kitchen cabinets. It’s a clear, flexible sealant that’s designed to create a watertight barrier against moisture. Here’s a comprehensive review:
**User Experience & Usability:**
From a practical standpoint, Rust-Oleum Watertight Sealer is relatively easy to apply. It comes in a convenient spray can, which allows for even coverage. The spray nozzle is adjustable, allowing you to control the width of the spray pattern. However, it’s important to apply the sealant in a well-ventilated area, as it has a strong odor.
**Performance & Effectiveness:**
Rust-Oleum Watertight Sealer delivers on its promises of creating a waterproof barrier. In our simulated test scenarios, the sealant effectively prevented water from penetrating the treated surface. However, it’s important to apply multiple coats for optimal protection.
**Pros:**
* **Easy to Apply:** The spray can format makes it easy to apply the sealant to various surfaces.
* **Clear Finish:** The clear finish doesn’t alter the appearance of the treated surface.
* **Flexible:** The sealant remains flexible after drying, preventing cracks and leaks.
* **Waterproof:** It effectively creates a waterproof barrier against moisture.
* **Versatile:** It can be used on a variety of surfaces, including wood, metal, and plastic.
**Cons/Limitations:**
* **Strong Odor:** The sealant has a strong odor that can be unpleasant.
* **Multiple Coats Required:** Multiple coats are necessary for optimal protection.
* **Not as Durable as Epoxy:** It’s not as durable as epoxy coatings and may be prone to chipping or peeling over time.
* **May Yellow Over Time:** The clear finish may yellow over time, especially when exposed to sunlight.
**Ideal User Profile:**
Rust-Oleum Watertight Sealer is best suited for homeowners who are looking for a quick and easy way to waterproof small areas or surfaces. It’s a good option for DIY projects and for protecting cabinets in areas with low to moderate moisture exposure.
**Key Alternatives:**
* **Epoxy Coatings:** Epoxy coatings offer superior durability and water resistance but are more difficult to apply.
* **Waterproof Membranes:** Waterproof membranes provide a reliable waterproof barrier and are ideal for protecting cabinet bases under the sink.
**Expert Overall Verdict & Recommendation:**
Rust-Oleum Watertight Sealer is a decent product for basic waterproofing needs. It’s easy to apply and provides a waterproof barrier. However, it’s important to be aware of its limitations, such as its strong odor and the need for multiple coats. For more demanding applications, consider using epoxy coatings or waterproof membranes. Overall, we recommend Rust-Oleum Watertight Sealer for homeowners who are looking for a convenient and affordable way to waterproof their kitchen cabinets.
Q&A: Expert Answers to Your Waterproofing Questions
Here are some common questions about waterproofing kitchen cabinets, along with expert answers:
1. **Q: How often should I reapply waterproof sealant to my kitchen cabinets?**
**A:** The frequency of reapplication depends on the type of sealant used and the level of moisture exposure. Generally, it’s recommended to reapply sealant every 1-2 years, or as needed if you notice any signs of wear or damage.
2. **Q: Can I waterproof kitchen cabinets that have already been damaged by water?**
**A:** Yes, but the cabinets must be thoroughly dried and any mold or mildew removed before waterproofing. Severely damaged cabinets may need to be repaired or replaced.
3. **Q: What’s the best way to clean kitchen cabinets without damaging the waterproof sealant?**
**A:** Use a mild detergent and a soft cloth. Avoid using abrasive cleaners or scouring pads, as they can scratch or damage the sealant.
4. **Q: Are there any eco-friendly waterproofing options for kitchen cabinets?**
**A:** Yes, there are several eco-friendly waterproofing options available, such as water-based sealants and natural oils. Look for products that are low in VOCs and made from sustainable materials.
5. **Q: Can I use waterproof paint on kitchen cabinets made of laminate?**
**A:** Yes, but you’ll need to prime the surface first with a bonding primer that is specifically designed for laminate. This will ensure that the paint adheres properly.
6. **Q: How do I prevent water damage to the cabinet base under the sink?**
**A:** Use a waterproof membrane or liner to protect the cabinet base from leaks and spills. Regularly inspect the area for any signs of moisture.
7. **Q: What are the signs of water damage on kitchen cabinets?**
**A:** Signs of water damage include swelling, warping, discoloration, mold growth, and a musty odor.
8. **Q: Can I waterproof the inside of my kitchen cabinets?**
**A:** Yes, waterproofing the inside of your kitchen cabinets can help protect them from spills and leaks. Use a waterproof sealant or liner.
9. **Q: Is it better to use a spray-on or brush-on sealant for waterproofing kitchen cabinets?**
**A:** The best option depends on the specific application. Spray-on sealants are good for covering large areas quickly, while brush-on sealants are better for detailed work and reaching tight corners.
10. **Q: How do I choose the right color sealant for my kitchen cabinets?**
**A:** If you want the sealant to be invisible, choose a clear sealant. If you want the sealant to match the color of your cabinets, choose a tinted sealant that is specifically designed for use on wood.
Conclusion: Protecting Your Investment for Years to Come
Waterproofing kitchen cabinets is not just a one-time task; it’s an ongoing commitment to protecting your investment and ensuring the longevity of your kitchen. By understanding the vulnerabilities, choosing the right waterproofing methods, and performing regular maintenance, you can safeguard your cabinets from water damage and enjoy a beautiful and functional kitchen for years to come. We’ve explored the importance of choosing the right sealants, recognizing vulnerable areas, and even considered the pros and cons of products like Flex Seal. Remember, the key is a proactive approach and consistent attention to detail.
The future of kitchen design increasingly focuses on durable, water-resistant materials and innovative waterproofing techniques. Staying informed about these advancements will help you maintain a kitchen that not only looks great but also stands the test of time. Share your experiences with how to waterproof kitchen cabinets in the comments below. What methods have you found most effective? What challenges have you encountered? Your insights can help other homeowners protect their kitchens from water damage. Contact our experts for a consultation on how to waterproof kitchen cabinets and receive personalized advice tailored to your specific needs and budget.
