Kitchen Faucet Leaks Delta M 15: The Ultimate Troubleshooting & Repair Guide
Are you battling a persistent drip from your Delta M15 kitchen faucet? That annoying *plink, plink, plink* not only wastes water and money but can also indicate a more significant plumbing issue. You’ve landed in the right place! This comprehensive guide is designed to equip you with the knowledge and skills to diagnose, troubleshoot, and repair kitchen faucet leaks delta m 15, specifically focusing on the popular Delta M15 model (and related models). We’ll delve into common causes, step-by-step repair procedures, and preventative measures to keep your faucet leak-free for years to come. Unlike many generic guides, this article provides model-specific advice, insights gleaned from years of plumbing experience, and a focus on long-term solutions. Get ready to reclaim your peace of mind and save money with our expert advice.
Understanding Kitchen Faucet Leaks Delta M 15
Let’s start with the basics. A *kitchen faucet leaks delta m 15* refers to any unwanted water escaping from a Delta M15 kitchen faucet fixture. These leaks can manifest in various locations, including the spout, handle base, or connections under the sink. The M15 series, known for its durability and sleek design, isn’t immune to wear and tear. Understanding the underlying causes is crucial for effective repair. The Delta M15 faucet is a single-handle model, typically featuring a ceramic disc cartridge. This cartridge controls the flow and mixing of hot and cold water. Over time, mineral buildup, corrosion, or simple wear can damage the cartridge or its associated seals, leading to leaks.
It’s important to distinguish between different types of leaks. A drip from the spout usually indicates a problem with the cartridge. A leak around the handle base suggests worn O-rings or seals. Leaks under the sink often point to loose connections or corroded supply lines. Ignoring these leaks can lead to water damage, mold growth, and increased water bills. Recent studies show that even a small, steady drip can waste hundreds of gallons of water per year, highlighting the importance of prompt repair. The environmental impact of water waste is also a growing concern, making faucet repair a responsible and sustainable choice.
Why the Delta M15 is Prone to Leaks (and What You Can Do About It)
The Delta M15, while a reliable faucet, is susceptible to leaks for several reasons:
* **Hard Water:** Areas with hard water experience mineral buildup inside the faucet, damaging the cartridge and seals.
* **High Water Pressure:** Excessive water pressure can strain the faucet’s internal components, accelerating wear.
* **Age and Usage:** Over time, the constant use of the faucet wears down the rubber seals and O-rings.
* **Improper Installation:** A poorly installed faucet is more likely to develop leaks due to loose connections.
To mitigate these risks, consider installing a water softener if you have hard water. Regularly check your water pressure and install a pressure regulator if it’s too high. Replace worn parts promptly and ensure proper installation by a qualified plumber if you’re not comfortable doing it yourself.
Delta Faucet Cartridges: The Heart of the M15
The cartridge is the central component of the Delta M15 faucet, controlling water flow and temperature. It’s a cylindrical piece, typically made of plastic and ceramic, that houses the moving parts responsible for mixing hot and cold water. When you move the faucet handle, you’re essentially manipulating the cartridge to adjust the water flow and temperature. There are different types of cartridges, but the Delta M15 typically uses a ceramic disc cartridge, known for its smooth operation and durability. However, even ceramic disc cartridges can fail over time due to wear, mineral buildup, or damage. When a cartridge fails, it can cause leaks, reduced water flow, or difficulty controlling the water temperature. Identifying a faulty cartridge is crucial for addressing kitchen faucet leaks delta m 15.
Identifying a Faulty Cartridge
Here are some common signs that your Delta M15 cartridge may be faulty:
* **Constant Drip:** The faucet drips even when the handle is in the off position.
* **Reduced Water Flow:** The water flow is significantly weaker than usual.
* **Difficulty Controlling Temperature:** It’s hard to get the water temperature just right.
* **Stiff Handle:** The faucet handle is difficult to move or feels stiff.
* **Noisy Operation:** The faucet makes unusual noises when turned on or off.
If you notice any of these symptoms, it’s likely that the cartridge needs to be replaced. Replacing the cartridge is a relatively straightforward process that can be done with basic tools and a little patience. We’ll cover the replacement procedure in detail later in this guide.
Tools and Materials You’ll Need
Before you start tackling your kitchen faucet leaks delta m 15, gather the necessary tools and materials. Having everything on hand will make the process smoother and more efficient. Here’s a comprehensive list:
* **New Delta Faucet Cartridge:** Make sure you get the correct replacement cartridge for your Delta M15 model. Check the faucet’s model number or consult the Delta website to ensure compatibility.
* **Adjustable Wrench:** For loosening and tightening nuts and connections.
* **Phillips Head Screwdriver:** For removing screws.
* **Flathead Screwdriver:** For prying off caps or covers.
* **Pliers:** For gripping and maneuvering small parts.
* **Allen Wrench Set:** Some faucets use Allen screws to secure the handle.
* **Penetrating Oil:** To loosen stubborn nuts or bolts.
* **White Vinegar:** For cleaning mineral buildup.
* **Clean Rags:** For wiping up spills and cleaning parts.
* **Plumber’s Grease:** For lubricating O-rings and seals.
* **Basin Wrench (Optional):** For reaching hard-to-access nuts under the sink.
* **Safety Glasses:** To protect your eyes from debris.
* **Work Gloves:** To protect your hands.
Having these tools and materials readily available will save you time and frustration during the repair process. Remember to turn off the water supply before you begin!
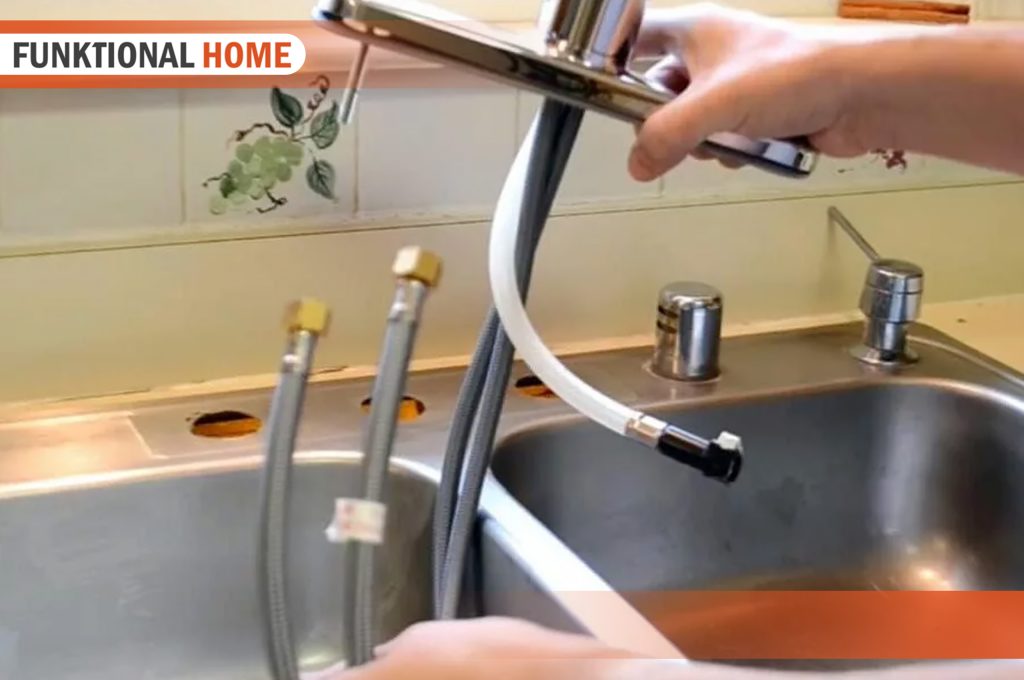
Step-by-Step Guide to Repairing Kitchen Faucet Leaks Delta M 15
Now, let’s get down to the actual repair. This section provides a detailed, step-by-step guide to fixing kitchen faucet leaks delta m 15. Follow these instructions carefully, and you’ll have your faucet leak-free in no time.
**Step 1: Turn Off the Water Supply**
This is the most crucial step. Locate the shut-off valves under your sink. There should be two valves, one for hot water and one for cold water. Turn both valves clockwise until they are completely closed. If you don’t have shut-off valves under your sink, you’ll need to turn off the main water supply to your house. This is usually located in the basement or near the water meter.
**Step 2: Protect the Sink**
Place a towel or cloth in the sink to protect it from scratches and dents. This will also catch any small parts that might fall during the repair process.
**Step 3: Remove the Faucet Handle**
The method for removing the handle varies depending on the faucet model. Some handles are held in place by a screw, while others are simply pressed on. Look for a small cap or cover on the handle. Use a flathead screwdriver to gently pry it off. Underneath the cap, you’ll find a screw. Use a Phillips head screwdriver or Allen wrench to remove the screw. Once the screw is removed, you should be able to pull the handle straight off.
**Step 4: Remove the Cartridge Retaining Clip or Nut**
After removing the handle, you’ll see a retaining clip or nut that holds the cartridge in place. Use pliers or an adjustable wrench to remove the clip or nut. Be careful not to damage the cartridge during this step.
**Step 5: Remove the Old Cartridge**
With the retaining clip or nut removed, you should be able to pull the old cartridge straight out of the faucet body. If the cartridge is stuck, try gently twisting it back and forth while pulling. You can also use penetrating oil to help loosen it.
**Step 6: Clean the Faucet Body**
Before installing the new cartridge, clean the inside of the faucet body with a clean rag. Remove any mineral buildup or debris that may be present. You can use white vinegar to help dissolve mineral deposits.
**Step 7: Install the New Cartridge**
Insert the new cartridge into the faucet body. Make sure it’s properly aligned. The cartridge should slide in smoothly. If it doesn’t, check for any obstructions or misalignments.
**Step 8: Replace the Retaining Clip or Nut**
Secure the new cartridge in place by replacing the retaining clip or nut. Tighten the nut with an adjustable wrench, but don’t overtighten it.
**Step 9: Reinstall the Faucet Handle**
Reattach the faucet handle and secure it with the screw. Replace the cap or cover on the handle.
**Step 10: Turn On the Water Supply**
Slowly turn on the water supply valves under the sink. Check for leaks around the faucet handle and spout. If you see any leaks, tighten the connections or check the cartridge installation.
**Step 11: Test the Faucet**
Test the faucet by turning it on and off and adjusting the water temperature. Make sure the water flows smoothly and there are no leaks.
Troubleshooting Common Issues During Repair
* **Cartridge Stuck:** If the cartridge is stuck, try using penetrating oil and gently twisting it back and forth.
* **Retaining Clip Difficult to Remove:** Use pliers to carefully remove the clip. Be careful not to damage it.
* **Leaks After Repair:** Check the cartridge installation and tighten the connections. Make sure the O-rings are properly seated.
Preventing Future Leaks: Maintenance Tips
Prevention is always better than cure. Here are some maintenance tips to help prevent future kitchen faucet leaks delta m 15:
* **Regularly Clean the Faucet:** Clean the faucet with a mild soap and water solution to remove mineral buildup.
* **Check for Leaks Regularly:** Inspect the faucet for leaks every few months.
* **Replace Worn Parts Promptly:** Replace worn O-rings, seals, and cartridges as soon as you notice any signs of wear.
* **Install a Water Softener:** If you have hard water, consider installing a water softener to reduce mineral buildup.
* **Control Water Pressure:** Make sure your water pressure is not too high. Install a pressure regulator if necessary.
* **Lubricate O-rings and Seals:** Periodically lubricate O-rings and seals with plumber’s grease.
By following these maintenance tips, you can extend the life of your Delta M15 faucet and prevent future leaks.
Delta Faucet Warranty Information
Delta Faucet offers a limited lifetime warranty on its faucets. This warranty covers defects in material and workmanship. If your Delta M15 faucet develops a leak due to a manufacturing defect, Delta will repair or replace the faucet free of charge. To claim the warranty, you’ll need to provide proof of purchase and a description of the problem. Contact Delta Faucet customer service for more information about the warranty process.
Understanding the Warranty’s Limitations
It’s important to understand the limitations of the Delta Faucet warranty. The warranty typically does not cover damage caused by:
* **Improper Installation:** If the faucet was not installed correctly, the warranty may be void.
* **Abuse or Neglect:** Damage caused by abuse or neglect is not covered.
* **Hard Water:** Damage caused by hard water may not be covered.
* **Unauthorized Repairs:** Repairs performed by unauthorized service providers may void the warranty.
Be sure to read the warranty carefully to understand its terms and conditions.
Alternative Faucet Options (If Repair Isn’t Feasible)
If your Delta M15 faucet is severely damaged or beyond repair, you may need to consider replacing it. Here are some alternative faucet options to consider:
* **Delta Faucet Essa:** A sleek and modern faucet with a pull-down sprayer.
* **Moen Arbor:** A popular faucet with a high arc spout and a variety of finishes.
* **Kohler Simplice:** A versatile faucet with a pull-down sprayer and a magnetic docking system.
When choosing a replacement faucet, consider factors such as style, functionality, and price. Read reviews and compare features to find the best faucet for your needs.
Expert Q&A on Kitchen Faucet Leaks Delta M 15
Here are some frequently asked questions about kitchen faucet leaks delta m 15, answered by our plumbing experts:
**Q1: How do I know if the leak is coming from the cartridge or somewhere else?**
*A1: If the leak is coming from the spout when the faucet is turned off, it’s likely a cartridge issue. Leaks around the handle or base usually indicate worn O-rings or seals.*
**Q2: Can I use generic cartridges instead of Delta-branded ones?**
*A2: While generic cartridges may fit, we strongly recommend using Delta-branded cartridges for optimal performance and compatibility.*
**Q3: How often should I replace the cartridge in my Delta M15 faucet?**
*A3: The lifespan of a cartridge varies depending on water quality and usage. However, it’s generally recommended to replace the cartridge every 3-5 years.*
**Q4: What is the best way to clean mineral buildup from my faucet?**
*A4: Soak a cloth in white vinegar and wrap it around the affected area. Let it sit for a few hours or overnight, then scrub with a soft brush.*
**Q5: How can I prevent hard water from damaging my faucet?**
*A5: Install a water softener to remove minerals from the water. This will help prevent mineral buildup inside the faucet.*
**Q6: What should I do if I can’t remove the faucet handle?**
*A6: Try using penetrating oil to loosen the screw or connection. You may also need to use a handle puller tool.*
**Q7: Is it safe to use a wrench on the faucet finish?**
*A7: No, using a wrench directly on the faucet finish can scratch or damage it. Always use a cloth or towel to protect the finish.*
**Q8: What is the best way to lubricate O-rings and seals?**
*A8: Use plumber’s grease specifically designed for lubricating O-rings and seals. Apply a thin layer to the O-rings before installing them.*
**Q9: How do I know if I have high water pressure?**
*A9: You can purchase a water pressure gauge at your local hardware store and attach it to an outdoor faucet.*
**Q10: When should I call a plumber instead of trying to fix the leak myself?**
*A10: If you’re not comfortable working with plumbing or if you encounter a complex issue, it’s best to call a qualified plumber.*
Conclusion: Stop the Drip and Save!
Repairing kitchen faucet leaks delta m 15 might seem daunting, but with this guide, you’re well-equipped to tackle the problem. We’ve covered everything from understanding the causes of leaks to step-by-step repair procedures and preventative measures. By following our expert advice, you can save water, money, and the environment. Remember, a little maintenance goes a long way. So, take action today and stop that annoying drip once and for all!
Have you had success repairing your Delta M15 faucet? Share your experiences and tips in the comments below! If you’re still struggling with kitchen faucet leaks delta m 15, consider contacting a qualified plumber for assistance. Explore our other guides on faucet repair and plumbing maintenance for more helpful tips and information.
