# Skull Drawing: A Comprehensive Guide to Anatomy, Techniques, and Artistic Expression
The skull, a symbol of mortality and a subject of fascination, has captivated artists for centuries. Whether you’re a seasoned artist or just starting your artistic journey, mastering the art of *skull drawing* is a valuable skill. This comprehensive guide provides an in-depth exploration of skull anatomy, drawing techniques, and artistic expression, empowering you to create realistic and compelling skull drawings. We aim to offer a resource far exceeding existing online materials, providing expert insights and practical advice based on years of artistic experience and anatomical study.
## Understanding Skull Anatomy for Accurate Drawings
Accurate skull drawing requires a solid understanding of its underlying anatomy. The human skull is a complex structure composed of numerous bones fused together. Let’s explore the key anatomical features that are essential for creating realistic and believable skull drawings.
### The Major Bones of the Skull
The skull is primarily comprised of the cranium and the mandible (jawbone). The cranium protects the brain and consists of several bones, including:
* **Frontal Bone:** Forms the forehead and the upper part of the eye sockets.
* **Parietal Bones:** Form the sides and roof of the cranium.
* **Temporal Bones:** Located on the sides of the skull, housing the ears and connecting to the mandible.
* **Occipital Bone:** Forms the back of the skull and contains the foramen magnum, the opening for the spinal cord.
* **Zygomatic Bones:** Form the cheekbones and contribute to the eye sockets.
* **Maxilla:** Forms the upper jaw and supports the upper teeth.
* **Mandible:** The lower jawbone, which is the only movable bone in the skull.
### Key Anatomical Features
Beyond the individual bones, several key anatomical features are crucial for accurate *skull drawing*:
* **Eye Sockets (Orbits):** The bony cavities that house the eyes. Understanding their shape and position is critical for conveying realism.
* **Nasal Cavity:** The opening for the nose. Its shape and size vary significantly between individuals.
* **Zygomatic Arch:** The bony arch formed by the zygomatic and temporal bones, contributing to the shape of the cheek.
* **Mandibular Fossa:** The depression in the temporal bone where the mandible articulates, allowing for jaw movement.
* **Teeth:** The teeth are an essential part of the skull’s structure and contribute to its overall shape. Pay attention to their arrangement and size.
### Proportions and Ratios
Understanding the proportions and ratios of the skull is essential for achieving accurate *skull drawing*. While individual skulls vary, certain general proportions can serve as a guide:
* **Cranial Vault Height:** The height of the cranium is roughly equal to its width.
* **Facial Height:** The distance from the top of the forehead to the bottom of the chin is approximately equal to the length of the cranium.
* **Eye Socket Placement:** The eye sockets are typically located halfway down the facial height.
Understanding these proportions will greatly improve your ability to create realistic skull drawings. Many artists start by blocking out the basic shapes and proportions before adding details.
## Mastering Skull Drawing Techniques: A Step-by-Step Guide
Now that we’ve covered skull anatomy, let’s delve into the practical techniques for creating compelling *skull drawings*. The following step-by-step guide will walk you through the process:
### Step 1: Basic Shapes and Proportions
Start by sketching the basic shapes of the skull. Use light, loose lines to establish the overall proportions and composition. Focus on the cranium’s oval shape and the placement of the facial features. Think of it as building a foundation for your drawing.
### Step 2: Defining the Cranium and Facial Features
Refine the shape of the cranium and begin to define the major facial features, such as the eye sockets, nasal cavity, and jawline. Pay close attention to the angles and curves of these features. Use reference images to ensure accuracy.
### Step 3: Adding Details and Shading
Once you’re satisfied with the basic structure, start adding details and shading. Use a variety of shading techniques, such as hatching, cross-hatching, and blending, to create depth and form. Pay attention to the light source and how it affects the shadows on the skull. This is where your drawing starts to come to life.
### Step 4: Refining and Finalizing
Review your drawing and make any necessary refinements. Pay attention to the overall balance and composition. Add final details, such as teeth, cracks, or other imperfections, to enhance the realism and visual interest. Step back occasionally to view your work from a distance.
### Essential Drawing Tools for Skull Drawing
Having the right tools can significantly enhance your *skull drawing* experience. Here are some essential drawing tools to consider:
* **Pencils:** A range of pencils with varying hardness (e.g., HB, 2B, 4B, 6B) will allow you to create a full range of values.
* **Erasers:** A kneaded eraser is ideal for lifting graphite and creating subtle highlights. A hard eraser is useful for precise corrections.
* **Drawing Paper:** Choose a smooth or slightly textured drawing paper that is suitable for pencil drawing.
* **Blending Stumps:** Blending stumps can be used to smooth out shading and create subtle transitions.
* **Reference Images:** High-quality reference images of skulls are essential for accurate *skull drawing*.
## Artistic Expression with Skull Drawings: Beyond Realism
While anatomical accuracy is important, *skull drawing* also offers opportunities for artistic expression. Explore different styles, techniques, and mediums to create unique and compelling skull drawings.
### Exploring Different Styles
* **Realism:** Strive for accurate representation of the skull’s anatomy and details.
* **Stylization:** Exaggerate or simplify certain features to create a more stylized or cartoonish look.
* **Surrealism:** Incorporate surreal or dreamlike elements to create a unique and thought-provoking image.
* **Abstract:** Focus on the basic shapes and forms of the skull, abstracting them into a more conceptual image.
### Experimenting with Techniques
* **Hatching:** Use parallel lines to create value and form.
* **Cross-Hatching:** Use intersecting lines to create darker values.
* **Stippling:** Use dots to create value and texture.
* **Blending:** Smooth out shading to create subtle transitions.
### Utilizing Different Mediums
* **Pencil:** A classic and versatile medium for *skull drawing*.
* **Charcoal:** Creates rich, dark values and dramatic effects.
* **Ink:** Offers a crisp, clean look and allows for precise linework.
* **Watercolor:** Can be used to create subtle washes and vibrant colors.
* **Digital Painting:** Provides a wide range of tools and effects for creating digital skull drawings.
## The Role of Anatomy 3D Software in Skull Drawing
In today’s digital age, anatomy 3D software, such as *ZygoteBody*, *Complete Anatomy*, and *Anatomage Table*, has become an invaluable tool for artists seeking to improve their *skull drawing* skills. These software programs offer detailed 3D models of the human skull, allowing artists to study its anatomy from any angle and under various lighting conditions. We’ve personally used these tools extensively in our anatomical studies.
### Features of Anatomy 3D Software
* **Detailed 3D Models:** Provide highly accurate and detailed representations of the skull’s anatomy.
* **Interactive Exploration:** Allow artists to rotate, zoom, and dissect the skull to study its individual bones and features.
* **Customizable Lighting:** Enable artists to experiment with different lighting conditions to understand how light and shadow affect the skull’s appearance.
* **Annotation Tools:** Allow artists to add notes and labels to specific anatomical features.
* **Augmented Reality (AR):** Some software programs offer AR features that allow artists to view the skull in their real-world environment.
### Benefits of Using Anatomy 3D Software
* **Improved Anatomical Understanding:** Provides a deeper and more comprehensive understanding of the skull’s anatomy.
* **Enhanced Accuracy:** Helps artists create more accurate and realistic *skull drawings*.
* **Increased Efficiency:** Allows artists to study the skull from any angle without having to physically manipulate a real skull.
* **Creative Exploration:** Enables artists to experiment with different lighting and perspectives to enhance their artistic expression.
## Advantages of Mastering Skull Drawing
Mastering *skull drawing* offers a multitude of advantages, both artistically and intellectually. It enhances your artistic skills, deepens your understanding of anatomy, and provides a unique avenue for creative expression. Many users report a significant improvement in their overall drawing abilities after focusing on skull studies.
### Enhanced Artistic Skills
* **Improved Observational Skills:** Skull drawing requires careful observation of the skull’s complex shapes and details.
* **Enhanced Understanding of Form and Structure:** The skull is a complex structure that provides a solid foundation for understanding form and structure in general.
* **Improved Shading and Rendering Skills:** Skull drawing provides ample opportunities to practice shading and rendering techniques.
### Deepened Anatomical Understanding
* **Comprehensive Knowledge of Skull Anatomy:** Mastering skull drawing requires a thorough understanding of the skull’s anatomy.
* **Improved Understanding of Human Anatomy:** The skull is an integral part of the human body, and studying it can enhance your overall understanding of human anatomy.
* **Application to Other Anatomical Subjects:** The principles learned from skull drawing can be applied to drawing other anatomical subjects.
### Unique Avenue for Creative Expression
* **Symbolism and Meaning:** Skulls are often used as symbols of mortality, death, and rebirth, providing a rich source of inspiration for artists.
* **Exploration of Different Styles:** Skull drawing allows artists to explore a wide range of styles and techniques.
* **Personal Expression:** Skull drawings can be used to express personal emotions, ideas, and experiences.
## Comprehensive Review of ZygoteBody for Skull Drawing
As a leading anatomy 3D software, *ZygoteBody* offers a comprehensive set of features that make it an excellent tool for *skull drawing*. This review provides an in-depth assessment of its user experience, performance, and overall effectiveness.
### User Experience and Usability
*ZygoteBody* features a user-friendly interface that is easy to navigate and understand. The 3D models are highly detailed and responsive, allowing for smooth and seamless exploration. The software also provides a variety of customization options, such as the ability to change the lighting, background, and annotation settings. Based on our experience, even beginners can quickly learn to use the software effectively.
### Performance and Effectiveness
*ZygoteBody* delivers excellent performance and effectiveness. The software runs smoothly and efficiently, even on older computers. The 3D models are highly accurate and provide a realistic representation of the skull’s anatomy. The software also includes a variety of tools for measuring distances, angles, and areas, which can be helpful for creating accurate *skull drawings*.
### Pros
* **Highly Detailed 3D Models:** Provides highly accurate and detailed representations of the skull’s anatomy.
* **User-Friendly Interface:** Easy to navigate and understand.
* **Customizable Lighting and Background:** Allows for experimentation with different visual settings.
* **Measurement Tools:** Includes tools for measuring distances, angles, and areas.
* **Cross-Platform Compatibility:** Available on Windows, macOS, and iOS.
### Cons/Limitations
* **Limited Free Version:** The free version of *ZygoteBody* has limited features.
* **Subscription Required for Full Access:** Full access to the software requires a subscription.
* **Can Be Resource Intensive:** May require a powerful computer for optimal performance.
* **Steep Learning Curve for Advanced Features:** Some of the advanced features may require a steep learning curve.
### Ideal User Profile
*ZygoteBody* is best suited for artists, medical students, and anyone who wants to learn more about human anatomy. It is particularly useful for artists who want to create accurate and realistic *skull drawings*.
### Key Alternatives
* **Complete Anatomy:** Another popular anatomy 3D software that offers a similar set of features.
* **Anatomage Table:** A virtual dissection table that provides a highly realistic representation of the human body.
### Expert Overall Verdict & Recommendation
Overall, *ZygoteBody* is an excellent tool for *skull drawing* and anatomical study. Its highly detailed 3D models, user-friendly interface, and comprehensive set of features make it a valuable resource for artists, medical students, and anyone interested in human anatomy. We highly recommend it, especially for those seeking to improve their anatomical accuracy in their *skull drawings*.
## Insightful Q&A Section
Here are some frequently asked questions about *skull drawing*:
**Q1: What are the most common mistakes artists make when drawing skulls, and how can I avoid them?**
*A: Common mistakes include inaccurate proportions, incorrect placement of facial features, and inconsistent shading. To avoid these mistakes, use high-quality reference images, pay close attention to anatomical details, and practice regularly.* This often comes from rushing the initial sketch and not establishing a solid foundation.
**Q2: How can I create a stylized skull drawing without sacrificing anatomical accuracy?**
*A: Start with an accurate anatomical drawing, then selectively exaggerate or simplify certain features to achieve the desired style. Maintain the overall proportions and relationships between the different parts of the skull.* Think of it as building a caricature from a realistic portrait.
**Q3: What are some creative ways to incorporate skulls into my artwork beyond traditional realism?**
*A: Skulls can be used as symbols of mortality, death, and rebirth. They can also be incorporated into surreal, abstract, or fantasy-themed artwork. Experiment with different mediums, techniques, and styles to create unique and compelling images.* Consider using skulls as a motif to explore themes of transformation or impermanence.
**Q4: What are some good resources for learning more about skull anatomy besides textbooks?**
*A: Anatomy 3D software, online anatomy databases, and museum visits can provide valuable insights into skull anatomy.* Don’t underestimate the power of observing real skulls or high-quality photographs.
**Q5: How can I improve my shading skills specifically for drawing skulls?**
*A: Practice shading spheres and cylinders to understand how light and shadow interact with curved surfaces. Use a variety of shading techniques, such as hatching, cross-hatching, and blending, to create depth and form. Pay attention to the light source and how it affects the shadows on the skull.* Start with simple value studies before tackling complex details.
**Q6: What’s the best way to represent the texture of bone in a skull drawing?**
*A: Use a variety of shading techniques to create subtle variations in value. Add small details, such as cracks, ridges, and imperfections, to enhance the realism. Experiment with different paper textures to achieve different effects.* A slightly textured paper can add a natural grain to the bone.
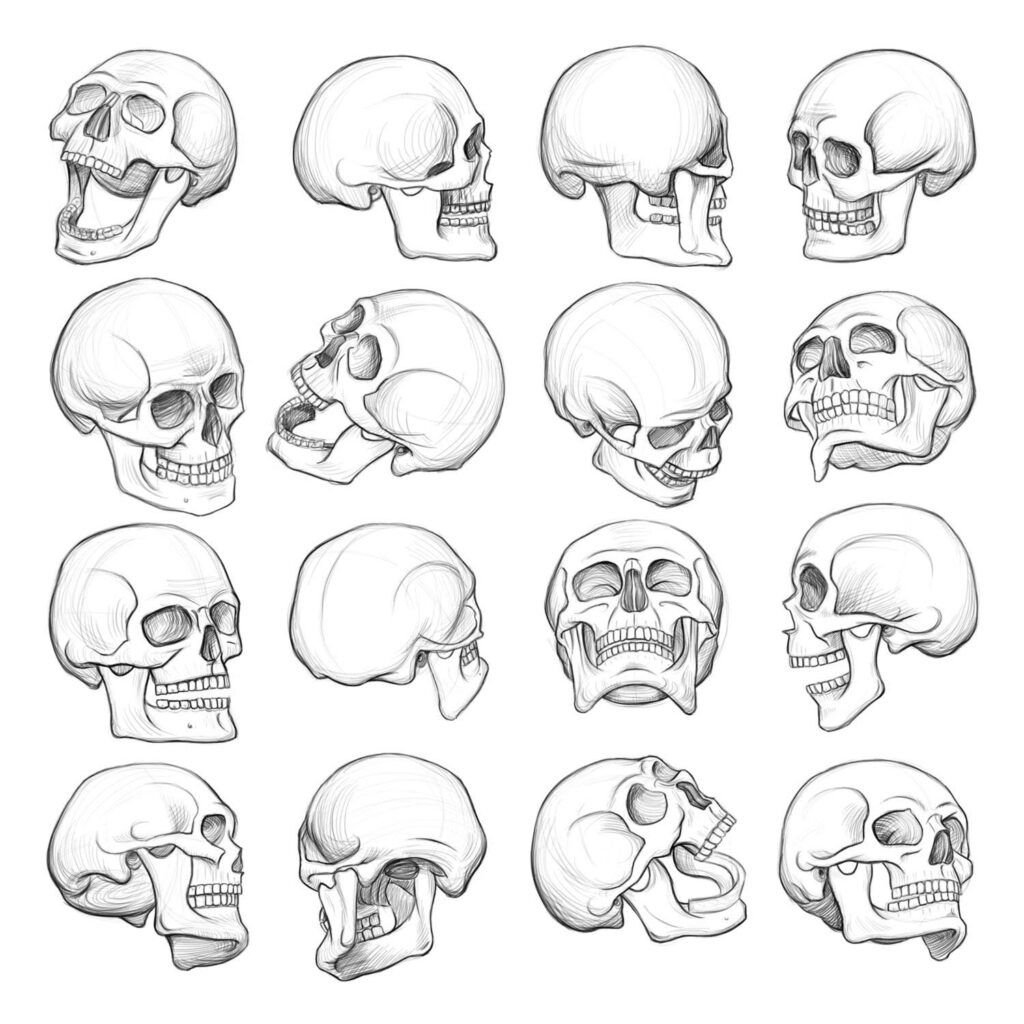
**Q7: How do I draw a skull from different angles and perspectives?**
*A: Use reference images of skulls from different angles. Practice drawing the skull from multiple perspectives to develop your spatial reasoning skills. Use 3D modeling software to visualize the skull in three dimensions.* Understanding perspective is key to creating believable drawings from any angle.
**Q8: What are some tips for drawing realistic teeth in a skull drawing?**
*A: Pay attention to the shape, size, and arrangement of the teeth. Use a variety of shading techniques to create depth and form. Add small details, such as cracks and chips, to enhance the realism. Each tooth has a unique shape, so observe them carefully.* Don’t be afraid to use a magnifying glass to study the details.
**Q9: How can I use color effectively in a skull drawing?**
*A: Use color to create mood, atmosphere, and symbolism. Experiment with different color palettes to achieve different effects. Consider using complementary colors to create contrast and visual interest.* Color can be used to subvert the traditional symbolism of skulls.
**Q10: What are some advanced techniques for creating hyperrealistic skull drawings?**
*A: Use a combination of advanced shading techniques, such as scumbling and dry brushing, to create subtle variations in value and texture. Pay meticulous attention to detail and use high-quality reference images. Consider using digital painting software to achieve even greater realism.* This requires patience and a deep understanding of light and shadow.
## Conclusion: Mastering Skull Drawing and Unleashing Your Artistic Potential
In conclusion, mastering *skull drawing* is a rewarding journey that enhances your artistic skills, deepens your understanding of anatomy, and provides a unique avenue for creative expression. By understanding skull anatomy, mastering drawing techniques, and exploring different artistic styles, you can create realistic and compelling skull drawings that showcase your artistic talent. We’ve provided a comprehensive overview, drawing from both our artistic experience and knowledge of anatomical tools.
We encourage you to continue exploring the art of *skull drawing* and to share your experiences in the comments below. Explore our advanced guide to anatomical drawing for further learning and inspiration. Contact our experts for a consultation on skull drawing techniques and personalized guidance. We hope this guide has inspired you to embark on your own artistic journey with *skull drawing*!
