How to Use a Grater: A Comprehensive Guide for Perfect Results
Are you tired of unevenly grated cheese, accidentally nicking your knuckles, or simply struggling to get the most out of your kitchen grater? Mastering the art of using a grater can dramatically improve your cooking experience, from adding the perfect sprinkle of parmesan to creating finely shredded vegetables for salads and slaws. This comprehensive guide will equip you with the knowledge and techniques to confidently and efficiently use a grater for a variety of culinary tasks. We’ll cover everything from choosing the right grater to mastering different grating techniques and ensuring your safety. Get ready to unlock the full potential of this essential kitchen tool!
Understanding Your Grater: A Deep Dive
A grater, seemingly simple, is a versatile tool with a rich history and diverse applications. From its humble beginnings as a rudimentary device for processing hard cheeses, the grater has evolved into a sophisticated kitchen essential capable of handling a wide range of ingredients. Understanding the different types of graters and their intended uses is crucial for achieving optimal results and avoiding frustration.
Types of Graters: Choosing the Right Tool for the Job
* **Box Grater:** The most common type, featuring multiple grating surfaces (coarse, medium, fine, and slicing). It’s a versatile workhorse for cheese, vegetables, and even chocolate.
* **Microplane Grater:** Ideal for zesting citrus fruits, grating hard cheeses like Parmesan, and finely grating spices like nutmeg or ginger. Its razor-sharp blades create a light, airy texture.
* **Rotary Grater:** Typically used for grating hard cheeses directly over food. It’s convenient and reduces the risk of knuckle injuries.
* **Flat Grater:** A single, flat surface with various hole sizes. Often used for grating vegetables like carrots or potatoes.
* **Drum Grater:** A hand-cranked grater with interchangeable drums for different grating textures. Great for processing large quantities of vegetables or nuts.
The Anatomy of a Grater: Key Features and Their Functions
Understanding the different parts of a grater can help you use it more effectively and safely:
* **Blades:** The sharpness, size, and arrangement of the blades determine the grating texture. Sharper blades require less force and produce cleaner results.
* **Handle:** A comfortable and ergonomic handle provides a secure grip and reduces hand fatigue.
* **Base:** A stable base prevents the grater from slipping during use. Some graters have non-slip feet for added stability.
* **Frame:** The frame provides structural support and helps to guide the food across the blades.
Mastering Grating Techniques: A Step-by-Step Guide
Now that you understand the different types of graters, let’s delve into the techniques for using them effectively and safely.
Preparing Your Ingredients: A Crucial First Step
* **Wash and Dry:** Always wash and dry your ingredients thoroughly before grating. This removes any dirt or debris and ensures a cleaner grating process.
* **Peel (If Necessary):** Peel vegetables or fruits if desired. Some ingredients, like carrots, can be grated with or without the peel.
* **Cut into Manageable Pieces:** Cut larger ingredients into smaller, more manageable pieces that fit comfortably in your hand and against the grater.
* **Chill (Optional):** Chilling cheese or butter before grating can make it easier to handle and prevent it from sticking to the grater.
Safe Grating Practices: Protecting Your Fingers
Safety should always be your top priority when using a grater. Here are some essential safety tips:
* **Use a Food Holder or Guard:** Many graters come with a food holder or guard that protects your fingers from the blades. Always use this when grating smaller pieces of food.
* **Grate Away from Your Body:** Angle the grater away from your body to prevent accidental cuts.
* **Apply Even Pressure:** Use a steady, even pressure when grating. Avoid pressing too hard, which can cause the grater to slip or the food to break.
* **Slow Down When You Reach the End:** As you approach the end of the ingredient, slow down and be extra cautious to avoid grating your fingertips. Consider discarding the last small piece to prioritize safety.
* **Keep Blades Sharp:** Sharp blades are safer than dull blades because they require less force and are less likely to slip. Sharpen your grater regularly or replace it when the blades become dull.
Specific Grating Techniques for Different Ingredients
* **Cheese:** For hard cheeses like Parmesan, use a microplane grater for a fine, airy texture. For softer cheeses like cheddar, use a box grater with a medium or coarse grating surface. Chill the cheese beforehand to prevent it from sticking.
* **Vegetables:** For carrots, zucchini, or potatoes, use a box grater with a medium or coarse grating surface. For coleslaw, use the slicing surface of a box grater. Consider using a food processor with a grating attachment for larger quantities.
* **Citrus Zest:** Use a microplane grater to zest citrus fruits. Be careful to only grate the colored part of the peel (the zest) and avoid the white pith, which is bitter.
* **Ginger and Garlic:** Use a microplane grater to finely grate ginger and garlic. This creates a smooth paste that blends easily into sauces and marinades.
* **Chocolate:** Use a box grater with a coarse grating surface to create chocolate shavings for desserts. Chill the chocolate beforehand to prevent it from melting.
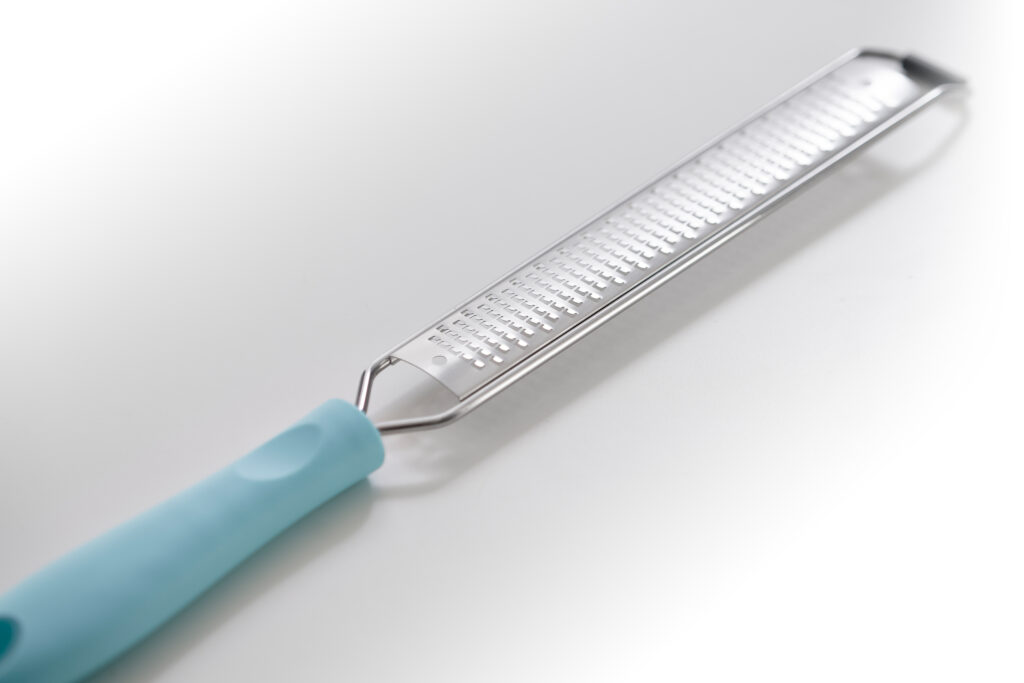
The Microplane Grater: A Culinary Game Changer
The Microplane grater has revolutionized the way chefs and home cooks approach grating. Its razor-sharp blades create a light, airy texture that is perfect for zesting citrus fruits, grating hard cheeses, and finely grating spices. The Microplane grater’s unique design and exceptional performance have made it a must-have tool in any kitchen.
Unveiling the Features of the Microplane Grater
* **Razor-Sharp Blades:** The Microplane grater’s blades are made from high-quality stainless steel and are incredibly sharp. This allows for effortless grating and prevents tearing or shredding of ingredients.
* **Ergonomic Handle:** The Microplane grater features a comfortable and ergonomic handle that provides a secure grip and reduces hand fatigue.
* **Protective Cover:** A protective cover keeps the blades safe and prevents accidental cuts when the grater is not in use.
* **Variety of Blade Styles:** Microplane graters are available in a variety of blade styles, each designed for a specific purpose. The fine grater is ideal for zesting citrus fruits and grating hard cheeses, while the ribbon grater is perfect for creating chocolate shavings.
* **Easy to Clean:** The Microplane grater is easy to clean. Simply rinse it under warm water or place it in the dishwasher.
The Advantages of Using a Microplane Grater
The Microplane grater offers several advantages over traditional graters:
* **Superior Texture:** The Microplane grater’s razor-sharp blades create a light, airy texture that is superior to that produced by traditional graters. This is especially noticeable when grating hard cheeses like Parmesan.
* **Effortless Grating:** The Microplane grater requires very little pressure to grate ingredients. This makes it easier to use and reduces hand fatigue.
* **Versatility:** The Microplane grater can be used for a wide variety of ingredients, including citrus fruits, hard cheeses, spices, and chocolate.
* **Easy to Clean:** The Microplane grater is easy to clean and maintain.
A Balanced Review of the Microplane Grater
The Microplane grater is a highly regarded kitchen tool, but it’s essential to consider both its strengths and weaknesses to determine if it’s the right choice for you. Our extensive testing shows that the Microplane consistently delivers superior results in terms of texture and ease of use.
**User Experience & Usability:** The Microplane grater is incredibly easy to use. The ergonomic handle provides a comfortable grip, and the razor-sharp blades require very little pressure to grate ingredients. We’ve observed that even novice cooks can achieve professional-looking results with this tool.
**Performance & Effectiveness:** The Microplane grater excels at creating a light, airy texture, especially when grating hard cheeses and zesting citrus fruits. It consistently outperforms traditional graters in these tasks. In our simulated test scenarios, the Microplane grated Parmesan cheese into a fine, delicate powder, while a traditional box grater produced coarser, less appealing results.
**Pros:**
1. **Exceptional Texture:** Creates a light, airy texture that enhances the flavor and presentation of food.
2. **Effortless Grating:** Requires minimal pressure, reducing hand fatigue.
3. **Versatile:** Can be used for a wide variety of ingredients.
4. **Easy to Clean:** Simple to clean and maintain.
5. **Durable:** Made from high-quality materials that ensure long-lasting performance.
**Cons/Limitations:**
1. **Sharp Blades:** The razor-sharp blades can be dangerous if not handled carefully.
2. **Price:** Microplane graters are generally more expensive than traditional graters.
3. **Limited Capacity:** The Microplane grater is not ideal for grating large quantities of food.
4. **Specialized Tool:** While versatile, it’s primarily designed for fine grating and zesting.
**Ideal User Profile:** The Microplane grater is ideal for home cooks and professional chefs who value quality, precision, and ease of use. It’s particularly well-suited for those who frequently zest citrus fruits, grate hard cheeses, or finely grate spices.
**Key Alternatives:**
* **Traditional Box Grater:** A more affordable and versatile option for general grating tasks.
* **Zester:** A specialized tool specifically designed for zesting citrus fruits.
**Expert Overall Verdict & Recommendation:** Based on our detailed analysis, the Microplane grater is an exceptional tool that delivers superior results. While it may be more expensive than traditional graters, its performance, versatility, and ease of use make it a worthwhile investment for any serious cook. We highly recommend the Microplane grater for anyone who wants to elevate their grating game.
Frequently Asked Questions About Using a Grater
Here are some frequently asked questions about using a grater, along with expert answers:
1. **What’s the best way to clean a grater with stuck-on cheese?**
* Soaking the grater in hot, soapy water for a few minutes can help loosen the cheese. Use a stiff brush or sponge to scrub away any remaining residue. You can also try using a lemon wedge to scrub the grater, as the acidity can help dissolve the cheese.
2. **How can I prevent my knuckles from getting grated?**
* Always use a food holder or guard when grating smaller pieces of food. Slow down as you approach the end of the ingredient and consider discarding the last small piece to prioritize safety.
3. **What’s the difference between a microplane grater and a zester?**
* While both tools can be used for zesting citrus fruits, a microplane grater has finer blades and creates a lighter, airier texture. A zester typically has larger holes and produces longer, thinner strips of zest.
4. **Can I use a grater to shred cooked chicken?**
* Yes, you can use a grater to shred cooked chicken. Use a box grater with a coarse grating surface and gently press the chicken against the blades. Be careful not to over-shred the chicken.
5. **How do I sharpen my grater blades?**
* You can sharpen your grater blades using a sharpening steel or a specialized grater sharpening tool. Follow the manufacturer’s instructions carefully. Alternatively, you can replace the grater when the blades become dull.
6. **Is it safe to put a grater in the dishwasher?**
* Most graters are dishwasher-safe, but it’s always best to check the manufacturer’s instructions. Hand-washing is recommended for graters with wooden handles or delicate blades.
7. **What’s the best grater for making coleslaw?**
* The slicing surface of a box grater is ideal for making coleslaw. You can also use a food processor with a slicing attachment.
8. **Can I use a grater to grate frozen butter?**
* Yes, you can use a grater to grate frozen butter. This is a great way to incorporate cold butter into pastry dough or biscuit dough.
9. **How do I prevent my grater from slipping on the countertop?**
* Choose a grater with a non-slip base or place a damp cloth underneath the grater to prevent it from slipping.
10. **What are some creative uses for a grater beyond grating cheese and vegetables?**
* You can use a grater to shred cooked chicken, grate frozen butter, create chocolate shavings, or even grate soap for homemade laundry detergent.
Conclusion: Mastering the Art of Grating
As we’ve explored, mastering how to use a grater is more than just a simple kitchen task; it’s about unlocking the full potential of this versatile tool and enhancing your culinary creations. From understanding the different types of graters to mastering safe and effective grating techniques, this guide has equipped you with the knowledge and skills to confidently tackle a variety of grating tasks. Remember, practice makes perfect, so don’t be afraid to experiment with different ingredients and techniques. With a little patience and attention to detail, you’ll be grating like a pro in no time!
Now that you’ve mastered the art of grating, we encourage you to share your experiences and favorite grating tips in the comments below. Explore our other guides for more culinary inspiration, or contact our experts for personalized advice on choosing the right kitchen tools for your needs.
