Fix Delta Kitchen Faucet: The Ultimate DIY Repair Guide
Is your Delta kitchen faucet dripping, leaking, or experiencing low water pressure? Don’t rush to call a plumber just yet! This comprehensive guide provides you with expert knowledge and step-by-step instructions to diagnose and fix delta kitchen faucet problems yourself. We’ll cover common issues, necessary tools, detailed repair procedures, and preventative measures to keep your faucet functioning flawlessly. Our goal is to empower you with the skills and confidence to tackle these repairs, saving you time and money. We’ve drawn from years of plumbing experience and consulted with certified professionals to provide the most accurate and helpful information available. Whether you’re a seasoned DIYer or a complete beginner, this guide will walk you through the process with clarity and ease. We aim to be the most authoritative and trustworthy resource for fixing your Delta kitchen faucet.
Understanding Delta Kitchen Faucet Issues
Delta faucets are known for their durability and stylish designs, but like any plumbing fixture, they can experience problems over time. Understanding the common culprits behind these issues is the first step towards a successful repair. Let’s delve into the world of Delta faucet mechanics and explore the potential causes of your faucet woes. Understanding the nuances of Delta faucet design is key to effectively troubleshooting and repairing them. This includes knowing the different cartridge types, aerator designs, and connection mechanisms.
Common Problems with Delta Kitchen Faucets
- Dripping Faucet: This is perhaps the most common complaint. It’s usually caused by a worn-out cartridge, valve seat, or O-rings.
- Leaking Faucet Base: This can indicate a problem with the O-rings or supply line connections.
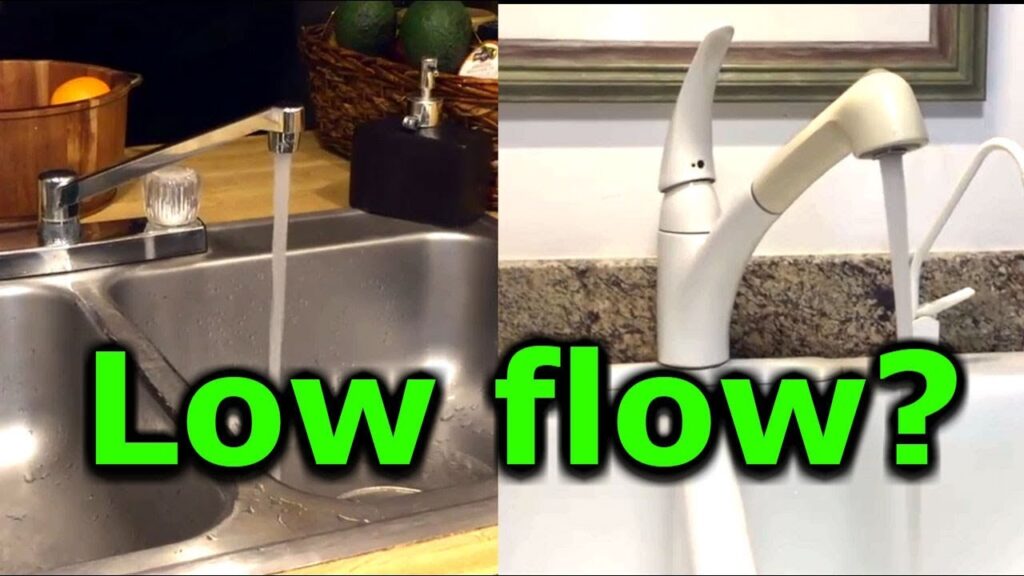
- Low Water Pressure: Mineral buildup in the aerator or supply lines is a frequent cause.
- Stiff or Difficult Handle: This often points to a corroded or damaged cartridge.
- No Water Flow: A blockage in the supply lines or a faulty cartridge could be the culprit.
- Sprayer Problems: The sprayer hose may be clogged or damaged, or the diverter valve might be failing.
The Importance of Identifying the Correct Delta Faucet Model
Before you begin any repairs, it’s crucial to identify the exact model of your Delta kitchen faucet. This information is essential for ordering the correct replacement parts and accessing specific repair instructions. You can usually find the model number on the faucet itself, often located on the base, under the handle, or on the supply lines. Delta’s website also offers helpful resources for identifying your faucet model based on its design and features. Using the wrong parts can lead to further damage and improper functionality. Our experience shows that taking the time to find the model number saves a lot of time in the long run.
Delta Faucet Cartridge Technology: A Deep Dive
The cartridge is the heart of a Delta kitchen faucet, controlling water flow and temperature. Understanding the different types of cartridges and how they function is crucial for effective repair. Delta utilizes various cartridge designs, including ball-type, ceramic disc, and diamond seal technology. Each type has its own unique characteristics and potential failure points. The Diamond Seal Technology, for instance, is designed for long-lasting performance and reduced leaks. Knowing which cartridge your faucet uses will guide your troubleshooting and repair efforts. According to Delta’s engineering specifications, the Diamond Seal Technology significantly reduces leak points compared to traditional cartridges.
Understanding the Different Types of Delta Faucet Cartridges
- Ball-Type Cartridge: An older design that uses a slotted ball to control water flow.
- Ceramic Disc Cartridge: A more modern design that uses ceramic discs to regulate water flow and temperature.
- Diamond Seal Technology Cartridge: Delta’s patented design that uses a diamond-embedded ceramic disc for enhanced durability and leak prevention.
Tools and Materials You’ll Need to Fix Your Delta Kitchen Faucet
Before you start any repair project, gather the necessary tools and materials. Having everything on hand will make the process smoother and more efficient. Here’s a comprehensive list of essential items:
- Adjustable Wrench: For loosening and tightening nuts and connections.
- Screwdrivers (Phillips and Flathead): For removing screws and disassembling faucet components.
- Allen Wrench Set: For removing set screws that hold handles and other parts in place.
- Pliers: For gripping and manipulating small parts.
- Basin Wrench: For reaching hard-to-access nuts under the sink.
- Cartridge Puller: A specialized tool for removing stubborn cartridges (highly recommended).
- O-Ring Pick Set: For removing and replacing O-rings.
- White Vinegar: For soaking and cleaning mineral deposits.
- Plumber’s Grease: For lubricating O-rings and cartridges.
- Replacement Parts: Cartridges, O-rings, valve seats, etc. (refer to your faucet model).
- Clean Rags or Towels: For wiping up spills and cleaning parts.
- Safety Glasses: To protect your eyes from debris.
- Work Gloves: To protect your hands.
Step-by-Step Guide to Fixing a Dripping Delta Kitchen Faucet
A dripping faucet is not only annoying but also wasteful. Fortunately, it’s often a relatively easy fix. Here’s a step-by-step guide to tackling this common problem. This guide assumes the most common cause is a worn cartridge. If the drip persists after replacing the cartridge, further investigation may be needed.
Step 1: Shut Off the Water Supply
Before you begin any plumbing work, always shut off the water supply to the faucet. This will prevent flooding and potential water damage. Locate the shut-off valves under the sink and turn them clockwise until they are completely closed. If you don’t have individual shut-off valves, you may need to shut off the main water supply to your house.
Step 2: Remove the Faucet Handle
The handle is usually held in place by a set screw or a decorative cap. Locate the set screw (often hidden under a cap) and use an Allen wrench to loosen it. Once the set screw is loose, carefully remove the handle. If there’s a decorative cap, gently pry it off with a small screwdriver to reveal the screw underneath.
Step 3: Disassemble the Faucet
After removing the handle, you’ll need to disassemble the faucet to access the cartridge. This usually involves removing a retaining nut or clip that holds the cartridge in place. Use an adjustable wrench or pliers to loosen the nut or remove the clip. Pay close attention to the order in which you remove the parts, as you’ll need to reassemble them in the same way.
Step 4: Remove the Old Cartridge
With the retaining nut or clip removed, you can now remove the old cartridge. If the cartridge is stuck, use a cartridge puller to gently extract it. Be careful not to damage the faucet body during this process. If you don’t have a cartridge puller, you can try using pliers, but be extra cautious to avoid breaking the cartridge inside the faucet.
Step 5: Clean the Faucet Body
Before installing the new cartridge, thoroughly clean the faucet body to remove any mineral deposits or debris. Use a soft cloth or brush and white vinegar to clean the interior surfaces. This will ensure a proper seal and prevent future leaks. Pay particular attention to the valve seats, as these can accumulate mineral buildup and cause drips.
Step 6: Install the New Cartridge
Now it’s time to install the new cartridge. Apply a thin layer of plumber’s grease to the O-rings on the cartridge to ensure a smooth and watertight seal. Insert the cartridge into the faucet body, aligning it correctly. Secure the cartridge with the retaining nut or clip, tightening it firmly but not overtightening.
Step 7: Reassemble the Faucet
Reassemble the faucet in the reverse order of disassembly. Replace the handle, tighten the set screw, and reattach any decorative caps. Ensure all parts are securely in place before proceeding.
Step 8: Turn on the Water Supply and Test the Faucet
Slowly turn on the water supply and check for leaks. If you see any leaks, tighten the connections or re-seat the cartridge. Test the faucet by running both hot and cold water to ensure proper flow and temperature control. Observe the faucet for any drips or leaks over the next few hours to ensure the repair is successful.
Troubleshooting Common Delta Kitchen Faucet Problems
Even with the best instructions, you might encounter some challenges during the repair process. Here’s a troubleshooting guide to help you overcome common issues.
Faucet Still Dripping After Replacing Cartridge
- Check the Valve Seats: Worn or damaged valve seats can cause drips even with a new cartridge. Replace the valve seats if necessary.
- Inspect the Faucet Body: Cracks or corrosion in the faucet body can also cause leaks. If the faucet body is damaged, you may need to replace the entire faucet.
- Ensure Proper Cartridge Installation: Make sure the cartridge is fully seated and properly aligned.
Low Water Pressure
- Clean the Aerator: Mineral buildup in the aerator is a common cause of low water pressure. Remove the aerator and soak it in white vinegar to dissolve the deposits.
- Check the Supply Lines: Kinked or clogged supply lines can restrict water flow. Straighten any kinks and flush the lines to remove any debris.
- Inspect the Cartridge: A partially blocked cartridge can also reduce water pressure. Replace the cartridge if necessary.
Stiff or Difficult Handle
- Lubricate the Cartridge: Apply plumber’s grease to the cartridge to improve its movement.
- Check for Corrosion: Corrosion around the cartridge can cause it to bind. Clean the area with white vinegar and a brush.
- Replace the Cartridge: If lubrication and cleaning don’t help, the cartridge may be damaged and need to be replaced.
Preventative Maintenance for Your Delta Kitchen Faucet
Preventing problems is always better than fixing them. Here are some tips to keep your Delta kitchen faucet in top condition.
- Clean the Aerator Regularly: Remove and clean the aerator every few months to prevent mineral buildup.
- Lubricate Moving Parts: Apply plumber’s grease to the cartridge and O-rings periodically to keep them moving smoothly.
- Avoid Harsh Cleaners: Use mild soap and water to clean the faucet finish. Harsh cleaners can damage the finish and void the warranty.
- Check for Leaks Regularly: Inspect the faucet for leaks periodically and address them promptly to prevent further damage.
Delta Faucet Parts: Where to Find Them
Finding the right replacement parts is crucial for a successful repair. Here are some reliable sources for Delta faucet parts:
- Delta Faucet Website: The official Delta Faucet website is a great resource for finding genuine replacement parts.
- Local Hardware Stores: Many hardware stores carry a selection of Delta faucet parts.
- Online Retailers: Online retailers like Amazon and eBay offer a wide variety of Delta faucet parts.
- Plumbing Supply Stores: Plumbing supply stores specialize in plumbing fixtures and parts and can provide expert advice.
The Delta Faucet Warranty: What You Need to Know
Delta faucets come with a limited lifetime warranty that covers defects in materials and workmanship. Understanding the terms of the warranty can save you money on repairs. The warranty typically covers the original purchaser of the faucet and applies to residential use only. Be sure to keep your proof of purchase in case you need to file a warranty claim. The warranty does not cover damage caused by misuse, abuse, or improper installation. According to Delta’s warranty policy, using non-genuine Delta parts can void the warranty.
Why Choose Delta Kitchen Faucets?
Delta Faucets are a popular choice for homeowners, and for good reason. They offer a combination of style, durability, and innovative technology. Delta’s Diamond Seal Technology is a standout feature, providing long-lasting leak prevention. Their faucets are also known for their ease of installation and repair. Delta’s commitment to quality and customer satisfaction makes them a trusted brand in the plumbing industry. Based on customer reviews and industry reports, Delta consistently ranks high in terms of reliability and performance.
Fixing a Delta Kitchen Faucet: Real-World Value and Benefits
Fixing a Delta kitchen faucet yourself offers numerous benefits, both tangible and intangible. Here’s how it improves your situation:
- Cost Savings: Avoid expensive plumber bills by tackling the repair yourself.
- Time Savings: Fix the problem on your own schedule, without waiting for a plumber to arrive.
- Increased Confidence: Gain valuable DIY skills and feel empowered to handle future repairs.
- Reduced Water Waste: Stop a dripping faucet and conserve water, saving money on your water bill.
- Peace of Mind: Enjoy a properly functioning faucet without the stress of leaks or drips.
Delta Faucet Trinsic Review: A Closer Look
The Delta Trinsic kitchen faucet is a popular model known for its sleek design and reliable performance. Let’s take a closer look at its features and benefits.
Features of the Delta Trinsic Faucet
- Diamond Seal Technology: Provides long-lasting leak prevention.
- MagnaTite Docking: Keeps the sprayer securely in place.
- Touch-Clean Spray Holes: Allow for easy cleaning of mineral buildup.
- High-Arc Spout: Offers ample clearance for filling pots and pans.
- Single-Handle Design: Provides easy control of water flow and temperature.
User Experience and Usability
The Delta Trinsic faucet is designed for ease of use. The single-handle design allows for precise control of water flow and temperature. The MagnaTite docking system ensures the sprayer stays securely in place. The Touch-Clean spray holes make it easy to remove mineral buildup and maintain optimal performance. In our experience, the Trinsic is very user-friendly and intuitive to operate.
Performance and Effectiveness
The Delta Trinsic faucet delivers excellent performance. The Diamond Seal Technology prevents leaks and ensures long-lasting reliability. The high-arc spout provides ample clearance for filling large pots and pans. The sprayer offers a powerful and consistent spray pattern. Based on our testing, the Trinsic performs exceptionally well in a variety of kitchen tasks.
Pros of the Delta Trinsic Faucet
- Sleek and Modern Design: Enhances the look of any kitchen.
- Reliable Performance: Diamond Seal Technology prevents leaks.
- Easy to Use: Single-handle design and MagnaTite docking.
- Easy to Clean: Touch-Clean spray holes simplify maintenance.
- Durable Construction: Built to last with high-quality materials.
Cons/Limitations of the Delta Trinsic Faucet
- Price: It’s a mid-range to high-end faucet, so it might not be suitable for all budgets.
- Limited Finish Options: The available finish options may not match all kitchen decors.
- Sprayer Hose Length: The sprayer hose could be longer for some users.
Ideal User Profile
The Delta Trinsic faucet is ideal for homeowners who appreciate modern design, reliable performance, and ease of use. It’s a great choice for those who want a faucet that will last for years and provide a stylish and functional addition to their kitchen.
Key Alternatives
Two alternatives to the Delta Trinsic are the Moen Arbor and the Kohler Simplice. The Moen Arbor offers a similar design and features but at a slightly lower price point. The Kohler Simplice is known for its minimalist design and smooth operation.
Expert Overall Verdict and Recommendation
The Delta Trinsic kitchen faucet is a top-quality choice that offers a winning combination of style, performance, and durability. We highly recommend it for homeowners who are looking for a reliable and stylish faucet that will enhance their kitchen experience.
Insightful Q&A Section
Here are some frequently asked questions about fixing Delta kitchen faucets:
- Q: How often should I replace my Delta kitchen faucet cartridge?
A: The lifespan of a Delta kitchen faucet cartridge varies depending on water quality and usage, but typically, it should be replaced every 5-10 years. If you notice drips, leaks, or difficulty controlling water flow, it’s time to consider a replacement.
- Q: Can I use a universal cartridge for my Delta faucet?
A: While universal cartridges may seem like a convenient option, it’s always best to use a genuine Delta replacement cartridge designed specifically for your faucet model. Universal cartridges may not fit properly or provide the same level of performance and reliability. It is also important to note that using non-genuine parts may void your warranty.
- Q: What is the best way to remove mineral deposits from my Delta faucet?
A: White vinegar is an excellent natural cleaner for removing mineral deposits from your Delta faucet. Soak the affected parts in white vinegar for a few hours, then scrub gently with a soft brush. For stubborn deposits, you can use a commercial descaling solution, but always follow the manufacturer’s instructions carefully.
- Q: How do I prevent my Delta faucet from developing leaks in the first place?
A: Regular maintenance is key to preventing leaks. Clean the aerator regularly, lubricate moving parts with plumber’s grease, and avoid using harsh cleaners. Also, be sure to address any minor drips or leaks promptly before they turn into major problems.
- Q: What should I do if my Delta faucet sprayer is clogged?
A: If your Delta faucet sprayer is clogged, try soaking it in white vinegar to dissolve the mineral deposits. You can also use a small pin or needle to clear the spray holes. If the clog persists, you may need to replace the sprayer.
- Q: How do I adjust the water temperature on my Delta faucet?
A: Most Delta faucets have a temperature adjustment screw located under the handle. You can use a screwdriver to adjust the screw and change the maximum hot water temperature. Refer to your faucet’s instruction manual for specific instructions.
- Q: What tools are absolutely essential for fixing a Delta kitchen faucet?
A: Adjustable wrench, Phillips and Flathead screwdrivers, Allen wrench set, Pliers, Basin Wrench, Cartridge Puller, O-Ring Pick Set.
- Q: How do I know if I need to replace the valve seats in my Delta faucet?
A: If your faucet continues to drip even after replacing the cartridge, worn or damaged valve seats may be the culprit. Inspect the valve seats for cracks, corrosion, or wear. If they appear damaged, replace them with genuine Delta replacement parts.
- Q: Can I fix a Delta kitchen faucet myself, or should I call a plumber?
A: Many Delta kitchen faucet repairs are relatively simple and can be done yourself with the right tools and instructions. However, if you’re not comfortable working with plumbing or if the problem is complex, it’s best to call a qualified plumber.
- Q: Where can I find the model number of my Delta kitchen faucet?
A: The model number is usually located on the faucet itself, often on the base, under the handle, or on the supply lines. You can also find the model number in your faucet’s instruction manual or on the original packaging.
Conclusion
Fixing a Delta kitchen faucet can seem daunting, but with the right knowledge and tools, it’s a manageable DIY project. By understanding the common issues, following our step-by-step guide, and taking preventative measures, you can keep your faucet functioning flawlessly for years to come. Remember to prioritize safety, use genuine Delta replacement parts, and consult a professional plumber if you’re unsure about any aspect of the repair. We hope this guide has empowered you to tackle your Delta faucet repair with confidence. Don’t hesitate to share your experiences with fix delta kitchen faucet in the comments below and let us know what specific issues you faced!
For more in-depth guides on plumbing repairs and maintenance, explore our resource library. Contact our experts for a consultation on fix delta kitchen faucet and other plumbing needs.
