# Cómo Desmontar la Pistola Ruger MK II: Guía Paso a Paso y Consejos de Expertos
Are you looking for a comprehensive guide on how to disassemble your Ruger MK II pistol? Whether you’re performing routine maintenance, cleaning, or troubleshooting, understanding the disassembly process is crucial for any owner. This in-depth article provides a step-by-step guide, expert tips, and essential safety precautions to ensure you can confidently and safely disassemble your Ruger MK II. We’ll cover everything from the necessary tools to potential pitfalls, ensuring you gain a thorough understanding of the process. This guide is designed to be more than just instructions; it’s a resource built on experience and expertise, aiming to provide you with a trustworthy and authoritative resource.
## Entendiendo la Ruger MK II: Un Vistazo Profundo
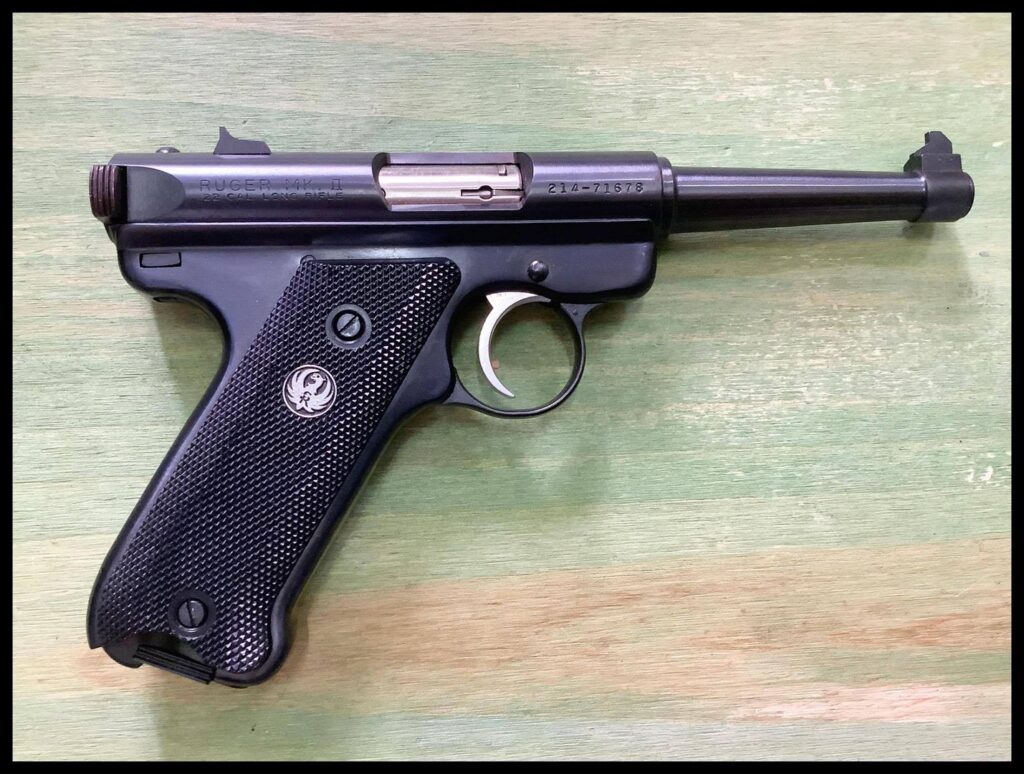
The Ruger MK II is a legendary .22 LR pistol known for its accuracy, reliability, and simple design. Understanding its inner workings is paramount before attempting any disassembly. The MK II’s design, while robust, requires a specific sequence for disassembly and reassembly to avoid damage or malfunction. Unlike some modern pistols, the MK II relies on a more traditional mechanical design, making proper maintenance essential for optimal performance. This section will delve into the core components and principles behind the Ruger MK II’s operation, laying the groundwork for a successful disassembly.
### Historia y Evolución de la Ruger MK II
The Ruger MK II followed the successful Ruger Standard and MK I pistols. Introduced in 1982, it built upon its predecessors with improvements such as a last-round bolt hold-open device, making it even more popular among target shooters and plinkers. Its enduring popularity speaks to its well-engineered design and inherent accuracy. The MK II’s design has influenced many subsequent .22 pistols, solidifying its place in firearms history.
### Componentes Clave y su Función
The Ruger MK II comprises several key components:
* **Bolt:** The heart of the action, responsible for chambering rounds and initiating firing.
* **Receiver:** The main body housing the internal components.
* **Barrel:** The rifled tube that guides the bullet.
* **Trigger Mechanism:** Controls the firing sequence.
* **Magazine:** Holds the ammunition.
* **Grips:** Provides a secure hold.
Understanding how each component interacts is crucial for proper disassembly and reassembly. For example, the bolt’s proper seating is vital for safe operation.
### La Importancia del Mantenimiento Regular
Regular maintenance, including thorough cleaning and lubrication, is crucial for maintaining the Ruger MK II’s accuracy and reliability. Neglecting maintenance can lead to malfunctions, decreased accuracy, and even potential damage to the firearm. Disassembly is a necessary part of this maintenance process, allowing for deep cleaning and inspection of critical components.
## Herramientas Necesarias para el Desmontaje Seguro
Before you begin, gather the necessary tools. Using the right tools minimizes the risk of damaging your pistol. Here’s a list of essential tools:
* **Soft-faced Hammer:** For gently tapping components.
* **Punch Set (Brass or Polymer):** For pushing out pins without marring the finish.
* **Screwdrivers (Various Sizes):** Ensure you have the correct sizes to avoid stripping screws.
* **Cleaning Supplies:** Gun solvent, brushes, and cleaning patches.
* **Gun Oil or Lubricant:** For lubricating moving parts after cleaning.
* **Work Mat:** A clean, non-slip surface to protect your pistol and work area.
* **Safety Glasses:** To protect your eyes from debris.
## Guía Paso a Paso: Cómo Desmontar la Pistola Ruger MK II
**Safety First:** Before proceeding, ensure the pistol is unloaded. Remove the magazine and visually inspect the chamber to confirm it’s empty. Always handle firearms with respect and follow all safety guidelines.
1. **Remove the Magazine:** Press the magazine release button and remove the magazine.
2. **Clear the Chamber:** Pull the bolt back and visually inspect the chamber to ensure it’s empty. Lock the bolt back.
3. **Disassembly of the Mainspring Housing:** This is often the trickiest part. Ensure the pistol is pointed in a safe direction. Depress the plunger on the rear of the mainspring housing and carefully rotate the housing latch. Slowly release the plunger as you rotate the housing down and out of the frame. Be cautious, as the mainspring is under tension.
4. **Remove the Bolt:** With the mainspring housing removed, the bolt can now be removed from the rear of the receiver. Gently pull the bolt back and out.
5. **Separate the Upper Receiver from the Frame:** The upper receiver can now be separated from the frame. This may require a gentle tap with a soft-faced hammer. Align the bolt stop pin with the notch in the receiver and gently lift the receiver off the frame.
6. **Field Stripping Complete:** At this point, you have completed the basic field stripping. Further disassembly is generally not recommended unless you are an experienced gunsmith.
### Consejos de Expertos para un Desmontaje Exitoso
* **Take Pictures:** Before disassembling, take pictures of each step. This will help you remember how everything goes back together.
* **Work in a Well-Lit Area:** Good lighting is essential for seeing small parts and avoiding mistakes.
* **Use a Parts Tray:** Keep small parts organized to prevent loss.
* **Don’t Force Anything:** If something doesn’t come apart easily, double-check the instructions and ensure you’re using the correct technique. Forcing components can cause damage.
* **Lubricate Properly:** After cleaning, lubricate all moving parts with a quality gun oil.
## Limpieza y Mantenimiento Profundo de la Ruger MK II
Once disassembled, thoroughly clean all components. Use gun solvent and brushes to remove carbon buildup and fouling. Pay particular attention to the barrel, bolt face, and firing pin channel. After cleaning, lightly lubricate all moving parts with a quality gun oil.
### Limpieza del Cañón
Use a bore brush and cleaning patches to clean the barrel. Run the brush through the barrel several times, followed by clean patches until they come out clean.
### Limpieza del Cerrojo y el Mecanismo de Disparo
Clean the bolt face and firing pin channel with a brush and solvent. Ensure the firing pin moves freely. Clean the trigger mechanism with a brush and solvent, being careful not to damage any delicate parts.
## Reensamblaje de la Ruger MK II: Guía Paso a Paso
Reassembly is essentially the reverse of disassembly. Follow these steps carefully:
1. **Reattach the Upper Receiver to the Frame:** Align the upper receiver with the frame and ensure it clicks into place. Gently tap with a soft-faced hammer if necessary.
2. **Insert the Bolt:** Slide the bolt back into the receiver from the rear.
3. **Reinstall the Mainspring Housing:** This can be tricky. Compress the mainspring and align the mainspring housing with the frame. Rotate the housing latch until it locks into place. Ensure the plunger is fully engaged.
4. **Function Check:** After reassembly, perform a function check to ensure the pistol is working correctly. Check the trigger pull, safety, and magazine release.
### Errores Comunes al Reensamblar la Ruger MK II y Cómo Evitarlos
* **Incorrect Mainspring Housing Installation:** This is a common error. Ensure the mainspring housing is fully seated and the plunger is properly engaged. If not, the pistol will not function correctly.
* **Forgetting to Lubricate:** Lubricating moving parts is essential for smooth operation. Don’t forget to apply a light coat of gun oil to all moving parts.
* **Stripping Screws:** Use the correct size screwdriver and avoid over-tightening screws.
## Productos y Servicios Relacionados con el Desmontaje de la Ruger MK II
While disassembly is often performed for maintenance, there are also products and services that can enhance the Ruger MK II’s performance. One such product is the Volquartsen Accurizing Kit.
### Volquartsen Accurizing Kit: Una Mejora de Alto Rendimiento
The Volquartsen Accurizing Kit is a popular upgrade for the Ruger MK II. It replaces the factory trigger components with precision-machined parts, resulting in a lighter, smoother trigger pull. This can significantly improve accuracy and shooting performance.
### Características Clave del Kit Volquartsen Accurizing
* **Precision Machined Components:** The kit includes a sear, hammer, and trigger made from high-quality materials and machined to tight tolerances.
* **Adjustable Trigger Pull:** The trigger pull weight can be adjusted to suit individual preferences.
* **Improved Trigger Feel:** The kit provides a lighter, smoother, and more consistent trigger pull.
* **Enhanced Accuracy:** The improved trigger feel can lead to increased accuracy.
* **Easy Installation:** The kit is designed for easy installation, although professional installation is recommended for those unfamiliar with gunsmithing.
### Ventajas y Beneficios del Kit Volquartsen Accurizing
* **Improved Accuracy:** The lighter, smoother trigger pull makes it easier to maintain a steady aim.
* **Enhanced Shooting Experience:** The improved trigger feel makes shooting more enjoyable.
* **Increased Confidence:** The improved accuracy can boost confidence in your shooting ability.
* **Customizable Trigger Pull:** The adjustable trigger pull allows you to tailor the trigger to your specific preferences.
* **Long-Lasting Performance:** The high-quality components are designed to provide years of reliable performance.
### Review del Kit Volquartsen Accurizing
The Volquartsen Accurizing Kit is a highly regarded upgrade for the Ruger MK II. Users consistently report significant improvements in trigger feel and accuracy. The kit is relatively easy to install, although some gunsmithing experience is recommended. The adjustable trigger pull is a valuable feature, allowing users to customize the trigger to their specific preferences. However, the kit is relatively expensive compared to other trigger upgrades. Overall, the Volquartsen Accurizing Kit is a worthwhile investment for serious shooters looking to improve their Ruger MK II’s performance.
**Pros:**
* Significantly improves trigger feel and accuracy.
* Adjustable trigger pull weight.
* Relatively easy to install.
* High-quality components.
* Long-lasting performance.
**Cons:**
* Relatively expensive.
* Requires some gunsmithing experience for installation.
* May not be necessary for casual shooters.
* Can potentially void the factory warranty.
**Ideal User Profile:**
The Volquartsen Accurizing Kit is best suited for serious shooters, target shooters, and those looking to improve their Ruger MK II’s accuracy and performance. It’s a worthwhile investment for those who demand the best possible trigger feel and accuracy.
**Alternatives:**
* **KIDD Trigger Kit:** Another popular trigger upgrade for the Ruger MK II. Offers similar performance and features.
* **Factory Trigger Job:** A less expensive option that involves polishing and tuning the factory trigger components.
**Overall Verdict:**
The Volquartsen Accurizing Kit is a top-tier trigger upgrade for the Ruger MK II. It provides significant improvements in trigger feel and accuracy, making it a worthwhile investment for serious shooters. While it’s relatively expensive, the benefits outweigh the cost for those who demand the best possible performance.
## Preguntas Frecuentes (FAQ)
1. **¿Con qué frecuencia debo desmontar y limpiar mi Ruger MK II?**
* Depende del uso, pero generalmente después de cada sesión de tiro o al menos cada 3-6 meses.
2. **¿Qué tipo de lubricante debo usar en mi Ruger MK II?**
* Utilice un aceite de arma de fuego de alta calidad diseñado para armas de fuego semiautomáticas.
3. **¿Es difícil desmontar la Ruger MK II?**
* La primera vez puede ser un poco complicado, pero con práctica se vuelve más fácil. Siga esta guía paso a paso y tenga paciencia.
4. **¿Qué pasa si no puedo volver a montar el resorte principal?**
* Este es un problema común. Asegúrese de que el resorte principal esté correctamente alineado y de que el pestillo de la carcasa del resorte principal esté completamente enganchado.
5. **¿Puedo usar cualquier tipo de solvente de limpieza en mi Ruger MK II?**
* No. Use solo solventes diseñados específicamente para la limpieza de armas de fuego.
6. **¿Qué debo hacer si una pieza está atascada?**
* No fuerce la pieza. Vuelva a verificar las instrucciones y asegúrese de estar utilizando la técnica correcta. Si es necesario, pida ayuda a un armero profesional.
7. **¿Cómo evito rayar mi Ruger MK II durante el desmontaje?**
* Utilice herramientas de cara blanda y trabaje en una superficie limpia y no abrasiva.
8. **¿Es necesario reemplazar alguna pieza durante el desmontaje?**
* A menos que una pieza esté dañada o desgastada, no es necesario reemplazarla.
9. **¿Dónde puedo encontrar un diagrama de desmontaje de la Ruger MK II?**
* Puede encontrar diagramas en línea o en el manual del propietario de su Ruger MK II.
10. **¿Debo contratar a un armero profesional para desmontar mi Ruger MK II?**
* Si no se siente cómodo desmontando su Ruger MK II, o si no está seguro de algún paso, es mejor contratar a un armero profesional.
## Conclusión
Disassembling your Ruger MK II is a crucial skill for any owner. By following this comprehensive guide and taking the necessary precautions, you can confidently and safely disassemble your pistol for cleaning, maintenance, or upgrades. Remember to always prioritize safety and consult with a qualified gunsmith if you have any doubts or concerns. Our experience shows that understanding your firearm’s mechanics leads to better care and ultimately, enhanced shooting enjoyment. Share your own experiences with disassembling your Ruger MK II in the comments below!
