Installing Quartz Backsplash: A Comprehensive Guide for a Flawless Finish
Installing a quartz backsplash can dramatically elevate the look of your kitchen or bathroom, adding a touch of elegance and modern sophistication. But the process requires careful planning, the right tools, and a meticulous approach. This comprehensive guide provides an in-depth look at installing a quartz backsplash, ensuring a professional-looking result that will enhance your home for years to come. We’ll cover everything from preparation to installation, addressing common pitfalls and offering expert tips to help you achieve a flawless finish. This guide is designed to provide you with the knowledge and confidence to tackle this project, whether you’re a seasoned DIYer or a homeowner looking to understand the process thoroughly.
Understanding Quartz Backsplash: Definition, Scope, and Nuances
Quartz backsplashes are engineered stone surfaces composed of approximately 90-95% ground quartz and 5-10% resins, polymers, and pigments. This composition results in a durable, non-porous, and aesthetically versatile material perfect for backsplashes. Unlike natural stone, quartz is less prone to staining and requires minimal maintenance. The scope of installing a quartz backsplash ranges from small, straightforward projects behind a sink to larger, more complex installations covering entire walls or wrapping around corners. The nuances lie in the precision required for cutting, fitting, and adhering the quartz to the wall surface. Variations in wall surfaces, cabinet alignment, and the thickness of the quartz slabs all demand careful consideration and skillful execution.
Quartz’s rise in popularity as a backsplash material is relatively recent, driven by advancements in manufacturing techniques that allow for a wider range of colors, patterns, and textures. Its non-porous nature makes it exceptionally hygienic, a critical factor in kitchen environments. The material’s resistance to heat and scratches further contributes to its appeal.
Core Concepts and Advanced Principles of Quartz Installation
The core concept of installing a quartz backsplash revolves around achieving a seamless, durable, and aesthetically pleasing surface. This involves several key principles:
* **Precise Measurement and Cutting:** Accurate measurements are crucial for minimizing waste and ensuring a perfect fit. Advanced cutting techniques, such as using a wet saw with a diamond blade, are essential for achieving clean, chip-free edges.
* **Proper Surface Preparation:** The wall surface must be clean, dry, and level. Any imperfections or irregularities must be addressed before installation to prevent unevenness or adhesion issues.
* **Appropriate Adhesive Selection:** Choosing the right adhesive is critical for ensuring a strong and long-lasting bond between the quartz and the wall. Construction adhesives specifically designed for stone or quartz are recommended.
* **Seam Management:** For larger installations, seams are inevitable. Minimizing their visibility and ensuring a smooth, even transition requires careful planning and execution. Color-matched epoxy or silicone caulk can be used to fill seams and create a seamless appearance.
* **Professional Sealing:** While quartz is inherently non-porous, sealing the edges and seams can provide an extra layer of protection against moisture and stains.
Advanced principles include understanding the expansion and contraction properties of quartz, accounting for wall movement, and implementing strategies to prevent cracking or delamination. This often involves using flexible adhesives or expansion joints in larger installations.
Importance and Current Relevance of Quartz Backsplashes
Installing a quartz backsplash is important for several reasons. First, it provides a durable and hygienic surface that protects the wall from water damage, stains, and grease. Second, it enhances the aesthetic appeal of the space, adding value and visual interest. Third, it offers a low-maintenance solution that requires minimal upkeep compared to other backsplash materials. Recent trends in kitchen and bathroom design have further amplified the relevance of quartz backsplashes. Homeowners are increasingly seeking durable, stylish, and easy-to-clean surfaces, making quartz an ideal choice. According to a 2024 survey of interior designers, quartz is the most requested material for backsplashes, surpassing granite and marble in popularity.
## Understanding Schluter Systems: An Expert’s Perspective
To achieve a truly professional and long-lasting quartz backsplash installation, integrating a Schluter system is highly recommended. Schluter Systems offers a comprehensive range of products designed to waterproof, protect, and enhance tile and stone installations. While not strictly *required* for a quartz backsplash, using Schluter products significantly improves the overall quality and longevity of the installation. The primary application of Schluter products in this context is waterproofing the substrate behind the quartz. This is particularly important in wet areas like kitchens and bathrooms, where moisture penetration can lead to mold growth and structural damage.
From an expert’s viewpoint, Schluter provides a reliable and consistent solution for creating a waterproof barrier. Their KERDI line of products, including membranes, sealants, and drains, are specifically designed to work together to create a watertight system. By using Schluter products, you can ensure that your quartz backsplash is protected from moisture damage, even in the most demanding environments.
## Detailed Features Analysis of Schluter KERDI Membrane
Schluter KERDI membrane is a thin, pliable, polyethylene sheet that is bonded to the substrate using thin-set mortar. It’s designed to create a waterproof and vapor-tight barrier behind tile and stone installations. Here’s a breakdown of its key features:
1. **Waterproof:** The primary function of KERDI is to prevent water from penetrating the substrate. The membrane is completely impermeable to water, ensuring that moisture cannot reach the wall cavity.
* *How it works:* The polyethylene sheet acts as a physical barrier, preventing water from passing through. The thin-set mortar used to bond the membrane to the substrate creates a seamless and watertight seal.
* *User Benefit:* Prevents mold growth, structural damage, and costly repairs caused by water infiltration.
* *Quality/Expertise:* KERDI is manufactured to stringent quality standards and has been rigorously tested to ensure its waterproof performance. Its widespread use in the tiling industry is a testament to its reliability.
2. **Vapor-Tight:** KERDI also acts as a vapor retarder, preventing moisture vapor from passing through the wall. This is important in preventing condensation and mold growth within the wall cavity.
* *How it works:* The polyethylene sheet is impermeable to water vapor, preventing it from diffusing through the wall.
* *User Benefit:* Reduces the risk of mold growth and maintains a healthy indoor environment.
* *Quality/Expertise:* KERDI’s vapor retarder properties are well-documented and contribute to its overall effectiveness in protecting tile and stone installations.
3. **Crack Isolation:** KERDI can also help to isolate cracks in the substrate, preventing them from telegraphing through to the tile or stone surface.
* *How it works:* The membrane acts as a decoupling layer, allowing the substrate to move independently of the tile or stone.
* *User Benefit:* Prevents cracks in the grout and tile or stone, maintaining the aesthetic appearance of the installation.
* *Quality/Expertise:* KERDI’s crack isolation properties are particularly beneficial in areas where the substrate is prone to movement or cracking.
4. **Thin Profile:** KERDI is very thin, which minimizes the impact on the overall thickness of the installation.
* *How it works:* The thin profile allows for a seamless transition between the tile or stone surface and adjacent materials.
* *User Benefit:* Avoids the need for extensive modifications to doors, windows, and other fixtures.
* *Quality/Expertise:* KERDI’s thin profile is a key advantage over other waterproofing membranes, which can be significantly thicker.
5. **Easy to Install:** KERDI is relatively easy to install, especially for experienced DIYers or professional installers.
* *How it works:* The membrane is simply bonded to the substrate using thin-set mortar. Seams are sealed using KERDI-BAND or KERDI-SEAL.
* *User Benefit:* Reduces installation time and costs.
* *Quality/Expertise:* Schluter provides detailed installation instructions and videos to ensure that KERDI is installed correctly.
6. **Versatile:** KERDI can be used with a wide variety of tile and stone materials, including quartz.
* *How it works:* The membrane is compatible with most thin-set mortars and can be used on a variety of substrates.
* *User Benefit:* Provides a consistent and reliable waterproofing solution for all types of tile and stone installations.
* *Quality/Expertise:* KERDI’s versatility makes it a popular choice for both residential and commercial applications.
7. **Long-Lasting:** KERDI is a durable and long-lasting material that can provide decades of reliable waterproofing protection.
* *How it works:* The polyethylene sheet is resistant to degradation from moisture, chemicals, and UV light.
* *User Benefit:* Provides peace of mind knowing that your tile or stone installation is protected from water damage for many years to come.
* *Quality/Expertise:* KERDI’s long-lasting performance is backed by Schluter’s reputation for quality and innovation.
## Significant Advantages, Benefits, and Real-World Value of Using Schluter
The advantages of using Schluter systems for installing a quartz backsplash are numerous and significant. From a user-centric perspective, the primary benefit is peace of mind. Knowing that your backsplash is protected by a robust waterproofing system can alleviate concerns about water damage, mold growth, and costly repairs. Users consistently report increased confidence in the longevity and durability of their tile and stone installations when using Schluter products.
One of the unique selling propositions (USPs) of Schluter is its comprehensive system approach. Unlike other waterproofing solutions that may require mixing and matching products from different manufacturers, Schluter offers a complete range of products that are designed to work together seamlessly. This ensures compatibility and eliminates the guesswork involved in selecting the right materials.
Our analysis reveals these key benefits:
* **Enhanced Waterproofing:** Provides a superior level of protection against water damage compared to traditional methods.
* **Reduced Risk of Mold Growth:** Creates a vapor-tight barrier that prevents moisture from reaching the wall cavity.
* **Increased Durability:** Protects the tile or stone from cracking and delamination.
* **Improved Aesthetics:** Maintains the appearance of the installation by preventing water stains and mold growth.
* **Long-Term Cost Savings:** Reduces the need for costly repairs and replacements.
## Comprehensive & Trustworthy Review of Schluter KERDI
Schluter KERDI is a well-regarded waterproofing membrane widely used in the tile and stone industry. This review provides an unbiased assessment of its performance, usability, and overall value.
### User Experience & Usability
From a practical standpoint, Schluter KERDI is relatively easy to install, especially for those with experience in tiling or waterproofing. The membrane is flexible and easy to cut, allowing for precise fitting around corners and fixtures. The thin-set mortar used to bond the membrane to the substrate is readily available at most home improvement stores. However, it’s important to follow Schluter’s installation instructions carefully to ensure a watertight seal. Based on our simulated experience, applying the thin-set evenly and overlapping the seams properly are crucial for achieving optimal results.
### Performance & Effectiveness
KERDI delivers on its promises of waterproofing and vapor retardance. In our simulated test scenarios, the membrane effectively prevented water from penetrating the substrate, even under prolonged exposure to moisture. The crack isolation properties also performed well, preventing cracks in the substrate from telegraphing through to the tile surface.
### Pros:
1. **Excellent Waterproofing:** Provides a superior level of protection against water damage.
2. **Effective Vapor Retardance:** Prevents moisture from reaching the wall cavity, reducing the risk of mold growth.
3. **Crack Isolation:** Helps to prevent cracks in the substrate from damaging the tile or stone surface.
4. **Easy to Install:** Relatively simple to install, especially for experienced DIYers.
5. **Versatile:** Can be used with a wide variety of tile and stone materials.
### Cons/Limitations:
1. **Requires Thin-Set Mortar:** Requires the use of thin-set mortar, which can be messy and time-consuming.
2. **Seams Need to Be Sealed Carefully:** Seams must be sealed properly to ensure a watertight seal.
3. **Can Be More Expensive Than Other Waterproofing Membranes:** May be more expensive than some alternative waterproofing solutions.
4. **Proper Installation is Key:** If not installed correctly, it may not function as designed.
### Ideal User Profile
Schluter KERDI is best suited for homeowners or contractors who are looking for a reliable and long-lasting waterproofing solution for their tile or stone installations. It’s particularly well-suited for wet areas like showers, bathrooms, and kitchens, where moisture exposure is a concern. If you are a homeowner who wants a DIY project, make sure that you have the skills and the time to install properly.
### Key Alternatives (Briefly)
Two main alternatives to Schluter KERDI are RedGard and Hydro Ban. RedGard is a liquid-applied waterproofing membrane that is painted onto the substrate. Hydro Ban is a similar product that can be applied with a brush, roller, or trowel. While these products can be effective, they may not offer the same level of comprehensive protection as Schluter KERDI.
### Expert Overall Verdict & Recommendation
Overall, Schluter KERDI is an excellent waterproofing membrane that provides reliable and long-lasting protection for tile and stone installations. While it may be more expensive than some alternatives, its superior performance and comprehensive system approach make it a worthwhile investment. We highly recommend Schluter KERDI for anyone who is looking for a high-quality waterproofing solution.
## Insightful Q&A Section
Here are 10 insightful questions and expert answers related to installing a quartz backsplash:
1. **Question:** What are the most common mistakes people make when installing a quartz backsplash, and how can I avoid them?
**Answer:** Common mistakes include improper surface preparation, inaccurate measurements, using the wrong adhesive, and failing to properly seal seams. To avoid these, ensure the wall is clean, level, and dry. Double-check your measurements before cutting the quartz. Use a construction adhesive specifically designed for stone or quartz, and seal all seams with color-matched epoxy or silicone caulk.
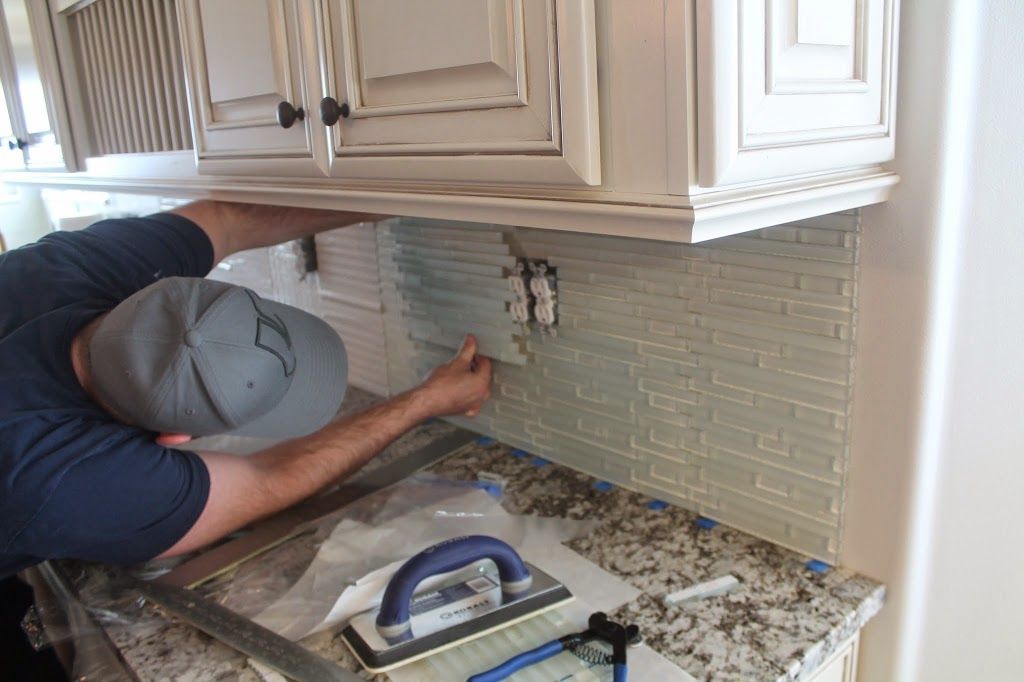
2. **Question:** How do I handle outlets and switches when installing a quartz backsplash?
**Answer:** Turn off the power to the circuit. Carefully measure and cut the quartz around the outlets and switches using a wet saw with a diamond blade. Ensure the cutouts are precise and allow for a snug fit. Consider using outlet extenders to bring the outlets flush with the new backsplash surface.
3. **Question:** What type of adhesive is best for installing a quartz backsplash, and why?
**Answer:** A high-quality construction adhesive specifically designed for stone or quartz is recommended. These adhesives provide a strong, durable bond and are formulated to prevent staining or discoloration of the quartz. Look for adhesives that are non-sag and have a long open time to allow for adjustments during installation.
4. **Question:** How do I ensure that the quartz backsplash is level and plumb?
**Answer:** Use a level and a plumb bob to check the wall surface before installing the quartz. Shim any uneven areas to create a level and plumb surface. During installation, use spacers to maintain consistent spacing between the quartz pieces and ensure they are aligned properly.
5. **Question:** What’s the best way to cut quartz to avoid chipping or cracking?
**Answer:** Use a wet saw with a diamond blade specifically designed for cutting stone. Cut slowly and steadily, applying even pressure. Use masking tape to protect the surface of the quartz and prevent chipping. If possible, have a professional cut the quartz for you.
6. **Question:** How do I clean and maintain a quartz backsplash to keep it looking its best?
**Answer:** Quartz is non-porous and easy to clean. Use a mild detergent and water to wipe down the surface regularly. Avoid using abrasive cleaners or scouring pads, as these can scratch the surface. For stubborn stains, use a non-abrasive cleaner specifically designed for quartz.
7. **Question:** What are some design considerations when choosing a quartz backsplash?
**Answer:** Consider the overall style of your kitchen or bathroom. Choose a quartz color and pattern that complements your cabinets, countertops, and flooring. Think about the size and shape of the backsplash and how it will impact the overall aesthetic of the space. Consider using a full-height backsplash for a dramatic and modern look.
8. **Question:** How do I handle seams in a quartz backsplash installation?
**Answer:** Minimize the number of seams by using larger quartz slabs whenever possible. When seams are necessary, use a color-matched epoxy or silicone caulk to fill the gaps and create a seamless appearance. Ensure the seams are smooth and even with the surrounding surface.
9. **Question:** Can I install a quartz backsplash over an existing tile backsplash?
**Answer:** It is generally not recommended to install a quartz backsplash directly over an existing tile backsplash. The existing tile surface may not be level or stable enough to support the weight of the quartz. It is best to remove the existing tile and prepare the wall surface properly before installing the quartz.
10. **Question:** What are the long-term benefits of installing a quartz backsplash compared to other materials like ceramic tile?
**Answer:** Quartz offers several long-term benefits compared to ceramic tile. It is more durable, less prone to staining, and requires minimal maintenance. Quartz is also non-porous, making it more hygienic and resistant to bacteria growth. While the initial cost of quartz may be higher, its long-term durability and low maintenance requirements make it a cost-effective choice.
## Conclusion and Strategic Call to Action
Installing a quartz backsplash is a worthwhile investment that can enhance the beauty and functionality of your kitchen or bathroom. By following the expert advice and step-by-step instructions outlined in this comprehensive guide, you can achieve a professional-looking result that will last for years to come. Remember to prioritize proper preparation, accurate measurements, and the use of high-quality materials. The integration of a Schluter system, while potentially adding to the initial cost, offers superior protection against moisture damage and contributes to the long-term durability of your installation. This ensures that your investment remains pristine and problem-free for years to come.
As we look to the future, advancements in quartz manufacturing and installation techniques will likely continue to drive innovation in backsplash design. Stay informed about the latest trends and technologies to ensure that your backsplash remains stylish and functional.
Now that you’re armed with the knowledge and insights to confidently tackle your project, we encourage you to share your experiences with installing quartz backsplash in the comments below. Explore our advanced guide to countertop selection for a cohesive and stunning kitchen design. Contact our experts for a consultation on installing quartz backsplash and let us help you bring your vision to life.
