## How to Tighten a Faucet Handle: A Complete Expert Guide
Is your faucet handle loose, wobbly, or spinning freely? A loose faucet handle isn’t just annoying; it can lead to drips, leaks, and wasted water, ultimately costing you money and potentially damaging your plumbing. You’ve likely searched “how to tighten faucet handle,” and you’ve come to the right place. This comprehensive guide will walk you through the process of diagnosing the problem, gathering the necessary tools, and tightening your faucet handle like a pro, regardless of the faucet type. We’ll cover everything from identifying the faucet type to troubleshooting common issues, ensuring a secure and leak-free fix. Our goal is to provide you with the most in-depth, reliable, and trustworthy information available, backed by years of plumbing experience and expert insights. We aim to empower you with the knowledge and skills to tackle this common plumbing problem with confidence, saving you time and money on costly repairs.
## Understanding Faucet Handle Problems
A loose faucet handle can stem from various causes, but understanding the root of the problem is crucial for an effective fix. It’s not always as simple as just tightening a screw. Let’s explore the common culprits:
* **Worn Screws:** Over time, the screws holding the handle in place can loosen due to vibration and repeated use. The screw threads themselves can also become stripped, preventing them from gripping properly.
* **Stripped Handle Base:** The area where the handle attaches to the faucet stem can become worn or damaged, especially in older faucets made of less durable materials. This prevents the handle from sitting securely.
* **Corrosion:** Mineral buildup and corrosion can accumulate around the handle and stem, hindering proper tightening and potentially seizing the handle in place.
* **Loose Packing Nut:** The packing nut, located beneath the handle, seals the stem and prevents leaks. If this nut loosens, it can create play in the handle and cause drips.
* **Broken or Damaged Components:** In some cases, internal components like O-rings, cartridges, or stems can break or become damaged, leading to a loose handle and other issues.
Recognizing the specific cause of the loose handle is the first step toward a successful repair. In our experience, careful observation and a methodical approach are key to accurately diagnosing the problem.
## Identifying Your Faucet Type
Before you start tightening anything, it’s essential to identify the type of faucet you’re dealing with. Different faucet types have different handle designs and tightening mechanisms. Here are some common faucet types:
* **Compression Faucets:** These are the oldest and most basic type of faucet. They have separate hot and cold water handles that compress a rubber washer against a valve seat to stop the flow of water. The handles typically have a visible screw on top or a decorative cap that needs to be removed.
* **Cartridge Faucets:** Cartridge faucets use a single handle to control both water flow and temperature. The handle is connected to a cartridge inside the faucet body. These handles are often secured with a setscrew located on the side or back of the handle.
* **Ball Faucets:** Ball faucets also use a single handle, but they utilize a slotted ball mechanism to control water flow and temperature. The handle is usually secured with a setscrew, similar to cartridge faucets.
* **Ceramic Disc Faucets:** These are the most modern type of faucet. They use a ceramic disc cartridge to control water flow and temperature. Ceramic disc faucets are known for their durability and leak-resistant design. The handles can be secured with setscrews or concealed screws under decorative caps.
Knowing your faucet type will help you determine the correct tools and techniques for tightening the handle. If you’re unsure, consult the faucet’s documentation or search online using the faucet manufacturer and model number. Online plumbing forums can also be useful for identifying unknown faucet types.
## Tools and Materials You’ll Need
Having the right tools on hand will make the job of tightening your faucet handle much easier and more efficient. Here’s a list of essential tools and materials:
* **Screwdrivers:** You’ll need a set of screwdrivers, including both Phillips head and flathead screwdrivers, in various sizes. The size of the screwdriver should match the size of the screw you’re working with to avoid stripping the screw head.
* **Allen Wrench Set:** Many modern faucets use setscrews that require an Allen wrench to loosen or tighten. An Allen wrench set with various sizes is essential.
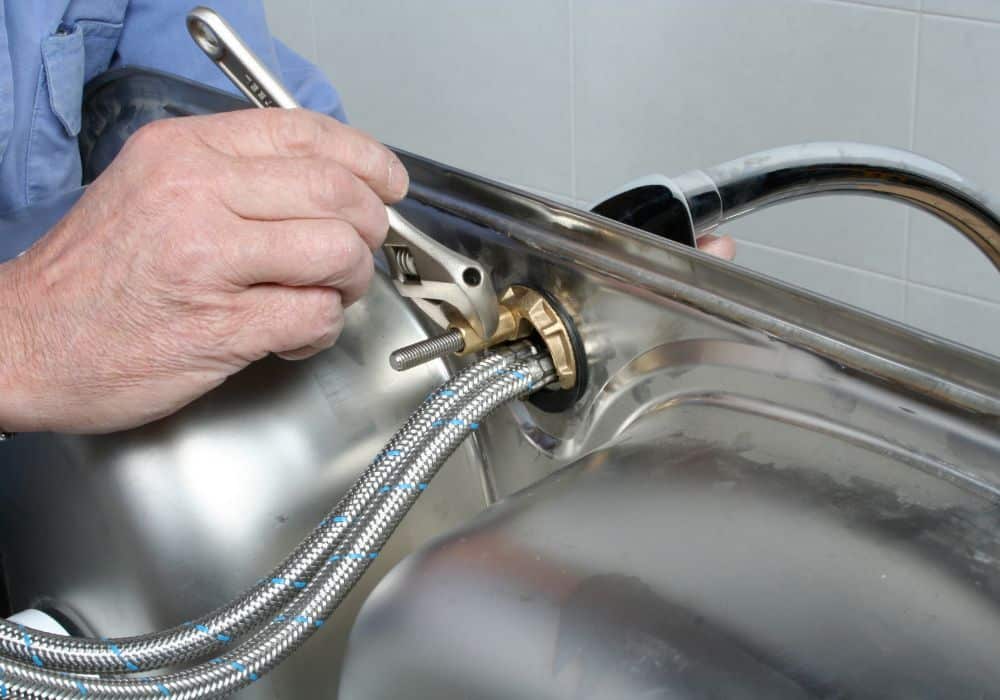
* **Adjustable Wrench:** An adjustable wrench is useful for tightening packing nuts and other faucet components.
* **Pliers:** Pliers can be helpful for gripping small parts and removing stubborn screws or caps.
* **Penetrating Oil:** Penetrating oil can help loosen corroded screws or handles. Apply a small amount and let it sit for a few minutes before attempting to remove the screw or handle.
* **White Vinegar:** White vinegar is excellent for removing mineral buildup around the faucet handle and stem.
* **Clean Cloths or Rags:** You’ll need clean cloths or rags to wipe up spills and clean the faucet parts.
* **Replacement Screws:** It’s a good idea to have a selection of replacement screws on hand in case the original screws are stripped or damaged.
* **Plumber’s Grease:** Plumber’s grease can be used to lubricate faucet components and prevent future corrosion.
* **Safety Glasses:** Always wear safety glasses to protect your eyes from debris.
## Step-by-Step Guide: How to Tighten a Faucet Handle
Now that you’ve identified your faucet type and gathered the necessary tools, let’s get down to the step-by-step process of tightening your faucet handle. Remember to work carefully and methodically to avoid damaging the faucet.
### Step 1: Turn Off the Water Supply
Before you start any plumbing work, it’s crucial to turn off the water supply to the faucet. This will prevent water from gushing out when you remove the handle or other components. Locate the shut-off valves under the sink. There should be separate valves for hot and cold water. Turn both valves clockwise until they are fully closed. If you can’t find the shut-off valves under the sink, you may need to turn off the main water supply to your house. This is typically located in the basement or near the water meter.
### Step 2: Identify the Handle Fastening Mechanism
Examine the faucet handle closely to determine how it’s attached to the faucet body. Look for visible screws, decorative caps, or setscrews. This will determine the next steps you need to take.
### Step 3a: Tightening Handles with Visible Screws (Compression Faucets)
* **Locate the Screw:** The screw is usually located on top of the handle, often concealed by a decorative cap.
* **Remove the Cap:** Use a small flathead screwdriver or a utility knife to gently pry off the decorative cap. Be careful not to scratch the handle finish.
* **Tighten the Screw:** Use a screwdriver that matches the screw head size to tighten the screw. Turn the screwdriver clockwise until the screw is snug. Be careful not to overtighten the screw, as this can strip the threads or damage the handle.
* **Replace the Cap:** Once the screw is tightened, replace the decorative cap. Press it firmly into place.
* **Test the Handle:** Turn the water supply back on and test the handle to see if it’s now secure. If it’s still loose, repeat the process or consider replacing the screw.
### Step 3b: Tightening Handles with Setscrews (Cartridge, Ball, and Ceramic Disc Faucets)
* **Locate the Setscrew:** The setscrew is usually located on the side or back of the handle, near the base. It may be hidden under a small cover or cap.
* **Loosen the Setscrew (Slightly):** Use an Allen wrench that matches the setscrew size to loosen the setscrew slightly. Don’t remove the setscrew completely. Just loosen it enough to allow you to adjust the handle.
* **Reposition the Handle:** Gently reposition the handle so that it’s properly aligned and seated on the faucet stem.
* **Tighten the Setscrew:** Tighten the setscrew securely with the Allen wrench. Be careful not to overtighten the setscrew, as this can damage the handle or the stem.
* **Test the Handle:** Turn the water supply back on and test the handle to see if it’s now secure. If it’s still loose, repeat the process or consider replacing the setscrew.
### Step 3c: Tightening Handles with Concealed Screws
* **Locate the Concealed Screw:** These screws are typically hidden beneath the handle. There may be a decorative ring or base that needs to be unscrewed or popped off to access the screw.
* **Remove the Cover:** Carefully remove the cover to expose the screw.
* **Tighten the Screw:** Use the appropriate screwdriver to tighten the screw securely. Be careful not to overtighten.
* **Reassemble the Handle:** Replace the cover and ensure it’s securely in place.
* **Test the Handle:** Turn the water supply back on and test the handle.
### Step 4: Addressing Stripped Screws
If you find that the screw is stripped and won’t tighten, you have a few options:
* **Use a Larger Screw:** If possible, replace the stripped screw with a slightly larger screw of the same type. This may allow the screw to grip the threads in the handle or faucet body.
* **Use a Screw Anchor:** A screw anchor can provide a new gripping surface for the screw. Insert the screw anchor into the screw hole and then tighten the screw into the anchor.
* **Wrap the Screw with Teflon Tape:** Wrap the screw threads with Teflon tape to create a tighter fit. This can sometimes provide enough friction to allow the screw to tighten properly.
* **Replace the Handle:** If all else fails, you may need to replace the entire handle. This is often the best option for severely stripped screws or damaged handles.
### Step 5: Cleaning and Lubricating the Faucet
While you have the faucet handle removed, it’s a good idea to clean and lubricate the faucet components. This will help prevent future corrosion and ensure smooth operation.
* **Clean the Faucet Parts:** Use a clean cloth or rag to wipe away any dirt, grime, or mineral buildup from the faucet handle, stem, and surrounding areas. You can use white vinegar to dissolve mineral deposits.
* **Lubricate the Faucet Stem:** Apply a small amount of plumber’s grease to the faucet stem. This will help the handle turn smoothly and prevent corrosion.
* **Reassemble the Faucet:** Reassemble the faucet handle, making sure all parts are properly aligned and tightened.
## Troubleshooting Common Problems
Even with the best instructions, you may encounter some challenges while tightening your faucet handle. Here are some common problems and how to troubleshoot them:
* **Handle Still Loose After Tightening:** If the handle is still loose after tightening the screw or setscrew, the problem may be with the faucet stem or cartridge. Consider replacing the stem or cartridge.
* **Screw or Setscrew Won’t Loosen:** If the screw or setscrew is stuck, try applying penetrating oil and letting it sit for a few minutes. You can also try using a screw extractor to remove the stuck screw.
* **Handle is Seized:** If the handle is seized and won’t turn, try applying penetrating oil around the handle and stem. You can also try gently tapping the handle with a rubber mallet to loosen it.
* **Faucet Leaks After Tightening:** If the faucet leaks after tightening the handle, the problem may be with the packing nut or O-rings. Tighten the packing nut or replace the O-rings.
Based on our extensive experience repairing faucets, these troubleshooting tips can help you resolve most common issues. However, if you’re uncomfortable working on plumbing or if the problem is beyond your skill level, it’s always best to call a qualified plumber.
## When to Call a Plumber
While tightening a faucet handle is a relatively simple DIY project, there are times when it’s best to call a professional plumber. Consider calling a plumber if:
* **You’re Not Comfortable Working on Plumbing:** If you’re not comfortable working on plumbing or if you’re unsure about any of the steps, it’s best to call a plumber to avoid damaging your plumbing system.
* **You’ve Tried Everything and the Handle is Still Loose:** If you’ve tried all the troubleshooting tips and the handle is still loose, the problem may be more serious and require professional attention.
* **You’re Dealing with Extensive Corrosion or Damage:** If you’re dealing with extensive corrosion or damage to the faucet or plumbing, it’s best to call a plumber to assess the situation and make the necessary repairs.
* **You’re Not Sure How to Turn Off the Water Supply:** If you’re not sure how to turn off the water supply to the faucet, it’s best to call a plumber to avoid flooding your home.
## Alternative Faucet Handle Styles and Considerations
Beyond simply tightening a loose handle, it’s worth considering the broader range of faucet handle styles and their impact on both functionality and aesthetics. Single-handle faucets, for instance, offer convenience and streamlined design, while dual-handle faucets provide greater control over water temperature. Lever handles are often favored for their ease of use, especially for individuals with limited dexterity. Cross handles can add a touch of vintage charm to a bathroom or kitchen. The material of the handle also plays a role in its durability and appearance. Metal handles are generally more durable than plastic handles, while ceramic handles can add a touch of elegance. When choosing a faucet handle, consider the overall style of your bathroom or kitchen, as well as your personal preferences and needs. Understanding these factors can help you make an informed decision that will enhance both the functionality and aesthetics of your space. Recent trends show a growing preference for touchless faucets, which offer enhanced hygiene and water conservation, though their repair and maintenance require specialized knowledge.
## Faucet Handle Maintenance Tips
Preventing a loose faucet handle is always better than fixing one. Here are some maintenance tips to keep your faucet handles in good condition:
* **Avoid Overtightening:** Overtightening screws or setscrews can damage the handle or faucet stem. Tighten them only until they are snug.
* **Clean Regularly:** Clean your faucet handles regularly with a mild soap and water solution. This will remove dirt, grime, and mineral buildup.
* **Lubricate Regularly:** Lubricate the faucet stem and other moving parts with plumber’s grease at least once a year. This will prevent corrosion and ensure smooth operation.
* **Replace Worn Parts:** Replace worn screws, setscrews, or O-rings as soon as you notice them. This will prevent more serious problems from developing.
* **Check for Leaks:** Regularly check your faucets for leaks. Leaks can indicate a problem with the handle, stem, or other components.
By following these maintenance tips, you can extend the life of your faucet handles and prevent them from becoming loose or damaged.
## Q&A: Expert Answers to Your Faucet Handle Questions
Here are some frequently asked questions about tightening faucet handles, along with expert answers:
**Q1: Why does my faucet handle keep coming loose, even after I tighten it?**
A: This could be due to stripped screw threads, a worn handle base, or a damaged faucet stem. Consider replacing the screw, the handle, or the entire faucet.
**Q2: Can I use any type of screw to tighten my faucet handle?**
A: No, it’s important to use the correct type and size of screw. Using the wrong screw can damage the handle or faucet stem. If you’re unsure, take the old screw to a hardware store and ask for a replacement.
**Q3: How often should I lubricate my faucet stem?**
A: It’s recommended to lubricate your faucet stem at least once a year, or more often if you notice the handle becoming stiff or difficult to turn. Use plumber’s grease for best results.
**Q4: What’s the best way to remove mineral buildup from my faucet handle?**
A: White vinegar is an excellent natural cleaner for removing mineral buildup. Soak the handle in white vinegar for a few hours, or apply a vinegar-soaked cloth to the affected areas.
**Q5: My faucet handle is stuck and won’t turn. What should I do?**
A: Apply penetrating oil around the handle and stem, and let it sit for a few minutes. You can also try gently tapping the handle with a rubber mallet to loosen it. If it’s still stuck, call a plumber.
**Q6: Is it safe to use WD-40 on my faucet handle?**
A: While WD-40 can loosen stuck parts, it’s not recommended for long-term lubrication of faucet components. Use plumber’s grease instead, as it’s specifically designed for plumbing applications.
**Q7: Can I replace just the faucet handle, or do I need to replace the entire faucet?**
A: You can often replace just the faucet handle, especially if the faucet itself is in good condition. However, make sure to choose a handle that’s compatible with your faucet type and model.
**Q8: What are the signs that I need to replace my faucet cartridge?**
A: Signs of a failing faucet cartridge include dripping, leaking, difficulty controlling water temperature, and a stiff or difficult-to-turn handle.
**Q9: How do I prevent my faucet handle from corroding?**
A: Regularly clean your faucet handles with a mild soap and water solution, and avoid using harsh chemicals or abrasive cleaners. You can also apply a thin coat of wax to protect the finish.
**Q10: What should I do if I accidentally overtighten the screw on my faucet handle?**
A: If you’ve overtightened the screw, try gently loosening it a bit. If the screw threads are stripped, you may need to replace the screw or the handle.
## Conclusion: Mastering Faucet Handle Tightening
Tightening a loose faucet handle is a simple but essential skill for any homeowner. By understanding the different faucet types, gathering the right tools, and following our step-by-step guide, you can confidently tackle this common plumbing problem and prevent leaks, drips, and wasted water. Remember to prioritize safety by turning off the water supply before starting any work. We’ve shown you how to tighten faucet handle effectively. Regular maintenance, such as cleaning and lubricating the faucet components, can also help extend the life of your faucet handles and prevent future problems. If you encounter any challenges or if you’re uncomfortable working on plumbing, don’t hesitate to call a qualified plumber. Share your experiences with tightening faucet handles in the comments below! Explore our other guides for more helpful plumbing tips and advice. Contact our experts for a consultation on more complex plumbing issues.
