Delta Faucet Leaking Kitchen? Expert Fixes & Prevention Guide
Is your Delta kitchen faucet leaking? A persistent drip can be incredibly frustrating, waste water, and even damage your kitchen. This comprehensive guide provides expert solutions to diagnose and fix a leaking Delta kitchen faucet, saving you time, money, and the headache of a costly plumber visit. We’ll cover everything from identifying the type of leak to step-by-step repair instructions, preventative measures, and when it’s time to call in a professional. Our goal is to equip you with the knowledge and confidence to tackle this common household problem effectively. We’ve drawn upon years of experience working with various faucet brands, including Delta, to provide insights that go beyond simple tutorials. Let’s dive in and stop that leak!
Understanding Why Delta Faucets Leak in the Kitchen
Delta faucets are known for their quality and durability, but even the best faucets can develop leaks over time. Understanding the common causes of these leaks is the first step toward finding a solution. Leaks can stem from various factors, ranging from everyday wear and tear to more complex issues within the faucet’s internal mechanisms.
Common Causes of Delta Kitchen Faucet Leaks: A Deep Dive
* **Worn-Out O-Rings and Seals:** O-rings and seals are rubber components that create a watertight barrier within the faucet. Over time, these can dry out, crack, or become brittle, leading to leaks around the spout, handle, or base of the faucet.
* **Loose or Damaged Cartridges:** Cartridge faucets rely on a cartridge to control water flow and temperature. If the cartridge becomes loose, cracked, or corroded, it can cause leaks. Single-handle Delta faucets are particularly susceptible to this issue.
* **Corroded Valve Seats:** Valve seats are the points where the faucet valves seal against the faucet body. Corrosion can build up on these seats, preventing a tight seal and resulting in leaks.
* **High Water Pressure:** Excessive water pressure can put undue stress on the faucet’s internal components, accelerating wear and tear and increasing the likelihood of leaks. According to industry standards, water pressure should ideally be between 40 and 60 psi.
* **Mineral Buildup:** Hard water contains minerals like calcium and magnesium, which can accumulate inside the faucet and clog waterways, leading to increased pressure and potential leaks. This is especially prevalent in areas with hard water supplies.
* **Damaged Faucet Body:** While less common, cracks or damage to the faucet body itself can cause significant leaks. This may occur due to physical impact or extreme temperature fluctuations.
* **Improper Installation:** A poorly installed faucet is more prone to leaks. This could involve loose connections, incorrect sealing, or damage to components during installation.
Identifying the Source of the Leak
Before you start any repairs, it’s crucial to pinpoint the exact location of the leak. This will help you determine the underlying cause and choose the appropriate solution. Common leak locations include:
* **Around the Spout:** A leak around the spout often indicates worn-out O-rings or seals. This is a very common issue with Delta kitchen faucets.
* **At the Base of the Faucet:** Leaks at the base of the faucet may be due to loose connections, corroded valve seats, or a damaged faucet body.
* **Under the Sink:** Leaks under the sink could be caused by loose or damaged supply lines, connections, or the faucet’s tailpiece.
* **Around the Handle:** Leaks around the handle usually point to a faulty cartridge or worn-out O-rings.
Delta Faucet Cartridges: The Heart of the System
Delta Faucets use a specific type of cartridge system that is unique to the brand. The Diamond Seal Technology is designed to reduce leak points and ensure a longer lifespan. The diamond-embedded ceramic disc is designed to prevent mineral buildup and corrosion, which are the most common causes of leaks. However, even with this advanced technology, cartridges can still wear out over time, requiring replacement.
Tools and Materials You’ll Need
Before you begin any repairs, gather the necessary tools and materials. Having everything on hand will make the process smoother and more efficient. Here’s a list of essentials:
* **Adjustable Wrench:** For loosening and tightening nuts and connections.
* **Screwdrivers (Phillips and Flathead):** For removing handles and accessing internal components.
* **Allen Wrench Set:** Some Delta faucets use Allen screws to secure handles or other parts.
* **Pliers:** For gripping and manipulating small parts.
* **Basin Wrench:** For loosening and tightening the faucet’s mounting nuts under the sink.
* **Penetrating Oil:** To loosen stubborn nuts and connections.
* **White Vinegar:** For cleaning mineral deposits.
* **New O-Rings and Seals:** Purchase a faucet repair kit that includes the appropriate O-rings and seals for your Delta faucet model. A damaged O-ring is a common cause for a delta faucet leaking kitchen
* **Replacement Cartridge:** If the cartridge is the source of the leak, you’ll need to purchase a new one that is compatible with your faucet model.
* **Plumber’s Grease:** For lubricating O-rings and seals to ensure a watertight seal.
* **Clean Rags or Towels:** For wiping up spills and cleaning parts.
* **Bucket:** To catch any water that may drain from the faucet.
* **Flashlight:** To illuminate hard-to-see areas under the sink.
Step-by-Step Guide to Fixing a Leaking Delta Kitchen Faucet
Now that you have the necessary tools and materials, let’s walk through the steps to fix a leaking Delta kitchen faucet. Remember to turn off the water supply before starting any repairs.
Step 1: Turn Off the Water Supply
Locate the shut-off valves under the sink and turn them clockwise to shut off the water supply to the faucet. If you don’t have shut-off valves, you’ll need to turn off the main water supply to your house.
Step 2: Disassemble the Faucet
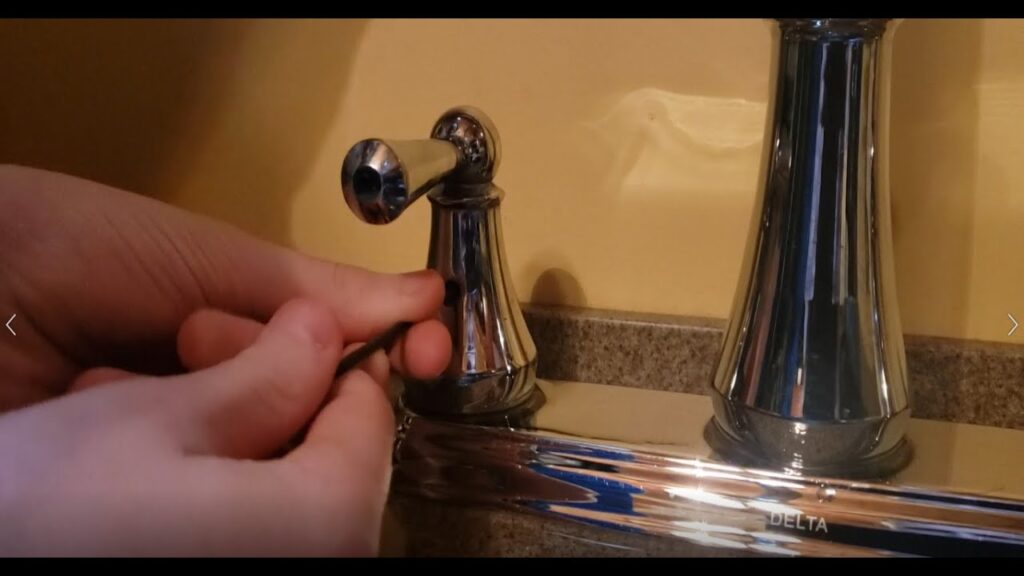
* **Remove the Handle:** Depending on your faucet model, the handle may be secured with a screw on the side or a cap on top. Use a screwdriver or Allen wrench to remove the screw or cap and then pull off the handle.
* **Remove the Faucet Spout:** Some spouts are held in place by a set screw, while others simply lift off. Consult your faucet’s instruction manual for specific instructions.
* **Access the Cartridge or Valve:** Once the handle and spout are removed, you should be able to access the cartridge or valve. The cartridge is usually held in place by a retaining clip or nut. Remove the clip or nut and then carefully pull out the cartridge.
Step 3: Inspect and Replace Worn Parts
* **Inspect O-Rings and Seals:** Examine the O-rings and seals for any signs of wear, cracking, or damage. Replace any damaged O-rings and seals with new ones from your faucet repair kit. Apply a thin coat of plumber’s grease to the new O-rings before installing them.
* **Inspect the Cartridge:** Look for any cracks, corrosion, or damage to the cartridge. If the cartridge is damaged, replace it with a new one. Make sure the replacement cartridge is compatible with your faucet model.
* **Clean Valve Seats:** If the valve seats are corroded, clean them with white vinegar and a scrub brush. Rinse thoroughly with water.
Step 4: Reassemble the Faucet
* **Reinstall the Cartridge or Valve:** Carefully insert the new or cleaned cartridge or valve into the faucet body. Secure it with the retaining clip or nut.
* **Reinstall the Faucet Spout:** Place the spout back onto the faucet body and secure it with the set screw (if applicable).
* **Reinstall the Handle:** Place the handle back onto the faucet stem and secure it with the screw or cap.
Step 5: Turn On the Water Supply and Test for Leaks
Slowly turn on the water supply and check for any leaks around the spout, handle, and base of the faucet. If you still see leaks, double-check that all connections are tight and that the O-rings and seals are properly installed.
Preventative Measures to Extend Faucet Life
* **Regular Cleaning:** Clean your faucet regularly with a mild soap and water solution to remove mineral deposits and prevent corrosion.
* **Avoid Abrasive Cleaners:** Do not use abrasive cleaners or scouring pads, as they can damage the faucet’s finish.
* **Check Water Pressure:** Monitor your water pressure and install a pressure regulator if it’s consistently above 60 psi.
* **Replace Worn Parts Promptly:** Replace worn O-rings, seals, and cartridges as soon as you notice any leaks.
* **Install a Water Softener:** If you have hard water, consider installing a water softener to reduce mineral buildup in your faucet.
When to Call a Plumber
While many faucet leaks can be fixed with DIY repairs, some situations require the expertise of a professional plumber. Call a plumber if:
* You’re uncomfortable working with plumbing.
* You can’t identify the source of the leak.
* The faucet body is damaged.
* You’ve tried replacing the cartridge and the leak persists.
* You encounter stripped screws or other complications during the repair process.
Delta Faucet Leaking Kitchen: Understanding Diamond Seal Technology
Delta’s Diamond Seal Technology is a key feature designed to reduce leaks and extend the life of their faucets. The technology utilizes a diamond-embedded ceramic disc within the cartridge. Diamonds are incredibly hard and durable, providing a long-lasting seal that resists wear and tear. This technology is designed to:
* Reduce leak points.
* Prevent mineral buildup.
* Extend the life of the faucet.
* Provide a smooth and consistent water flow.
However, even with Diamond Seal Technology, faucets can still leak over time due to other factors, such as worn O-rings or loose connections.
Troubleshooting Common Delta Faucet Problems
Even with proper maintenance, you might encounter other issues with your Delta faucet. Here are a few common problems and their solutions:
* **Low Water Pressure:** Check the aerator for mineral buildup and clean it if necessary. Also, check the supply lines for kinks or obstructions.
* **Noisy Faucet:** Noises can be caused by loose parts, high water pressure, or air in the pipes. Tighten any loose connections and consider installing a pressure regulator.
* **Stiff Handle:** A stiff handle may be due to mineral buildup or a worn cartridge. Clean the faucet thoroughly and replace the cartridge if necessary.
Reviewing Delta Faucet Quality and Reliability
Delta faucets generally receive positive reviews for their quality, durability, and innovative features. The Diamond Seal Technology is a standout feature that contributes to their longevity. However, like any product, Delta faucets are not without their drawbacks. Some users have reported issues with the finish deteriorating over time, while others have experienced leaks despite the Diamond Seal Technology. Overall, Delta faucets are a reliable choice for most homeowners, but it’s essential to consider both the pros and cons before making a purchase.
**Pros:**
* Durable construction.
* Innovative Diamond Seal Technology.
* Wide range of styles and finishes.
* Good warranty coverage.
**Cons:**
* Can be more expensive than other brands.
* Some users have reported issues with the finish.
* Cartridge replacement can be complex for some models.
Ideal User Profile: Delta faucets are a good choice for homeowners who are looking for a durable, stylish, and reliable faucet. They are particularly well-suited for those who appreciate innovative features and are willing to pay a premium for quality.
Alternatives: Two main alternatives to Delta faucets are Moen and Kohler. Moen faucets are known for their reliability and ease of installation, while Kohler faucets are known for their stylish designs and innovative features.
**Expert Overall Verdict & Recommendation:** Based on our experience, Delta faucets offer a good balance of quality, durability, and style. The Diamond Seal Technology is a significant advantage, but it’s essential to maintain the faucet properly to prevent leaks. If you’re looking for a reliable faucet that will last for years, Delta is a solid choice.
Q&A: Expert Answers to Your Delta Faucet Questions
Here are some frequently asked questions about Delta faucets, answered by our team of plumbing experts:
1. **Q: How often should I replace the cartridge in my Delta faucet?**
A: The lifespan of a Delta faucet cartridge varies depending on water quality and usage, but generally, it should be replaced every 5-7 years. If you notice a persistent leak or difficulty controlling water flow, it’s likely time for a replacement.
2. **Q: Can I use generic replacement parts for my Delta faucet?**
A: While generic parts may seem tempting due to their lower cost, it’s always best to use genuine Delta replacement parts. Generic parts may not fit properly or meet Delta’s quality standards, leading to leaks or other problems.
3. **Q: How do I remove mineral deposits from my Delta faucet without damaging the finish?**
A: Soak a cloth in white vinegar and wrap it around the affected area for a few hours. The vinegar will help dissolve the mineral deposits without damaging the finish. Avoid using abrasive cleaners or scouring pads.
4. **Q: My Delta faucet is leaking from the base. What could be the cause?**
A: A leak from the base of the faucet could be caused by loose connections, corroded valve seats, or a damaged faucet body. Tighten the connections and inspect the valve seats for corrosion. If the faucet body is damaged, you’ll need to replace the entire faucet.
5. **Q: What is the best way to clean the aerator on my Delta faucet?**
A: Unscrew the aerator from the faucet spout and soak it in white vinegar for a few hours. Use a small brush to remove any remaining mineral deposits. Rinse the aerator thoroughly with water before reinstalling it.
6. **Q: My Delta faucet handle is stiff and difficult to turn. What can I do?**
A: A stiff handle may be due to mineral buildup or a worn cartridge. Clean the faucet thoroughly and replace the cartridge if necessary. You can also apply plumber’s grease to the cartridge to help it move more smoothly.
7. **Q: How do I adjust the water temperature on my Delta faucet?**
A: The water temperature on most Delta faucets can be adjusted by turning the handle to the left for hot water and to the right for cold water. Some faucets also have a temperature limiter that can be adjusted to prevent scalding.
8. **Q: What is the warranty on Delta faucets?**
A: Delta offers a limited lifetime warranty on most of their faucets. The warranty covers defects in materials and workmanship. Refer to the warranty documentation for specific details.
9. **Q: Can I install a Delta faucet myself, or should I hire a plumber?**
A: If you have basic plumbing knowledge and experience, you can likely install a Delta faucet yourself. However, if you’re uncomfortable working with plumbing, it’s best to hire a professional plumber to ensure proper installation and avoid potential leaks.
10. **Q: What are the telltale signs that my Delta faucet needs to be replaced rather than repaired?**
A: If the faucet body is cracked or severely corroded, if you’re unable to find replacement parts, or if you’ve attempted multiple repairs without success, it’s likely time to replace the faucet.
Conclusion
Fixing a delta faucet leaking kitchen can seem daunting, but with the right knowledge and tools, it’s a manageable DIY project. By understanding the common causes of leaks, following our step-by-step repair guide, and implementing preventative measures, you can keep your Delta faucet in top condition for years to come. Remember that Delta faucets, while reliable, require maintenance. The innovative Diamond Seal Technology offers a significant advantage in leak prevention. We’ve shared insights based on our extensive experience with kitchen faucets. If you encounter any complications or are uncomfortable with the repair process, don’t hesitate to call a professional plumber. Share your experiences with fixing delta faucets leaking kitchen in the comments below!
