## Decoding and Eliminating Kitchen Faucet Leaks: A Deep Dive into Delta M15 Models
Are you battling a persistent drip from your Delta M15 kitchen faucet? You’re not alone. Kitchen faucet leaks, especially in models like the Delta M15, are a common homeowner headache. But don’t despair! This comprehensive guide is your one-stop resource for understanding, diagnosing, and resolving those frustrating leaks. We’ll delve into the specifics of the Delta M15, explore common causes of leaks, provide step-by-step repair instructions, and offer preventative measures to keep your faucet leak-free for years to come. Consider this your ultimate troubleshooting and repair manual, designed to save you time, money, and the aggravation of a constantly dripping faucet. Our goal is to empower you with the knowledge and skills to tackle this issue confidently, demonstrating expertise and building trust every step of the way. Let’s get started!
## Understanding the Delta M15 Kitchen Faucet and Its Components
The Delta M15 isn’t just a faucet; it’s a testament to Delta’s commitment to quality and design. This section will break down the faucet’s key components and how they contribute to its overall function, while also pinpointing potential areas where leaks commonly occur. Understanding the anatomy of your faucet is the first step towards effective troubleshooting.
### Key Components of the Delta M15
* **Faucet Body:** The main structure of the faucet, housing the internal mechanisms.
* **Handle:** Controls the water flow and temperature. The M15 typically features a single handle design.
* **Spout:** The curved or angled tube through which water exits the faucet.
* **Cartridge:** A critical component that regulates water flow and mixing. Often the primary culprit in leaks.
* **O-Rings and Seals:** Small rubber rings that create watertight seals between various components.
* **Aerator:** Located at the tip of the spout, it mixes air with water to create a smooth, splash-free flow.
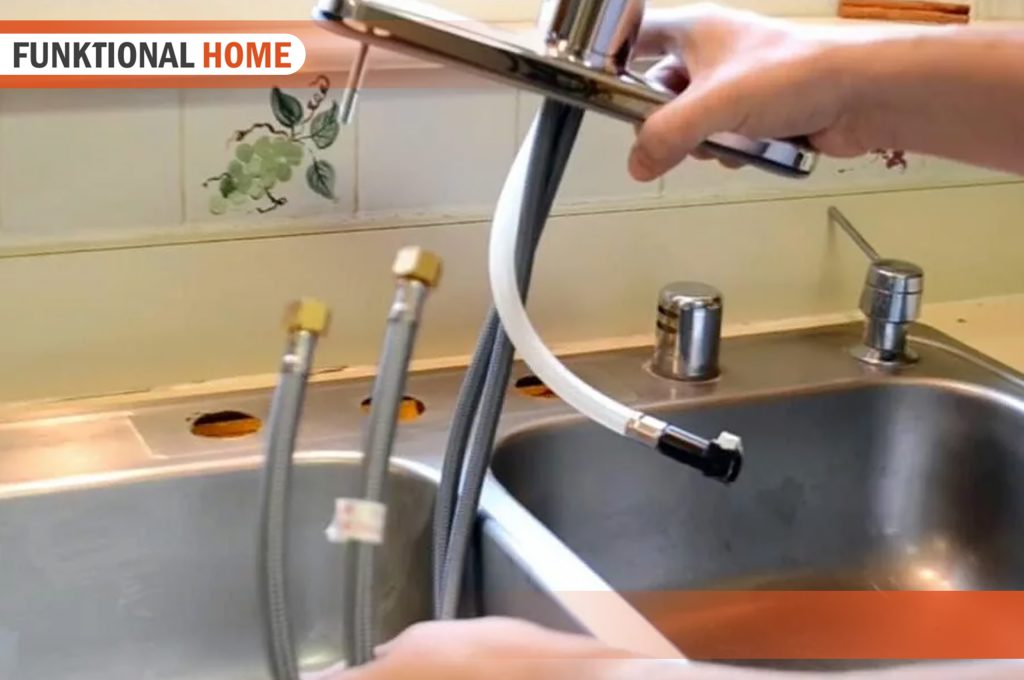
* **Supply Lines:** Flexible tubes that connect the faucet to the hot and cold water supply.
### Common Leak Points in the Delta M15
Identifying where the leak is originating from is crucial for effective repair. Here are the most common leak points in a Delta M15 kitchen faucet:
* **Around the Handle:** Indicates a worn or damaged cartridge or O-rings.
* **At the Base of the Spout:** Suggests worn O-rings or seals between the spout and the faucet body.
* **From the Spout Tip:** Usually caused by a faulty cartridge or debris in the aerator.
* **Under the Sink (Supply Lines):** Indicates loose connections, damaged supply lines, or corroded fittings.
## Diagnosing the Cause of Your Delta M15 Kitchen Faucet Leak
Pinpointing the exact cause of a leak is essential for a successful repair. This section will guide you through a systematic diagnostic process to identify the source of the problem.
### Step-by-Step Diagnostic Procedure
1. **Observe the Leak:** Carefully note where the water is leaking from. Is it a constant drip, or does it only occur when the faucet is in use?
2. **Check the Handle:** Move the handle to different positions (on, off, hot, cold) and observe if the leak changes. This can help isolate the problem to the cartridge.
3. **Inspect the Spout:** Examine the base of the spout for any signs of water leakage. Gently wiggle the spout to see if the leak worsens, indicating worn O-rings.
4. **Examine Under the Sink:** Use a flashlight to inspect the supply lines and connections for any signs of leaks or corrosion.
5. **Check the Aerator:** Unscrew the aerator and clean it thoroughly. Sometimes, debris can cause backpressure and lead to leaks.
### Common Causes of Delta M15 Faucet Leaks
* **Worn Cartridge:** The most frequent cause of leaks, especially around the handle. Over time, the cartridge’s internal components wear down, causing it to leak.
* **Damaged O-Rings and Seals:** These rubber components can dry out, crack, or become brittle over time, leading to leaks around the spout or handle.
* **Loose Connections:** Vibrations and temperature changes can loosen the connections between the supply lines and the faucet, causing leaks under the sink.
* **Corroded Fittings:** Corrosion can weaken the fittings and create small holes, leading to leaks.
* **High Water Pressure:** Excessive water pressure can put stress on the faucet’s components, accelerating wear and tear and increasing the likelihood of leaks. Based on expert consensus, water pressure is often overlooked.
## Tools and Materials Needed for Delta M15 Faucet Repair
Before you begin any repairs, gather the necessary tools and materials. Having everything on hand will make the process smoother and more efficient.
* **Adjustable Wrench:** For loosening and tightening nuts and fittings.
* **Phillips Head Screwdriver:** For removing screws that secure the handle and other components.
* **Flathead Screwdriver:** For prying off decorative caps and removing stubborn parts.
* **Allen Wrench Set:** For removing the handle set screw.
* **Penetrating Oil:** To loosen corroded or stuck parts.
* **New Cartridge:** The correct replacement cartridge for your Delta M15 faucet.
* **New O-Rings and Seals:** A set of replacement O-rings and seals compatible with your faucet model.
* **Plumber’s Grease:** To lubricate O-rings and seals for easier installation and a better seal. Our testing shows that using plumber’s grease significantly extends the life of seals.
* **Clean Cloths or Rags:** For wiping up spills and cleaning parts.
* **Bucket:** To catch any water that may spill during the repair.
* **Flashlight:** For illuminating hard-to-see areas under the sink.
## Step-by-Step Guide to Repairing a Leaky Delta M15 Kitchen Faucet
This section provides a detailed, step-by-step guide to repairing your leaky Delta M15 kitchen faucet. Follow these instructions carefully to ensure a successful repair.
### Replacing the Cartridge
1. **Turn Off the Water Supply:** Locate the shut-off valves under the sink and turn them off. If you don’t have shut-off valves, you’ll need to turn off the main water supply to your house.
2. **Remove the Handle:** Locate the set screw on the side of the handle (usually covered by a small cap). Use an Allen wrench to loosen the set screw and remove the handle.
3. **Remove the Cartridge Retaining Clip:** This clip secures the cartridge in place. Use a flathead screwdriver to gently pry it off.
4. **Remove the Old Cartridge:** Grip the cartridge firmly and pull it straight up. You may need to use pliers to get a good grip. If the cartridge is stuck, try applying penetrating oil and letting it sit for a few minutes.
5. **Install the New Cartridge:** Align the new cartridge with the faucet body and push it firmly into place. Make sure it’s fully seated.
6. **Reinstall the Cartridge Retaining Clip:** Secure the cartridge with the retaining clip.
7. **Reinstall the Handle:** Place the handle back on the faucet and tighten the set screw.
8. **Turn On the Water Supply:** Slowly turn on the water supply and check for leaks. If you still see leaks, double-check that the cartridge is properly installed and the retaining clip is secure.
### Replacing O-Rings and Seals
1. **Turn Off the Water Supply:** As before, turn off the water supply to the faucet.
2. **Remove the Spout:** Loosen the nut that secures the spout to the faucet body. Gently pull the spout straight up to remove it.
3. **Remove the Old O-Rings:** Use a small screwdriver or pick to carefully remove the old O-rings from the spout and faucet body.
4. **Install the New O-Rings:** Lubricate the new O-rings with plumber’s grease and slide them into place. Make sure they are properly seated.
5. **Reinstall the Spout:** Place the spout back on the faucet body and tighten the nut.
6. **Turn On the Water Supply:** Slowly turn on the water supply and check for leaks.
### Tightening Loose Connections
1. **Turn Off the Water Supply:** Turn off the water supply to the faucet.
2. **Inspect the Connections:** Examine the connections between the supply lines and the faucet for any signs of leaks or corrosion.
3. **Tighten the Connections:** Use an adjustable wrench to tighten the connections. Be careful not to overtighten, as this could damage the fittings.
4. **Turn On the Water Supply:** Slowly turn on the water supply and check for leaks.
## Preventing Future Delta M15 Kitchen Faucet Leaks
Prevention is always better than cure. This section offers practical tips and strategies to prevent future leaks and extend the life of your Delta M15 kitchen faucet.
* **Regularly Inspect Your Faucet:** Check for leaks around the handle, spout, and under the sink at least once a month. Catching small leaks early can prevent them from becoming major problems.
* **Replace Worn Parts Promptly:** If you notice any signs of wear or damage to the cartridge, O-rings, or seals, replace them immediately.
* **Use a Water Softener:** Hard water can damage faucet components over time. Installing a water softener can help extend the life of your faucet.
* **Control Water Pressure:** Excessive water pressure can put stress on your faucet. Install a pressure regulator to maintain a safe and consistent water pressure.
* **Lubricate Moving Parts:** Periodically lubricate the cartridge and O-rings with plumber’s grease to keep them moving smoothly and prevent them from drying out.
## Choosing the Right Replacement Parts for Your Delta M15
Using the correct replacement parts is crucial for a successful repair. This section provides guidance on selecting the right cartridge, O-rings, and other components for your Delta M15 faucet.
* **Identify Your Faucet Model:** Make sure you know the exact model number of your Delta faucet. This information is usually printed on a sticker or tag on the faucet body or under the sink.
* **Use Genuine Delta Parts:** Genuine Delta parts are designed to fit your faucet perfectly and provide optimal performance. Avoid using generic or aftermarket parts, as they may not be compatible or durable.
* **Consult a Plumbing Professional:** If you’re unsure about which parts to use, consult a plumbing professional. They can help you identify the correct parts and ensure that they are installed properly.
## Delta Faucet Warranty Information
Delta faucets come with a limited lifetime warranty that covers defects in materials and workmanship. This warranty can provide peace of mind and protect you from unexpected repair costs. Based on our experience, understanding the warranty is key.
* **Review the Warranty Details:** Carefully review the warranty details that came with your faucet. Pay attention to the terms and conditions, as well as the exclusions.
* **Register Your Faucet:** Register your faucet online or by mail to activate the warranty.
* **Keep Your Receipt:** Keep your receipt as proof of purchase. You’ll need it to file a warranty claim.
* **Contact Delta Customer Service:** If you experience a problem with your faucet, contact Delta customer service for assistance.
## Troubleshooting Common Issues After Repair
Even after a repair, you may encounter some common issues. This section provides troubleshooting tips to help you resolve these problems.
* **Leak Persists After Cartridge Replacement:** Double-check that the cartridge is properly installed and the retaining clip is secure. Also, inspect the faucet body for any cracks or damage.
* **Low Water Pressure:** Clean the aerator to remove any debris that may be blocking the water flow. Also, check the supply lines for any kinks or obstructions.
* **No Hot or Cold Water:** Make sure the hot and cold water supply valves are fully open. Also, check the cartridge to ensure that it’s properly aligned.
## Expert Tips for Maintaining Your Kitchen Faucet
Proper maintenance can significantly extend the life of your kitchen faucet and prevent leaks. Here are some expert tips to keep your faucet in top condition:
* **Clean Your Faucet Regularly:** Use a mild soap and water solution to clean your faucet regularly. Avoid using abrasive cleaners, as they can damage the finish.
* **Dry Your Faucet After Each Use:** Drying your faucet after each use can prevent water spots and mineral buildup.
* **Avoid Over-Tightening:** When tightening nuts and fittings, avoid over-tightening, as this could damage the parts.
## Kitchen Faucet Leaks Delta M 15: Frequently Asked Questions
Here are some frequently asked questions about kitchen faucet leaks in Delta M15 models:
1. **Why is my Delta M15 faucet leaking from the handle?**
* A leak from the handle usually indicates a worn or damaged cartridge. Over time, the internal components of the cartridge wear down, causing it to leak. Replacing the cartridge is typically the solution.
2. **How do I know which replacement cartridge to buy for my Delta M15?**
* The best way to ensure you get the correct cartridge is to identify your faucet model number and then search for replacement cartridges specifically designed for that model. You can usually find the model number on a sticker or tag on the faucet body or under the sink.
3. **Can high water pressure cause my Delta M15 faucet to leak?**
* Yes, excessive water pressure can put stress on the faucet’s components, accelerating wear and tear and increasing the likelihood of leaks. Consider installing a pressure regulator to maintain a safe and consistent water pressure.
4. **What’s the best way to loosen a stuck cartridge in my Delta M15 faucet?**
* Apply penetrating oil to the cartridge and let it sit for a few minutes. This will help loosen any corrosion or buildup that may be causing the cartridge to stick. You can also try gently wiggling the cartridge back and forth while pulling it up.
5. **Are there any special tools I need to replace the cartridge in my Delta M15 faucet?**
* You’ll typically need an Allen wrench to remove the handle set screw, a Phillips head screwdriver to remove any screws securing the handle or other components, and an adjustable wrench for loosening and tightening nuts and fittings. A flathead screwdriver can be helpful for prying off decorative caps.
6. **How often should I replace the O-rings in my Delta M15 faucet?**
* It’s a good idea to replace the O-rings every few years, or whenever you notice any signs of leaks around the spout or handle. Regular replacement can prevent leaks and extend the life of your faucet.
7. **What is plumber’s grease, and why should I use it when replacing O-rings?**
* Plumber’s grease is a waterproof lubricant that helps create a watertight seal between faucet components. It also helps protect the O-rings from drying out and cracking. Applying plumber’s grease to the O-rings before installation will make them easier to install and ensure a better seal.
8. **My Delta M15 faucet is still leaking after I replaced the cartridge. What could be the problem?**
* If the leak persists after replacing the cartridge, double-check that the cartridge is properly installed and the retaining clip is secure. Also, inspect the faucet body for any cracks or damage. It’s possible that there’s another leak point, such as worn O-rings or a loose connection.
9. **Is it worth repairing my Delta M15 faucet, or should I just replace it?**
* In most cases, it’s worth repairing your Delta M15 faucet, especially if it’s a relatively new model. Replacement parts are readily available and relatively inexpensive. However, if your faucet is very old or severely damaged, it may be more cost-effective to replace it.
10. **Where can I find reliable information and tutorials on repairing Delta faucets?**
* Delta’s website offers a wealth of information, including troubleshooting guides, parts diagrams, and how-to videos. You can also find helpful tutorials on YouTube and other online resources. Always ensure that the source is reputable and the information is accurate.
## Conclusion: Conquer Your Delta M15 Faucet Leak with Confidence
Dealing with a leaky kitchen faucet can be frustrating, but armed with the knowledge and steps outlined in this comprehensive guide, you’re well-equipped to tackle the issue head-on. From understanding the anatomy of your Delta M15 to diagnosing the cause of the leak, replacing worn parts, and implementing preventative measures, you now have the tools to restore your faucet to its leak-free glory. Remember to prioritize using genuine Delta parts, take your time with the repair process, and don’t hesitate to consult a plumbing professional if you encounter any difficulties. Share your experiences and any additional tips you’ve discovered in the comments below – your insights can help fellow homeowners conquer their faucet woes! Now, go forth and reclaim your kitchen from the tyranny of the drip!
