Sink is Leaking? A Comprehensive Guide to Identifying, Fixing, and Preventing Leaks
Is your sink dripping, pooling water, or showing signs of a leak? A leaking sink isn’t just an annoyance; it can lead to water damage, mold growth, and wasted money on your water bill. This comprehensive guide provides you with the expert knowledge and step-by-step instructions you need to diagnose, fix, and prevent sink leaks. We’ll cover everything from identifying the source of the leak to choosing the right tools and materials, ensuring a long-lasting and effective solution. Our goal is to empower you with the information necessary to tackle this common household problem with confidence and expertise, saving you time, money, and potential headaches down the road. This guide reflects years of experience in plumbing repairs and is designed to be both accessible to DIY enthusiasts and informative for those seeking a deeper understanding of sink plumbing.
Understanding the Anatomy of a Leaking Sink
Before you can fix a leaking sink, it’s crucial to understand the different components that make up your sink’s plumbing system. This knowledge will help you pinpoint the exact location of the leak and choose the appropriate repair method. The common parts of a sink plumbing system include:
* **Faucet:** The fixture that controls the flow of water into the sink. Leaks can occur around the base of the faucet, the handle, or the spout.
* **Supply Lines:** These flexible or rigid pipes connect the faucet to the hot and cold water supply valves. Leaks often happen at the connection points.
* **Shut-off Valves:** Located under the sink, these valves control the water supply to the faucet. They are essential for turning off the water before making any repairs.
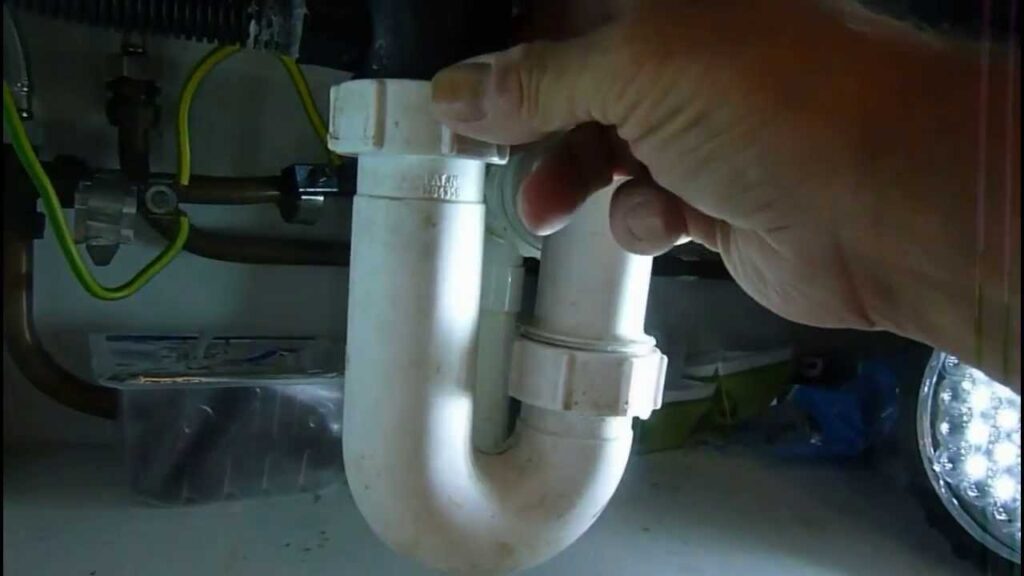
* **Drain Assembly:** Consists of the sink strainer, drainpipe, P-trap, and tailpiece. Leaks can occur in any of these components due to loose connections or corrosion.
* **P-Trap:** The curved section of pipe under the sink that traps debris and prevents sewer gases from entering your home.
* **Garbage Disposal (if applicable):** A device that grinds up food waste before it enters the drainpipe. Leaks can occur around the disposal’s connection points.
Knowing these components will significantly aid in diagnosing where your sink is leaking.
Common Causes of a Sink is Leaking
Pinpointing the cause of a sink leak is the first step to fixing it. Here are some of the most common culprits:
* **Loose Connections:** Over time, connections between pipes, faucets, and valves can loosen due to vibrations or temperature changes. This is a frequent cause of slow drips.
* **Worn-Out Washers and O-Rings:** These small rubber or plastic parts create a watertight seal in faucets and valves. As they age, they can become brittle, cracked, or worn, leading to leaks.
* **Corroded Pipes:** Corrosion can weaken pipes and create pinhole leaks. This is more common in older homes with galvanized steel pipes.
* **Damaged Faucet Cartridges:** Faucet cartridges control the flow of water in single-handle faucets. If the cartridge is damaged, it can cause leaks or difficulty controlling the water temperature.
* **Clogged Drains:** A clogged drain can cause water to back up into the sink and leak from the overflow drain or around the drain assembly.
* **High Water Pressure:** Excessive water pressure can put stress on plumbing components and cause them to leak.
* **Improper Installation:** Sometimes, leaks are the result of faulty installation. This is especially true for new sinks or faucets.
Understanding these common causes will help you narrow down the source of your sink is leaking.
Step-by-Step Guide to Diagnosing a Leaking Sink
Before you start tearing apart your sink, take the time to carefully diagnose the problem. Here’s a step-by-step approach:
1. **Dry the Area:** Use a towel to thoroughly dry the area under and around the sink. This will make it easier to spot the source of the leak.
2. **Observe Carefully:** Turn on the faucet and run water. Watch closely for drips or leaks around the faucet base, handles, spout, and supply lines.
3. **Check the Drain:** Fill the sink with water and then release the drain. Look for leaks around the sink strainer, drainpipe, and P-trap.
4. **Inspect the Supply Lines:** Examine the supply lines for any signs of corrosion, cracks, or leaks at the connection points.
5. **Feel for Moisture:** Run your hand along the pipes and connections to feel for any dampness.
6. **Use a Flashlight:** A flashlight can help you see into tight spaces and identify hard-to-spot leaks.
By following these steps, you can effectively pinpoint the source of your sink is leaking.
Essential Tools and Materials for Fixing a Sink is Leaking
Before you start any repairs, gather the necessary tools and materials. Having everything on hand will make the job easier and prevent unnecessary trips to the hardware store. Here’s a list of essential items:
* **Basin Wrench:** Used to loosen and tighten nuts in tight spaces, such as under the sink.
* **Adjustable Wrench:** For tightening and loosening various nuts and bolts.
* **Pliers:** For gripping and manipulating small parts.
* **Screwdrivers (Phillips and Flathead):** For removing screws.
* **Plumber’s Tape (Teflon Tape):** Used to create a watertight seal on threaded connections.
* **Plumber’s Putty:** Used to seal the sink strainer to the sink basin.
* **Replacement Washers and O-Rings:** For replacing worn-out seals in faucets and valves.
* **Replacement Supply Lines:** If the existing supply lines are corroded or damaged.
* **Bucket:** To catch dripping water.
* **Towels:** To clean up spills and dry the area.
* **Safety Glasses:** To protect your eyes from debris.
* **Gloves:** To protect your hands.
Having these tools and materials readily available will make the repair process much smoother.
Fixing Common Sink Leak Scenarios
Now that you’ve identified the source of the leak and gathered your tools, let’s look at how to fix some common sink leak scenarios:
Leaking Faucet Base
* **Cause:** Worn-out O-rings or loose connections.
* **Solution:**
1. Turn off the water supply to the faucet.
2. Remove the faucet handle and escutcheon (the decorative plate around the base of the faucet).
3. Inspect the O-rings and replace them if they are worn or damaged.
4. Tighten any loose connections.
5. Reassemble the faucet and turn on the water supply to test for leaks.
Leaking Faucet Handle
* **Cause:** Worn-out cartridges or stems.
* **Solution:**
1. Turn off the water supply to the faucet.
2. Remove the faucet handle.
3. Remove the cartridge or stem.
4. Replace the cartridge or stem with a new one.
5. Reassemble the faucet and turn on the water supply to test for leaks.
Leaking Supply Line
* **Cause:** Loose connections or damaged supply lines.
* **Solution:**
1. Turn off the water supply to the faucet.
2. Tighten the connections at both ends of the supply line.
3. If the supply line is damaged, replace it with a new one.
4. Turn on the water supply to test for leaks.
Leaking Drainpipe
* **Cause:** Loose connections or corroded pipes.
* **Solution:**
1. Loosen the slip nuts that connect the drainpipe sections.
2. Inspect the pipes for corrosion or damage.
3. If the pipes are corroded, replace them with new ones.
4. Apply plumber’s tape to the threads of the pipes.
5. Reassemble the drainpipe and tighten the slip nuts.
6. Run water into the sink to test for leaks.
Leaking Sink Strainer
* **Cause:** Worn-out plumber’s putty or loose connections.
* **Solution:**
1. Remove the sink strainer.
2. Clean the sink basin and the strainer.
3. Apply a fresh bead of plumber’s putty to the underside of the strainer flange.
4. Reinstall the strainer and tighten the nut underneath the sink.
5. Remove any excess putty.
6. Run water into the sink to test for leaks.
These solutions cover many instances of a sink is leaking, but always consult a professional if unsure.
Preventative Measures to Avoid Future Sink Leaks
Preventing leaks is always better than fixing them. Here are some preventative measures you can take to avoid future sink leaks:
* **Regularly Inspect Your Plumbing:** Check under your sink for any signs of leaks or corrosion at least twice a year.
* **Tighten Loose Connections:** Periodically tighten any loose connections on your faucets, supply lines, and drainpipes.
* **Replace Worn-Out Parts:** Replace worn-out washers, O-rings, and cartridges as needed.
* **Avoid Over-Tightening:** When tightening connections, avoid over-tightening, as this can damage the parts.
* **Use a Water Softener:** If you have hard water, consider using a water softener to prevent corrosion.
* **Be Careful What You Put Down the Drain:** Avoid pouring grease or other debris down the drain, as this can clog the pipes and cause leaks.
Advanced Troubleshooting for Persistent Sink Leaks
Sometimes, even after following the above steps, a sink leak may persist. Here are some advanced troubleshooting tips:
* **Check for Hidden Leaks:** Use a moisture meter to check for hidden leaks in the walls or floor around the sink.
* **Inspect the Faucet Body:** Look for cracks or damage in the faucet body itself.
* **Consider Water Pressure:** If your water pressure is too high, it can cause leaks. Consider installing a pressure regulator.
* **Consult a Professional:** If you’ve tried everything and the leak persists, it’s time to call a professional plumber.
Choosing the Right Plumber for Your Sink Leak Repair
If you’re not comfortable tackling the repair yourself, or if the leak is complex, it’s best to hire a qualified plumber. Here are some tips for choosing the right plumber:
* **Get Recommendations:** Ask friends, family, or neighbors for recommendations.
* **Check Online Reviews:** Read online reviews to get an idea of the plumber’s reputation.
* **Verify Licensing and Insurance:** Make sure the plumber is licensed and insured.
* **Get Multiple Quotes:** Get quotes from several plumbers before making a decision.
* **Ask About Experience:** Ask the plumber about their experience with sink leak repairs.
The Environmental Impact of Leaking Sinks
It’s easy to underestimate the environmental impact of a small drip. However, even a seemingly minor leak can waste a significant amount of water over time. This wasted water not only increases your water bill but also puts a strain on our water resources. By promptly fixing a leaking sink, you can do your part to conserve water and protect the environment. The EPA estimates that household leaks can waste nearly 1 trillion gallons of water annually nationwide. Addressing a sink is leaking promptly is a small act with a big impact.
Sink Materials and Leak Prevention
The material your sink is made from can also influence its susceptibility to leaks. For example, stainless steel sinks are generally more resistant to corrosion than cast iron sinks. Similarly, the type of faucet you choose can also play a role. High-quality faucets with durable cartridges and washers are less likely to leak than cheaper models. When selecting a new sink or faucet, consider the material and construction to minimize the risk of future leaks.
The Financial Impact of a Leaking Sink
A leaking sink can have a significant financial impact beyond just the increased water bill. Water damage can lead to costly repairs to your floors, walls, and cabinets. Mold growth can also result in health problems and expensive remediation. By fixing a leaking sink promptly, you can avoid these costly consequences and save money in the long run. Consider the cost of inaction versus the relatively minor cost of repair. Addressing a sink is leaking is an investment in your home and your health.
Q&A: Expert Answers to Common Sink Leak Questions
Here are some frequently asked questions about sink leaks, along with expert answers:
**Q1: How can I tell if a sink leak is coming from the supply line or the drain?**
*A1:* Dry the area under the sink thoroughly. Then, run the faucet without using the drain. If you see a leak, it’s likely coming from the supply line or faucet. If the leak only appears when you drain the sink, it’s likely coming from the drain assembly.
**Q2: Is it safe to use chemical drain cleaners to fix a clogged drain that’s causing a leak?**
*A2:* While chemical drain cleaners can sometimes clear clogs, they can also damage your pipes and cause leaks. It’s generally safer to use a plunger or drain snake to clear clogs.
**Q3: How often should I replace the washers in my faucets?**
*A3:* It depends on the quality of the washers and the frequency of use. However, it’s generally a good idea to replace the washers every 2-3 years, or sooner if you notice any leaks.
**Q4: Can high water pressure cause a sink to leak?**
*A4:* Yes, high water pressure can put stress on plumbing components and cause them to leak. If you suspect that your water pressure is too high, you can purchase a water pressure gauge at most hardware stores to check it.
**Q5: What is the best type of plumber’s tape to use for sealing threaded connections?**
*A5:* Teflon tape is the most common and effective type of plumber’s tape. Make sure to wrap the tape in the direction of the threads to create a watertight seal.
**Q6: Can I use silicone caulk to seal a leaking sink strainer?**
*A6:* While silicone caulk can be used to seal some plumbing connections, it’s not the best choice for sealing a sink strainer. Plumber’s putty is specifically designed for this purpose and provides a more reliable seal.
**Q7: My sink is leaking only when I use the garbage disposal. What could be the problem?**
*A7:* The leak is likely coming from the connection between the garbage disposal and the drainpipe. Check the mounting bolts and make sure they are tight. Also, inspect the rubber gasket between the disposal and the sink flange for any damage.
**Q8: What are the signs of a hidden sink leak?**
*A8:* Signs of a hidden sink leak can include water stains on the ceiling below the sink, mold growth in the cabinet under the sink, or a musty odor.
**Q9: Should I hire a plumber to replace a leaky faucet, or can I do it myself?**
*A9:* If you’re comfortable with basic plumbing tasks and have the necessary tools, you can likely replace a leaky faucet yourself. However, if you’re not confident, it’s best to hire a professional plumber.
**Q10: What is the best way to prevent frozen pipes that can cause sink leaks in the winter?**
*A10:* To prevent frozen pipes, insulate your pipes, especially those in unheated areas. Also, let the faucet drip slightly during extremely cold weather.
Conclusion: Taking Control of Your Sink Leaks
A leaking sink can be a frustrating problem, but with the right knowledge and tools, you can often fix it yourself. By following the steps outlined in this guide, you can diagnose the source of the leak, make the necessary repairs, and prevent future leaks from occurring. Remember to always turn off the water supply before starting any repairs and to consult a professional plumber if you’re not comfortable tackling the job yourself. Addressing a sink is leaking promptly not only saves you money and water but also protects your home from potential damage. We encourage you to share your experiences and any additional tips you have for fixing sink leaks in the comments below. Explore our other guides for more plumbing tips and tricks, and don’t hesitate to contact our experts for personalized advice on any plumbing issues you may be facing. Taking action today will ensure a leak-free sink and a more secure home tomorrow.
