The Handle On My Tap Is Loose: Expert Solutions & Prevention
Is the handle on your tap loose? Don’t ignore it! A wobbly tap handle isn’t just annoying; it can lead to leaks, wasted water, and even costly damage. This comprehensive guide provides expert solutions to fix a loose tap handle, prevent future problems, and ensure your plumbing system remains in top condition. We’ll cover everything from identifying the cause of the looseness to step-by-step repair instructions, preventative maintenance, and expert tips. Whether you’re a seasoned DIYer or a complete beginner, this article will empower you to tackle this common plumbing issue with confidence.
Understanding Why The Handle On My Tap Is Loose
A loose tap handle is a common plumbing problem stemming from various causes. Understanding these causes is crucial for effective repair and prevention. The most frequent culprits include wear and tear, loose screws, damaged cartridges, and corrosion. Let’s delve deeper into each of these:
* **Wear and Tear:** Over time, the internal components of a tap, especially the handle and its connecting parts, experience wear and tear. Constant use can loosen screws, erode washers, and degrade the cartridge. This is a natural process, especially in older taps.
* **Loose Screws:** The screw that secures the handle to the tap stem can loosen due to vibrations and repeated use. This is often the simplest cause to fix.
* **Damaged Cartridge:** Cartridge taps rely on a cartridge to control water flow. If the cartridge is damaged or worn, it can cause the handle to become loose or difficult to turn. Cartridge damage can be caused by hard water buildup, corrosion, or physical damage.
* **Corrosion:** Mineral buildup and corrosion can affect the internal components of the tap, including the handle connection. Corrosion can weaken the metal parts and contribute to looseness.
Ignoring a loose tap handle can lead to more significant problems. A loose handle can cause leaks, wasting water and increasing your water bill. It can also damage the tap valve, requiring more extensive repairs or even replacement of the entire tap.
Identifying the Type of Tap
Before attempting any repairs, it’s essential to identify the type of tap you’re dealing with. Different tap types have different mechanisms and require different repair approaches. Common tap types include:
* **Compression Taps:** These are the traditional type of tap with separate hot and cold handles. They use rubber washers that compress against the valve seat to stop the flow of water. These are increasingly rare in modern homes.
* **Ball Taps:** These taps use a ball valve to control water flow. They typically have a single handle that moves left and right for temperature adjustment and up and down for flow control.
* **Cartridge Taps:** These taps use a cartridge to control water flow. They are similar to ball taps but have a different internal mechanism. A single handle typically controls both temperature and flow.
* **Ceramic Disc Taps:** These are the most modern type of tap and use ceramic discs to control water flow. They offer precise control and are less prone to leaks. They usually have a single lever.
Identifying the tap type is critical because the repair process varies significantly. Trying to repair a cartridge tap using instructions for a compression tap can lead to further damage.
Tools and Materials You’ll Need
Before you start, gather the necessary tools and materials. Having everything on hand will make the repair process smoother and more efficient. Here’s a list of essential tools and materials:
* **Screwdrivers:** You’ll need a set of screwdrivers, including both Phillips head and flathead screwdrivers, in various sizes.
* **Adjustable Wrench:** An adjustable wrench is essential for loosening and tightening nuts and bolts.
* **Pliers:** Pliers are useful for gripping and manipulating small parts.
* **Allen Wrench Set:** Some taps use Allen screws to secure the handle. An Allen wrench set is necessary for these taps.
* **Replacement Parts:** Depending on the cause of the looseness, you may need replacement parts such as screws, washers, or a cartridge.
* **Penetrating Oil:** Penetrating oil can help loosen corroded screws and nuts.
* **Clean Cloths:** Clean cloths are useful for wiping up spills and cleaning parts.
* **Plumber’s Grease:** Plumber’s grease can be used to lubricate moving parts and prevent corrosion.
Always turn off the water supply before starting any plumbing repairs. Locate the shut-off valves under the sink or the main water shut-off valve for your home. This will prevent flooding and water damage.
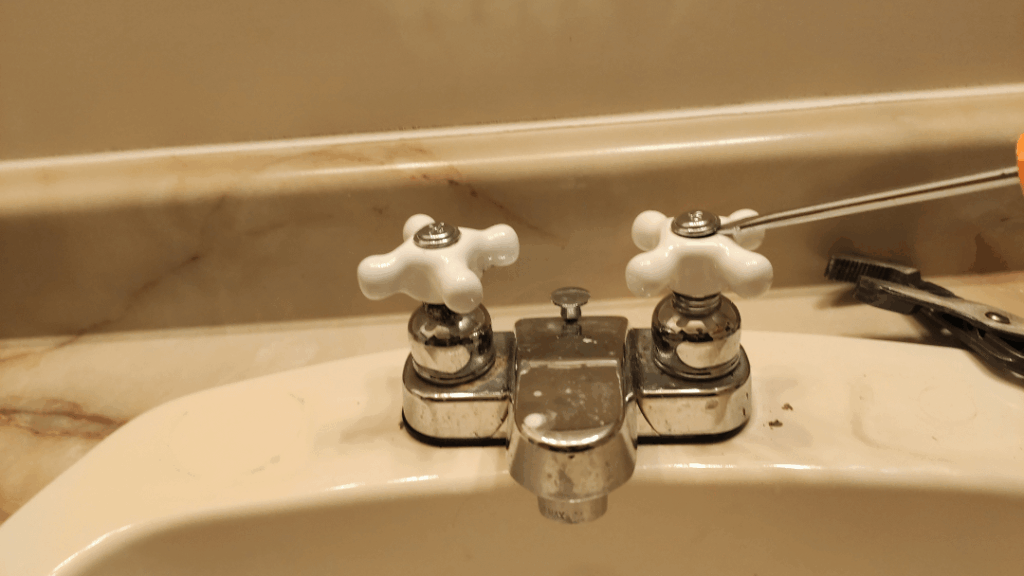
Step-by-Step Guide to Fixing a Loose Tap Handle
This section provides a general step-by-step guide to fixing a loose tap handle. However, remember that the specific steps may vary depending on the type of tap you have. Always consult the manufacturer’s instructions or a professional plumber if you’re unsure about any step.
1. **Turn Off the Water Supply:** Locate the shut-off valves under the sink and turn them off. If you can’t find shut-off valves under the sink, turn off the main water shut-off valve for your home.
2. **Remove the Handle:** Depending on the tap type, you may need to remove a decorative cap or cover to access the screw that secures the handle. Use a small screwdriver or a knife to gently pry off the cap. Once the cap is removed, use a screwdriver or an Allen wrench to loosen and remove the screw.
3. **Inspect the Handle and Stem:** Once the handle is removed, inspect the handle and the tap stem for any damage. Look for cracks, corrosion, or wear and tear. If the handle or stem is damaged, you’ll need to replace it.
4. **Tighten the Screw (If Applicable):** If the screw was loose, try tightening it. Be careful not to overtighten it, as this can damage the handle or the stem. If the screw is stripped, you may need to replace it with a new screw of the same size and thread.
5. **Replace the Cartridge (If Necessary):** If the cartridge is damaged, you’ll need to replace it. To do this, remove the handle and the cartridge retaining clip. Then, pull out the old cartridge and insert the new one. Reinstall the retaining clip and the handle.
6. **Reassemble the Tap:** Once you’ve tightened the screw or replaced the cartridge, reassemble the tap. Make sure all parts are properly aligned and securely fastened.
7. **Turn On the Water Supply:** Slowly turn on the water supply and check for leaks. If you see any leaks, turn off the water supply and recheck your work. You may need to tighten the connections or replace any worn washers or O-rings.
Troubleshooting Common Problems
Even with careful attention, you may encounter some common problems during the repair process. Here are some troubleshooting tips:
* **Stripped Screw:** If the screw is stripped, you can try using a screw extractor to remove it. Alternatively, you can try using a rubber band or steel wool to fill the gap between the screwdriver and the screw head.
* **Corroded Parts:** If the parts are corroded, you can try soaking them in vinegar or a rust remover. You may also need to use a wire brush to remove the corrosion.
* **Leaking Tap:** If the tap is still leaking after the repair, check the washers and O-rings. They may be worn or damaged and need to be replaced.
Preventative Maintenance Tips
Preventative maintenance is key to avoiding future problems with your taps. Here are some tips to keep your taps in good working order:
* **Regularly Tighten Screws:** Check the screws on your tap handles periodically and tighten them as needed.
* **Clean Your Taps:** Clean your taps regularly with a mild soap and water solution. This will help prevent mineral buildup and corrosion.
* **Lubricate Moving Parts:** Lubricate the moving parts of your taps with plumber’s grease. This will help prevent wear and tear.
* **Install a Water Softener:** If you have hard water, consider installing a water softener. This will help prevent mineral buildup and corrosion in your taps and other plumbing fixtures.
When to Call a Professional Plumber
While many tap repairs can be done DIY, there are situations where it’s best to call a professional plumber. These include:
* **Extensive Damage:** If the tap is extensively damaged or corroded, it may be beyond repair.
* **Complex Repairs:** If the repair involves complex plumbing work, such as replacing pipes or valves, it’s best to leave it to a professional.
* **Unsure About the Repair:** If you’re unsure about any step of the repair process, it’s best to call a professional to avoid further damage.
The Role of Tap Design in Handle Stability
The design of a tap plays a significant role in the stability of its handle. Taps with poorly designed handles or weak connection points are more prone to looseness. Factors influencing handle stability include:
* **Material Quality:** The quality of the materials used in the handle and stem affects their durability and resistance to wear and tear.
* **Connection Design:** The design of the connection between the handle and the stem influences the strength and stability of the connection.
* **Handle Size and Shape:** The size and shape of the handle can affect the amount of leverage applied to the stem, which can contribute to looseness.
Choosing high-quality taps with robust designs can help prevent future handle problems. Look for taps made from durable materials with strong connection points.
The Impact of Water Quality
Water quality significantly impacts the lifespan and performance of your taps. Hard water, in particular, can cause mineral buildup and corrosion, leading to various problems, including loose handles. The minerals in hard water can accumulate inside the tap, affecting the smooth operation of moving parts and weakening the handle connection. Consider installing a water softener if you live in an area with hard water.
Understanding Tap Cartridges
Tap cartridges are essential components that control water flow and temperature in single-handle taps. A damaged or worn-out cartridge can cause various problems, including a loose handle. Common signs of a failing cartridge include:
* **Difficulty Turning the Handle:** The handle may be difficult to turn or may require excessive force.
* **Leaking Tap:** The tap may leak even when the handle is in the off position.
* **Reduced Water Flow:** The water flow may be reduced or inconsistent.
Replacing a faulty cartridge is often a straightforward repair that can restore your tap to proper working order.
The Future of Tap Technology
The future of tap technology is focused on improving efficiency, convenience, and sustainability. Innovations include:
* **Touchless Taps:** These taps use sensors to detect hand movement and automatically turn on the water flow.
* **Smart Taps:** These taps can be controlled via smartphone apps and can provide data on water usage.
* **Water-Saving Taps:** These taps use aerators and flow restrictors to reduce water consumption.
These advancements promise to enhance the user experience and promote responsible water usage.
Expert Insights on Tap Maintenance
Based on expert consensus, regular maintenance and timely repairs are crucial for extending the lifespan of your taps and preventing costly problems. Some key takeaways include:
* **Don’t Ignore Minor Issues:** Address minor issues, such as a loose handle or a small leak, promptly to prevent them from escalating into major problems.
* **Use the Right Tools:** Use the correct tools for the job to avoid damaging the tap or its components.
* **Follow Manufacturer’s Instructions:** Always follow the manufacturer’s instructions when repairing or replacing tap parts.
By following these expert tips, you can keep your taps in top condition and avoid costly repairs.
Q&A: Addressing Common Tap Handle Concerns
Here are some frequently asked questions about loose tap handles:
1. **Why does my tap handle feel loose even after tightening the screw?**
* The screw threads may be stripped, or the handle itself might be cracked internally. Consider replacing the screw or the entire handle.
2. **Can hard water cause a tap handle to loosen over time?**
* Yes, hard water deposits can corrode internal tap components, including the handle’s connection point, leading to looseness. A water softener can help.
3. **Is it safe to use thread-locking compounds on tap handle screws?**
* Yes, but use a low-strength thread locker sparingly. Avoid high-strength compounds as they can make future removal difficult.
4. **How often should I inspect my taps for loose handles or other issues?**
* A visual inspection every 3-6 months is recommended. Check for leaks, handle looseness, and unusual noises.
5. **What’s the best way to clean mineral deposits from around the tap handle?**
* A solution of equal parts white vinegar and water, applied with a soft cloth, is effective for removing mineral deposits.
6. **Are there specific tap handle designs that are less prone to loosening?**
* Handles with a solid, one-piece construction and a robust connection mechanism tend to be more durable.
7. **Should I replace the entire tap if the handle keeps coming loose?**
* If the handle issue persists despite multiple attempts to fix it, and the tap is old or showing other signs of wear, replacement is often the most cost-effective solution.
8. **Can I use WD-40 to loosen a stuck tap handle?**
* WD-40 can help loosen stuck parts, but it’s not a lubricant. After using WD-40, apply plumber’s grease to ensure smooth operation.
9. **What type of screwdriver is best for tightening tap handle screws?**
* Use a screwdriver that precisely matches the screw head type and size. A loose fit can strip the screw head.
10. **Are there any eco-friendly tap handle options available?**
* Yes, some manufacturers offer tap handles made from recycled materials or sustainable wood.
Conclusion: Mastering Tap Handle Maintenance
Dealing with a loose tap handle doesn’t have to be a daunting task. By understanding the common causes, identifying your tap type, and following our step-by-step guide, you can confidently tackle this common plumbing issue. Remember to prioritize safety by turning off the water supply before starting any repairs. Regular maintenance and prompt attention to minor issues will help prevent future problems and extend the lifespan of your taps. If you encounter any complex issues or are unsure about any step of the repair process, don’t hesitate to contact a professional plumber. Share your experiences with fixing a loose tap handle in the comments below, or explore our advanced guide to plumbing maintenance for more in-depth information.
