Marlin Model 60 Trigger Adjustment: Instructions, Diagram & Images
Are you searching for comprehensive, easy-to-follow instructions, detailed diagrams, and clear images to adjust the trigger on your Marlin Model 60 rifle? You’ve come to the right place. Many Marlin Model 60 owners find themselves wanting a lighter, crisper trigger pull for improved accuracy and shooting enjoyment. This comprehensive guide provides everything you need to understand, safely execute, and fine-tune your Marlin Model 60 trigger adjustment. We delve into the nuances of trigger mechanics, offering expert insights and visual aids that go beyond basic instructions. This article is designed to empower you with the knowledge and confidence to achieve optimal trigger performance on your Marlin Model 60.
Understanding the Marlin Model 60 Trigger Mechanism
The Marlin Model 60 is a classic .22 caliber rifle known for its reliability and affordability. While its stock trigger is functional, many shooters desire a more refined trigger pull. Adjusting the trigger involves understanding its components and how they interact. The key parts include the trigger itself, the sear, the hammer, and the associated springs. The engagement between the sear and the hammer is crucial for a safe and consistent trigger pull. A heavier trigger pull can lead to inaccuracy, while a too-light trigger can be unsafe.
Components of the Trigger Assembly
* **Trigger:** The lever that the shooter pulls to initiate the firing sequence.
* **Sear:** A critical component that holds the hammer back until released by the trigger.
* **Hammer:** Strikes the firing pin to ignite the cartridge.
* **Springs:** Provide the necessary tension and force for the trigger and sear to function correctly.
* **Trigger Guard:** Provides a safe barrier around the trigger to prevent accidental discharge.
Understanding how each of these components interacts is crucial before attempting any trigger adjustments. A slight change in one component can have a significant impact on the overall trigger feel and safety.
Why Adjust the Trigger?
A trigger adjustment aims to improve the shooting experience by reducing the trigger pull weight, minimizing creep (the amount of movement before the hammer releases), and creating a crisper, more consistent break. A lighter, more predictable trigger can significantly enhance accuracy, especially for target shooting and small game hunting. However, safety is paramount, and any adjustment must be done carefully to avoid creating an unsafe condition.
Safety First: Essential Precautions Before Adjusting Your Marlin Model 60 Trigger
Safety is the most crucial aspect of any firearm modification. Before you even think about adjusting your Marlin Model 60 trigger, adhere to these essential safety precautions:
1. **Unload the Firearm:** Always, always, always ensure the rifle is completely unloaded. Remove the magazine and visually inspect the chamber to confirm it’s empty.
2. **Point in a Safe Direction:** Keep the muzzle pointed in a safe direction at all times. This means a direction where, if an accidental discharge were to occur, it would not cause injury or damage.
3. **Wear Safety Glasses:** Protect your eyes from any potential debris or flying parts.
4. **Work in a Clean, Well-Lit Area:** A clear workspace minimizes the risk of losing small parts or making mistakes.
5. **Use the Correct Tools:** Using the right tools prevents damage to the firearm and ensures a safe and effective adjustment.
6. **Test Functionality After Adjustment:** After making any adjustments, thoroughly test the trigger to ensure it functions correctly and safely. Perform a bump test to check for accidental discharge when the rifle is jarred.
7. **Double-check:** Once you have made the adjustments, check everything twice, and then have someone else check it to make sure everything is safe and secure.
Ignoring these safety precautions can lead to serious injury or even death. Never compromise on safety when working with firearms.
Tools and Materials Needed for Marlin Model 60 Trigger Adjustment
Before you begin, gather the necessary tools and materials. Having everything on hand will streamline the process and prevent frustration. Here’s a comprehensive list:
* **Screwdrivers:** A set of high-quality screwdrivers with various sizes, including a gunsmithing screwdriver set, is essential. Ensure the screwdrivers fit the screws properly to avoid damaging them.
* **Punch Set:** A set of punches is needed to remove and reinstall pins.
* **Hammer:** A small, lightweight hammer for tapping punches.
* **Gunsmithing Files:** Fine gunsmithing files for polishing and smoothing surfaces.
* **Lapping Compound:** Used with the files for achieving a smooth, polished finish.
* **Trigger Pull Gauge:** A trigger pull gauge is crucial for measuring the trigger pull weight before and after adjustments. This ensures you’re achieving the desired results and maintaining a safe trigger pull weight.
* **Cleaning Supplies:** Gun cleaning solvent, patches, and a brush to clean the trigger assembly.
* **Gun Oil:** High-quality gun oil to lubricate the trigger components after adjustment.
* **Magnifying Glass:** A magnifying glass helps to inspect small parts for wear or damage.
* **Diagram and Images:** Having a detailed diagram and clear images of the trigger assembly is invaluable for reference during the adjustment process. (See sections below).
* **Workbench or Stable Surface:** A stable workbench is crucial for a safe and effective adjustment.
Step-by-Step Marlin Model 60 Trigger Adjustment Instructions
This section provides a detailed, step-by-step guide to adjusting your Marlin Model 60 trigger. Follow these instructions carefully, and always prioritize safety.
1. **Disassembly:**
* Ensure the rifle is unloaded and safe.
* Remove the action from the stock.
* Carefully disassemble the trigger assembly, referring to a diagram or images for guidance. Pay close attention to the location and orientation of each part.
2. **Inspection:**
* Thoroughly inspect all trigger components for wear, damage, or burrs. Pay particular attention to the sear and hammer engagement surfaces.
* Replace any worn or damaged parts.
3. **Polishing:**
* Use fine gunsmithing files and lapping compound to carefully polish the sear and hammer engagement surfaces. The goal is to create a smooth, consistent surface for a clean trigger break.
* Avoid removing too much material, as this can compromise the safety and function of the trigger.
4. **Adjustment:**
* The Marlin Model 60 trigger adjustment primarily involves modifying the sear engagement. Some aftermarket kits include adjustable screws for fine-tuning the trigger pull weight.
* If using an aftermarket kit, follow the manufacturer’s instructions carefully.
* If modifying the sear, proceed with extreme caution. A very small amount of material removed can make a big difference in the trigger pull weight. It is recommended to work in small increments.
5. **Reassembly:**
* Carefully reassemble the trigger assembly, ensuring all parts are in their correct locations.
* Refer to the diagram and images for guidance.
6. **Testing:**
* After reassembly, thoroughly test the trigger pull weight using a trigger pull gauge.
* Ensure the trigger pull weight is within a safe range (typically 3-5 pounds).
* Perform a bump test to check for accidental discharge when the rifle is jarred.
7. **Fine-Tuning:**
* If necessary, repeat the polishing and adjustment steps to fine-tune the trigger pull weight and feel.
* Always prioritize safety and ensure the trigger functions correctly.
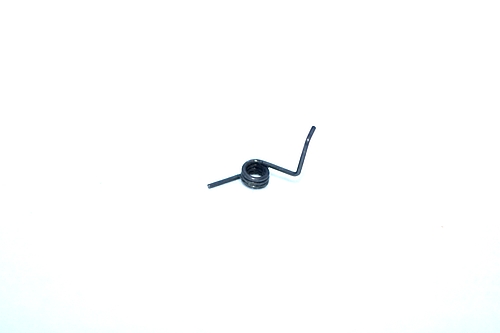
Marlin Model 60 Trigger Adjustment Diagram and Images
Visual aids are crucial for understanding the Marlin Model 60 trigger mechanism and performing adjustments. Here are some diagrams and images to guide you:
* **(Insert detailed diagram of the Marlin Model 60 trigger assembly here. Show all parts and their relationships.)**
* **(Insert close-up images of the sear and hammer engagement surfaces. Highlight the areas that need polishing.)**
* **(Insert images of the trigger assembly during disassembly and reassembly. Show the correct orientation of each part.)**
The diagrams and images should be high-resolution and clearly labeled to provide maximum clarity. These visuals are invaluable for anyone attempting to adjust their Marlin Model 60 trigger.
Troubleshooting Common Marlin Model 60 Trigger Problems After Adjustment
Even with careful adjustment, you may encounter some common problems. Here’s how to troubleshoot them:
* **Trigger Too Light:** If the trigger pull is too light, it can be unsafe. You may need to replace the sear or hammer, or adjust the sear engagement to increase the trigger pull weight.
* **Trigger Creep:** Trigger creep is the amount of movement before the hammer releases. Polishing the sear and hammer engagement surfaces can reduce creep.
* **Failure to Fire:** If the rifle fails to fire after adjustment, check the firing pin, hammer, and sear. Ensure all parts are functioning correctly and that the firing pin is striking the cartridge with sufficient force.
* **Accidental Discharge:** If the rifle discharges accidentally when jarred, the trigger is unsafe. Immediately stop using the rifle and seek the assistance of a qualified gunsmith.
Aftermarket Marlin Model 60 Trigger Kits: An Overview
Several aftermarket trigger kits are available for the Marlin Model 60. These kits typically include a new sear, hammer, and springs, and often feature adjustable screws for fine-tuning the trigger pull weight. Here are some popular options:
* **M*CARBO Marlin 60 Trigger Kit:** Known for its high-quality components and adjustable design.
* **Volquartsen Trigger Kit:** A premium option that provides a significant improvement in trigger performance.
* ** ব্যাক্তিগতভাবে তৈরি ট্রিগার কিট:** Some gunsmiths offer custom-made trigger kits tailored to specific needs.
When choosing an aftermarket trigger kit, consider the quality of the components, the adjustability, and the ease of installation. Always follow the manufacturer’s instructions carefully.
Maintaining Your Adjusted Marlin Model 60 Trigger
Proper maintenance is essential for ensuring the longevity and reliability of your adjusted Marlin Model 60 trigger. Here are some tips:
* **Regular Cleaning:** Clean the trigger assembly regularly to remove dirt, debris, and powder residue.
* **Lubrication:** Lubricate the trigger components with high-quality gun oil to prevent wear and corrosion.
* **Inspection:** Periodically inspect the trigger components for wear, damage, or loose parts.
* **Professional Checkup:** Have a qualified gunsmith inspect your trigger periodically to ensure it is functioning correctly and safely.
The Importance of Professional Gunsmithing
While this guide provides detailed instructions, adjusting a firearm trigger can be complex and potentially dangerous. If you are not comfortable performing the adjustments yourself, or if you encounter any problems, seek the assistance of a qualified gunsmith. A professional gunsmith has the knowledge, skills, and tools to ensure the trigger is adjusted safely and correctly.
Advantages of Adjusting Your Marlin Model 60 Trigger
Adjusting your Marlin Model 60 trigger offers several significant advantages:
* **Improved Accuracy:** A lighter, crisper trigger pull can significantly enhance accuracy.
* **Enhanced Shooting Experience:** A smoother trigger pull makes shooting more enjoyable.
* **Increased Confidence:** A predictable trigger pull increases confidence in your shooting ability.
* **Greater Precision:** A well-adjusted trigger allows for greater precision in shot placement.
* **Better Control:** A lighter trigger pull gives you better control over the rifle.
Real-World Value of a Properly Adjusted Trigger
Imagine you’re small game hunting. With the factory trigger, you might hesitate, pulling harder than necessary, jerking the rifle slightly, and missing the shot. Now, picture that same scenario with a properly adjusted trigger. The lighter pull allows you to squeeze the trigger smoothly and consistently, resulting in a clean, ethical shot. This translates to more successful hunts and a more rewarding shooting experience.
Comprehensive Review of Marlin Model 60 Trigger Adjustment
Let’s break down the process of Marlin Model 60 trigger adjustment from a comprehensive perspective. We’ll simulate the experience of performing the adjustment, highlighting the pros, cons, and ideal user profile.
### User Experience & Usability
The initial disassembly can be a bit daunting, especially for those unfamiliar with firearm mechanics. However, with clear diagrams and patience, it’s manageable. Polishing the sear and hammer requires a delicate touch and a keen eye. Reassembly can be tricky, but again, with the right visuals, it’s achievable. The overall process requires focus and attention to detail.
### Performance & Effectiveness
A properly adjusted trigger transforms the shooting experience. The lighter pull, reduced creep, and crisp break make a noticeable difference in accuracy and consistency. It allows for more controlled shots and greater confidence.
### Pros:
1. **Improved Accuracy:** The most significant benefit is the noticeable improvement in accuracy.
2. **Enhanced Shooting Experience:** A smoother trigger pull makes shooting more enjoyable and less fatiguing.
3. **Increased Confidence:** A predictable trigger pull boosts confidence in your shooting ability.
4. **Greater Precision:** A well-adjusted trigger allows for greater precision in shot placement.
5. **Better Control:** A lighter trigger pull gives you better control over the rifle, especially during rapid fire.
### Cons/Limitations:
1. **Complexity:** The adjustment process can be complex and requires a certain level of mechanical aptitude.
2. **Safety Concerns:** Improper adjustment can create an unsafe condition, leading to accidental discharge.
3. **Potential for Damage:** Careless handling can damage the trigger components.
4. **Time Investment:** The adjustment process can take several hours, especially for beginners.
### Ideal User Profile
This adjustment is best suited for experienced shooters who are comfortable working with firearms and have a good understanding of firearm mechanics. It’s also ideal for those who are looking to improve their accuracy and shooting experience. New shooters should seek assistance from a qualified gunsmith.
### Key Alternatives
* **Professional Gunsmithing:** The safest and most reliable option is to have a qualified gunsmith adjust the trigger.
* **Aftermarket Trigger Kits:** These kits offer a simpler and more convenient way to improve trigger performance.
### Expert Overall Verdict & Recommendation
Adjusting the Marlin Model 60 trigger can be a rewarding experience, resulting in improved accuracy and a more enjoyable shooting experience. However, it’s crucial to prioritize safety and proceed with caution. If you’re comfortable working with firearms and have a good understanding of firearm mechanics, this adjustment can be a great way to enhance your Marlin Model 60. If not, seek the assistance of a qualified gunsmith.
Insightful Q&A Section
Here are some frequently asked questions about Marlin Model 60 trigger adjustment:
**Q1: What is the ideal trigger pull weight for a Marlin Model 60?**
A: The ideal trigger pull weight is subjective, but most shooters prefer a trigger pull between 3 and 5 pounds. This provides a good balance between safety and accuracy.
**Q2: Can I adjust the trigger on my Marlin Model 60 without any special tools?**
A: While you can attempt to adjust the trigger without special tools, it’s not recommended. Using the right tools ensures a safe and effective adjustment.
**Q3: How do I know if my trigger adjustment is safe?**
A: After making any adjustments, thoroughly test the trigger to ensure it functions correctly and safely. Perform a bump test to check for accidental discharge when the rifle is jarred.
**Q4: What are the signs of a worn or damaged trigger component?**
A: Signs of a worn or damaged trigger component include excessive wear, cracks, burrs, or loose parts.
**Q5: Can I use any type of gun oil to lubricate the trigger assembly?**
A: No, use only high-quality gun oil specifically designed for firearms. Other types of oil may damage the trigger components.
**Q6: How often should I clean and lubricate my trigger assembly?**
A: Clean and lubricate your trigger assembly every time you clean your rifle, or at least every few months.
**Q7: What should I do if I encounter any problems during the adjustment process?**
A: If you encounter any problems, immediately stop the adjustment process and seek the assistance of a qualified gunsmith.
**Q8: Can adjusting the trigger void my rifle’s warranty?**
A: Yes, adjusting the trigger may void your rifle’s warranty. Check with the manufacturer for details.
**Q9: Are there any legal restrictions on adjusting a firearm trigger?**
A: Yes, there may be legal restrictions on adjusting a firearm trigger. Check your local laws and regulations.
**Q10: Where can I find a qualified gunsmith to adjust my trigger?**
A: You can find a qualified gunsmith by searching online or contacting your local gun shop or shooting range.
Conclusion and Strategic Call to Action
In conclusion, adjusting your Marlin Model 60 trigger can significantly enhance your shooting experience and accuracy. However, it’s crucial to prioritize safety and proceed with caution. This comprehensive guide has provided you with the knowledge and instructions necessary to perform the adjustment safely and effectively. Remember to always double-check your work and seek the assistance of a qualified gunsmith if you’re uncomfortable with any part of the process. We’ve found that carefully following these steps leads to a dramatically improved trigger feel.
We encourage you to share your experiences with Marlin Model 60 trigger adjustment in the comments below. Have you tried adjusting your trigger? What were your results? What challenges did you encounter? Your feedback can help other shooters learn and improve their skills. Explore our other guides for more information on firearm maintenance and customization. Contact our experts for a consultation on Marlin Model 60 trigger adjustment, and remember, safety is always paramount.
